
 Talk to an Expert
We will help you get your DNA Spaces dashboard up and running in no time.
Tell us how we can assist you?
Login into your Cisco Spaces account.
Click on the Location Hierarchy in the left navigation.
In the Location screen, click More Actions at the far right corner of the customer name. Choose Add Wireless Network. 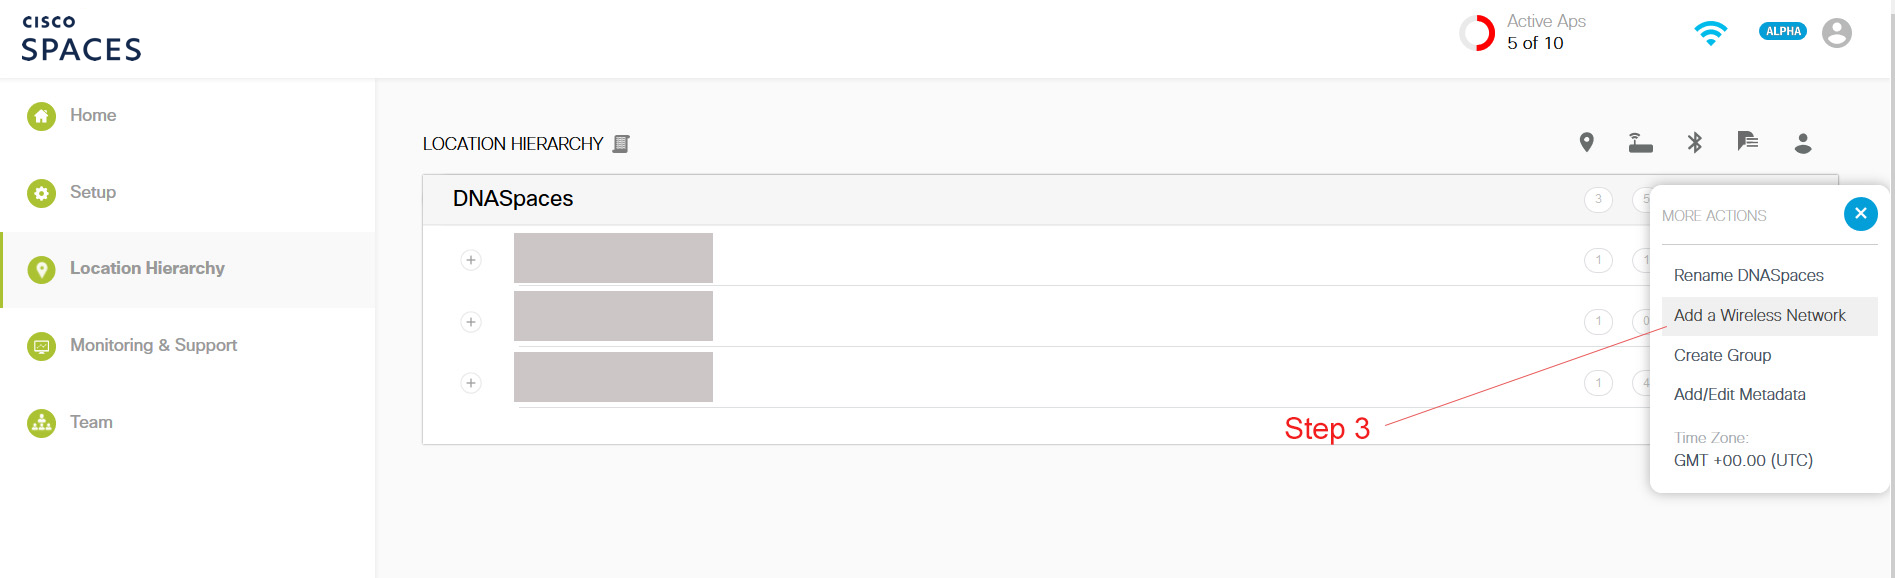
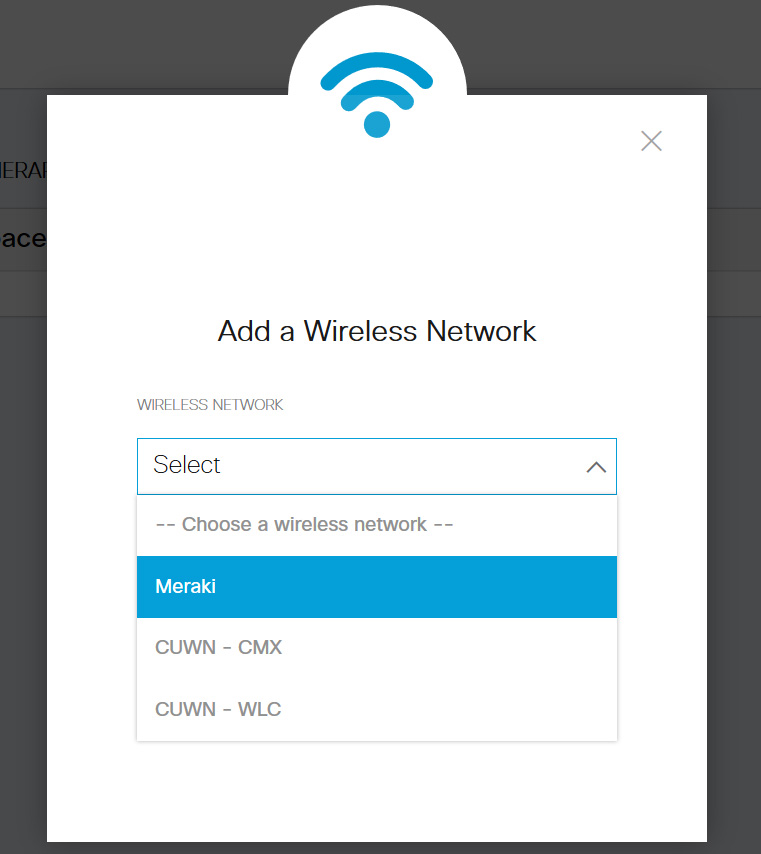
From the Add a Wireless Network drop-down list that appears, choose Meraki.
Enter the username and password for your Meraki account, and click Connect account. 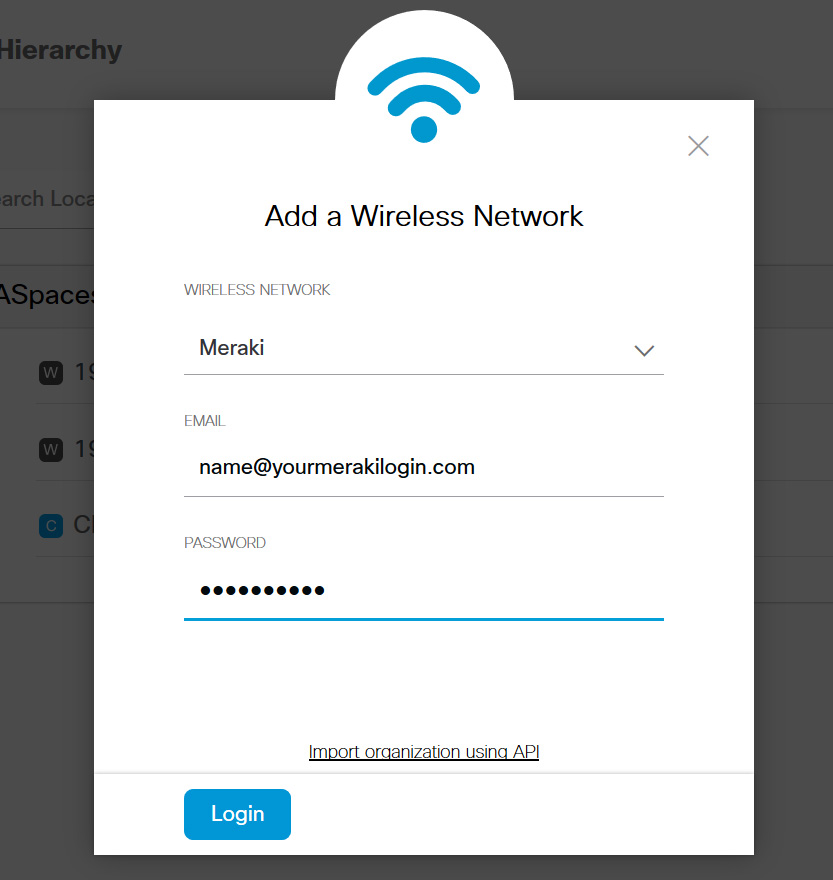
From the “Select Organization” drop-down list, select the Meraki organization of which you want to import the access points.
In the “Location Hierarchy” section, click on the ‘More Actions’ button of the organization row that you just imported.

Select networks that you want to import into Cisco Spaces cloud. Click Add. That’s it, the Meraki Access Points gets listed in the location hierarchy. 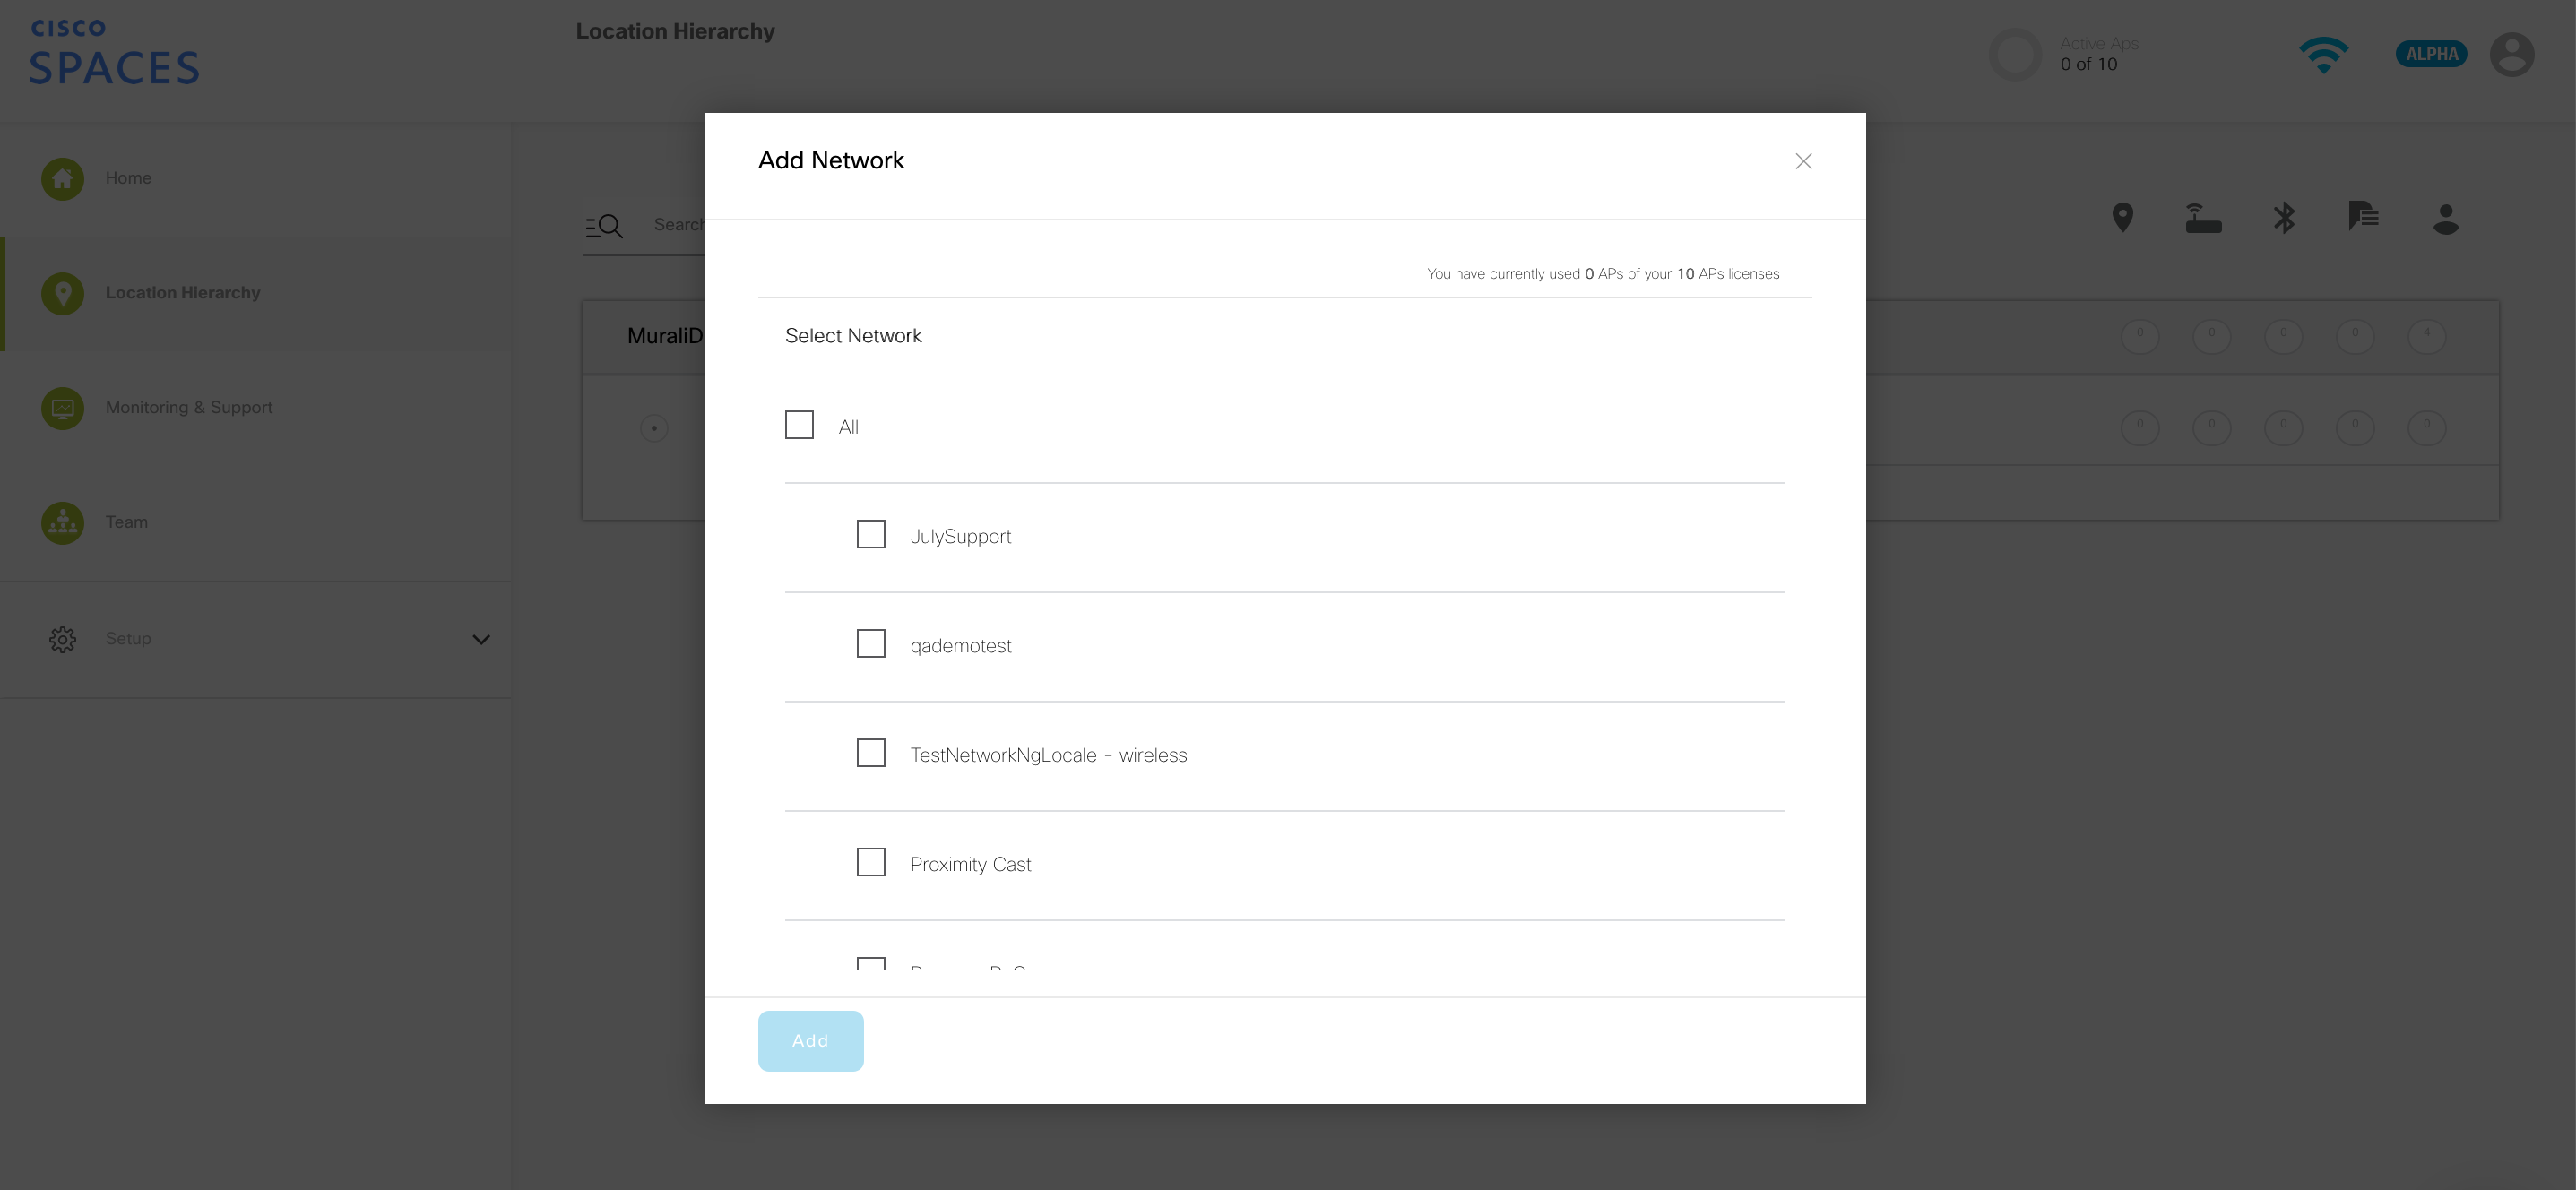
Perform the following steps to turn on location updates in Meraki:
Go to Network-Wide -> Configure -> General in Meraki Dashboard.
Enable Analytics and Scanning API under “Location and scanning” section. “Add a Post URL” link will be visible now. 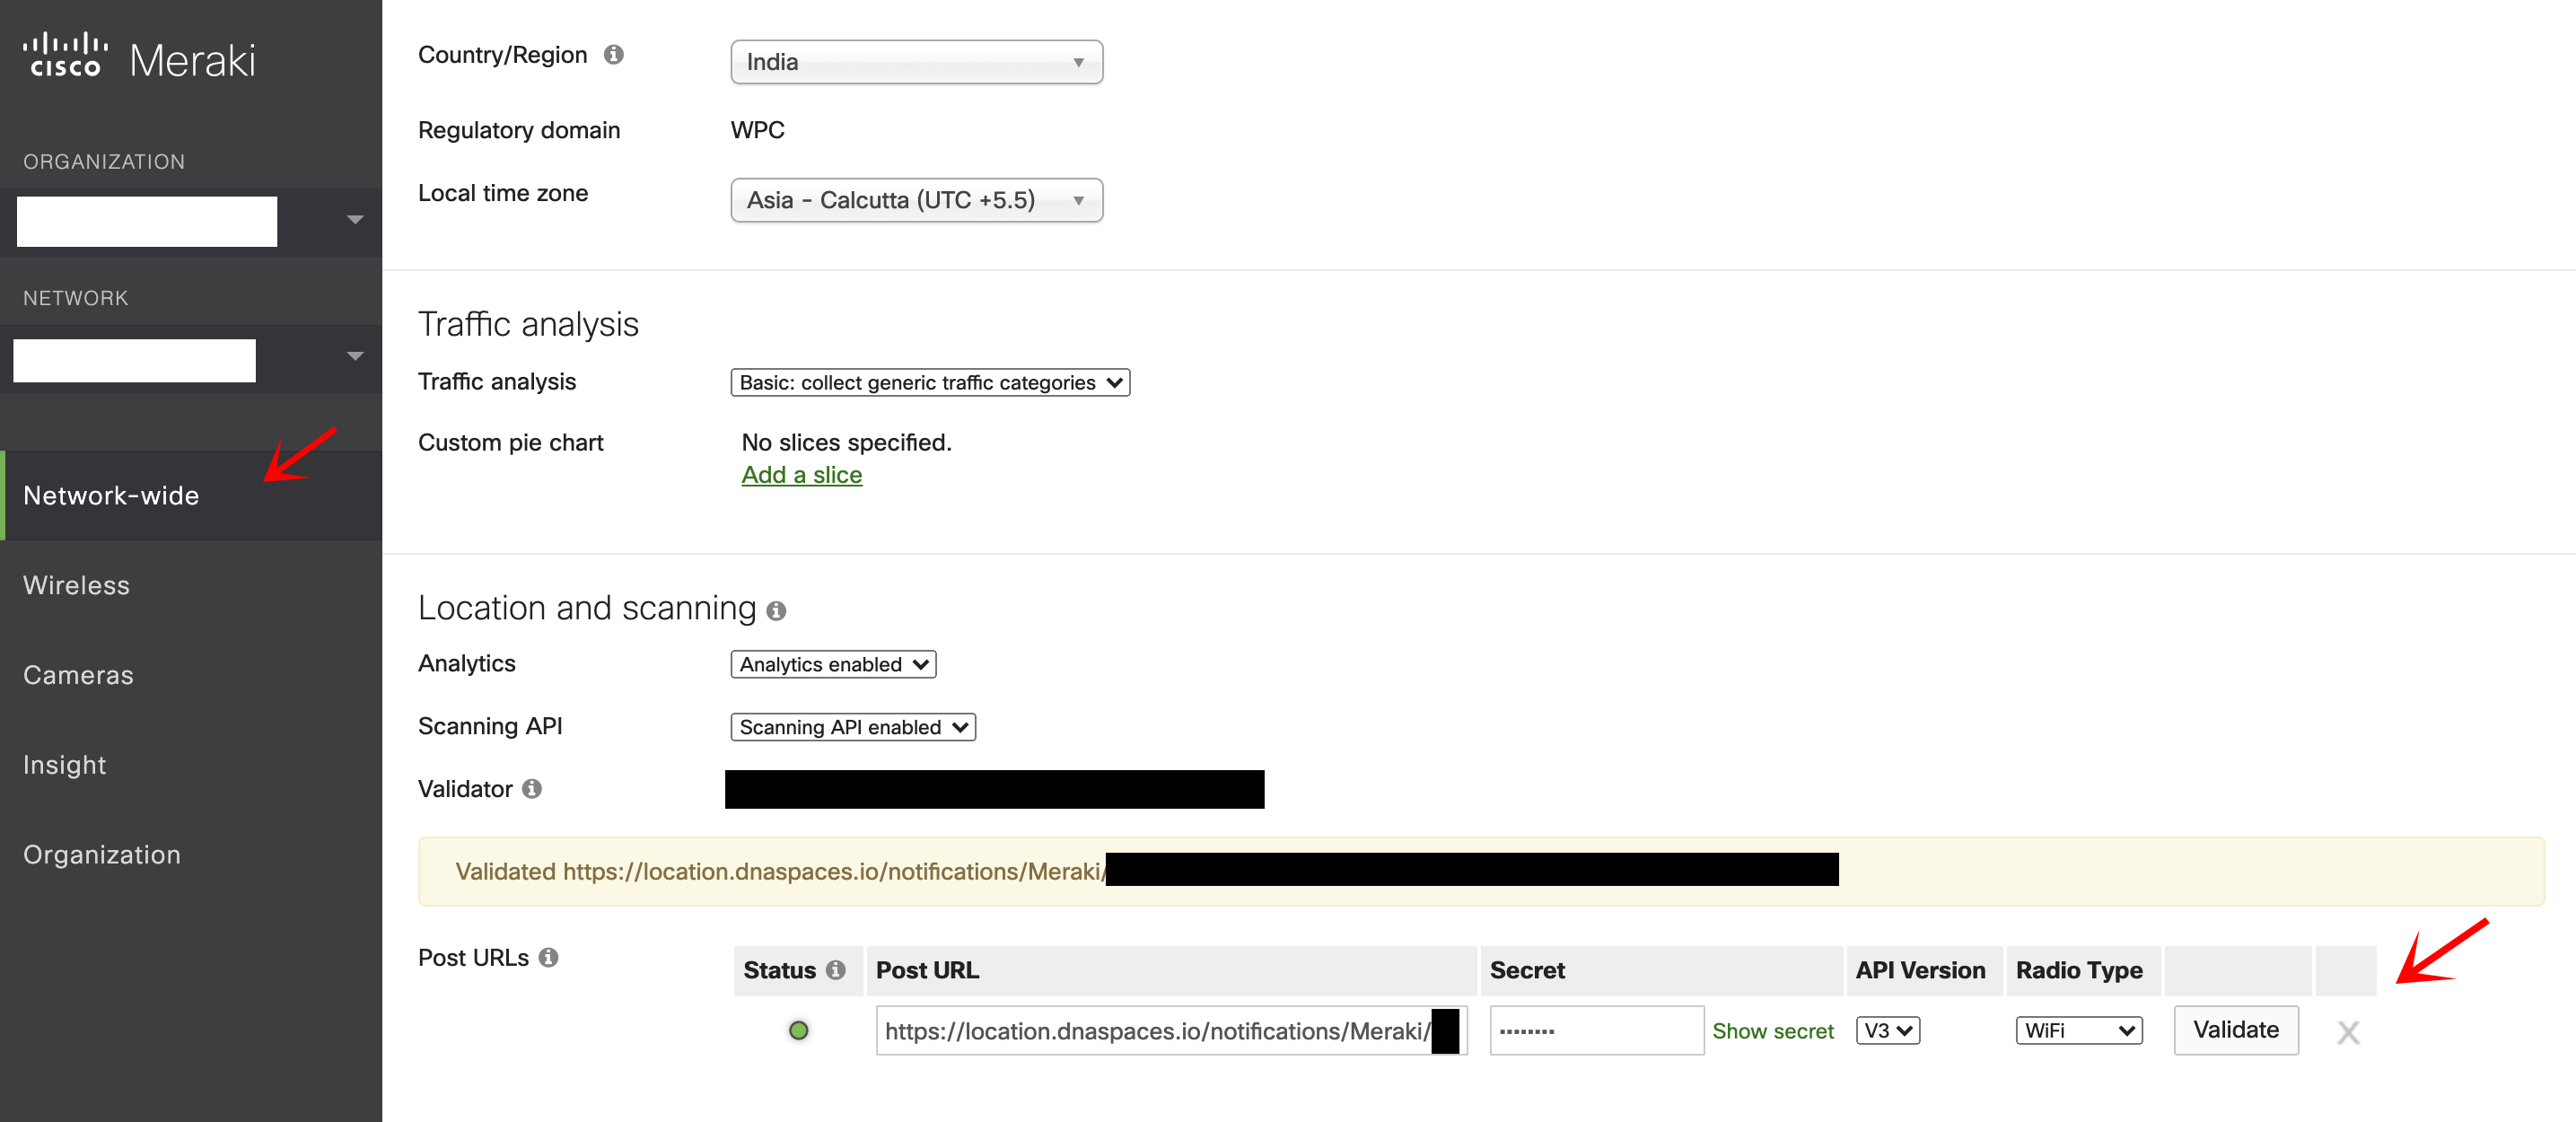
Click on “Add a Post URL” under the same section.
Configure under Post URLs.
Paste the following Post URL :
https://location.dnaspaces.io/notifications/Meraki/{yourdnaspacesname}/{network_id}/{url_validator}
Customers in Europe: https://location.dnaspaces.eu/notifications/Meraki/{yourdnaspacesname}/{network_id}/{url_validator}
Secret : {yourdnaspacesname} API Version : 3.0
Click on Save to update the settings.