Talk to an Expert
We will help you get your DNA Spaces dashboard up and running in no time.
Tell us how we can assist you?
Introduction to Location Hierarchy
Location Hierarchy feature enables you to organize your network view within Cisco Spaces based on your physical business location hierarchy and access point deployments. You can organize the hierarchy based specific
brands, regions and business taxonomy that is relevant for your business.
By translating your IT network view into a business view, you are automatically presented with a cleaner business relevant insights report. Any changes to your network topology are automatically reflected here thereby
making it easy to manage.
The Location Hierarchy module also makes it easy for you to manage role-based access, set tracking rules and drive varied outcomes based on the nature of the business location.
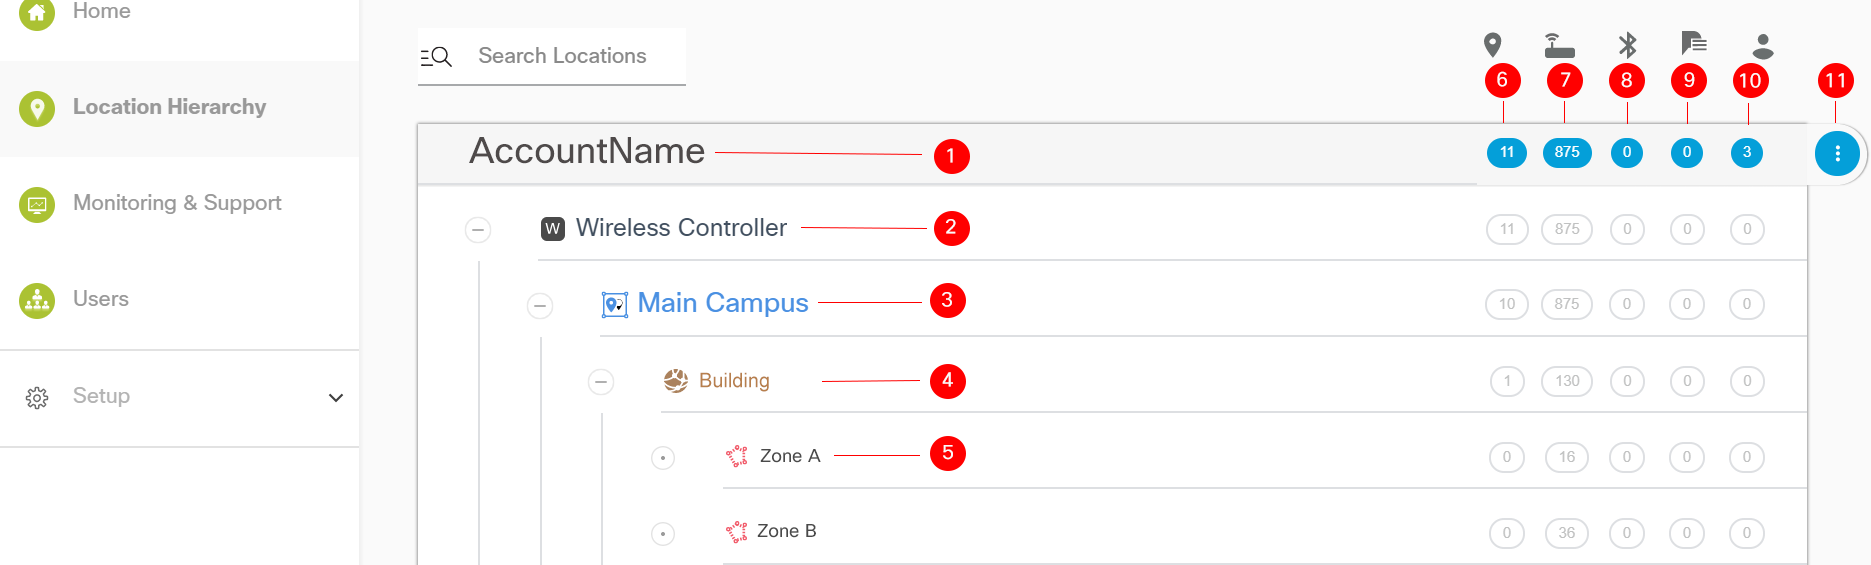
Location Hierarchy features as shown in the figure above:
Account Name: Each Cisco Spaces customer is provided with a default account name (root name), and this account name acts as the root location of Cisco Spaces location hierarchy.
Wireless Controller(s): Wireless controller(s) imported in Cisco Spaces. A single controller or multiple controllers added together as additional controllers under a Primary Controller
Groups: Multiple locations or zones grouped together based on geolocation, brand or any other type of grouping depending on the business
Location: All access points within a physical building consolidated as a Location.
This is the most important node in Location Hierarchy as business insights and location analytics calculations are generated from here
Zones: Collection of access points within a section of a building/location. It be defined based on the departments in a physical building of an organization
# of Locations: Number of locations in an Account, Controller, or Group
# of APs: Number of access points in an Account, Controller, Group, Location or Zone
# of BLE Beacons: Number of BLE beacons in an Account, Controller, Group, Location or Zone
# of Proximity Rules: Number of Proximity Rules defined in an Account, Controller, Group, Location or Zone
# of Users: Number of Users in an Account, Controller, Group, Location or Zone
More Actions: Various options to organize and setup Location Hierarchy
Recommended 5 Steps Process to Define Location Hierarchy
Choose primary and additional controllers before importing
Review the default (auto configuration) hierarchy suggested by platform
If the given hierarchy is in tune with physical business locations, then proceed to import as it is and create groups or zones if required
If the auto configuration hierarchy is incorrect, un-check the “Select All” option and import all APs under single location “Unconfigured”
Configure LH manually (Check How-To Section Below)
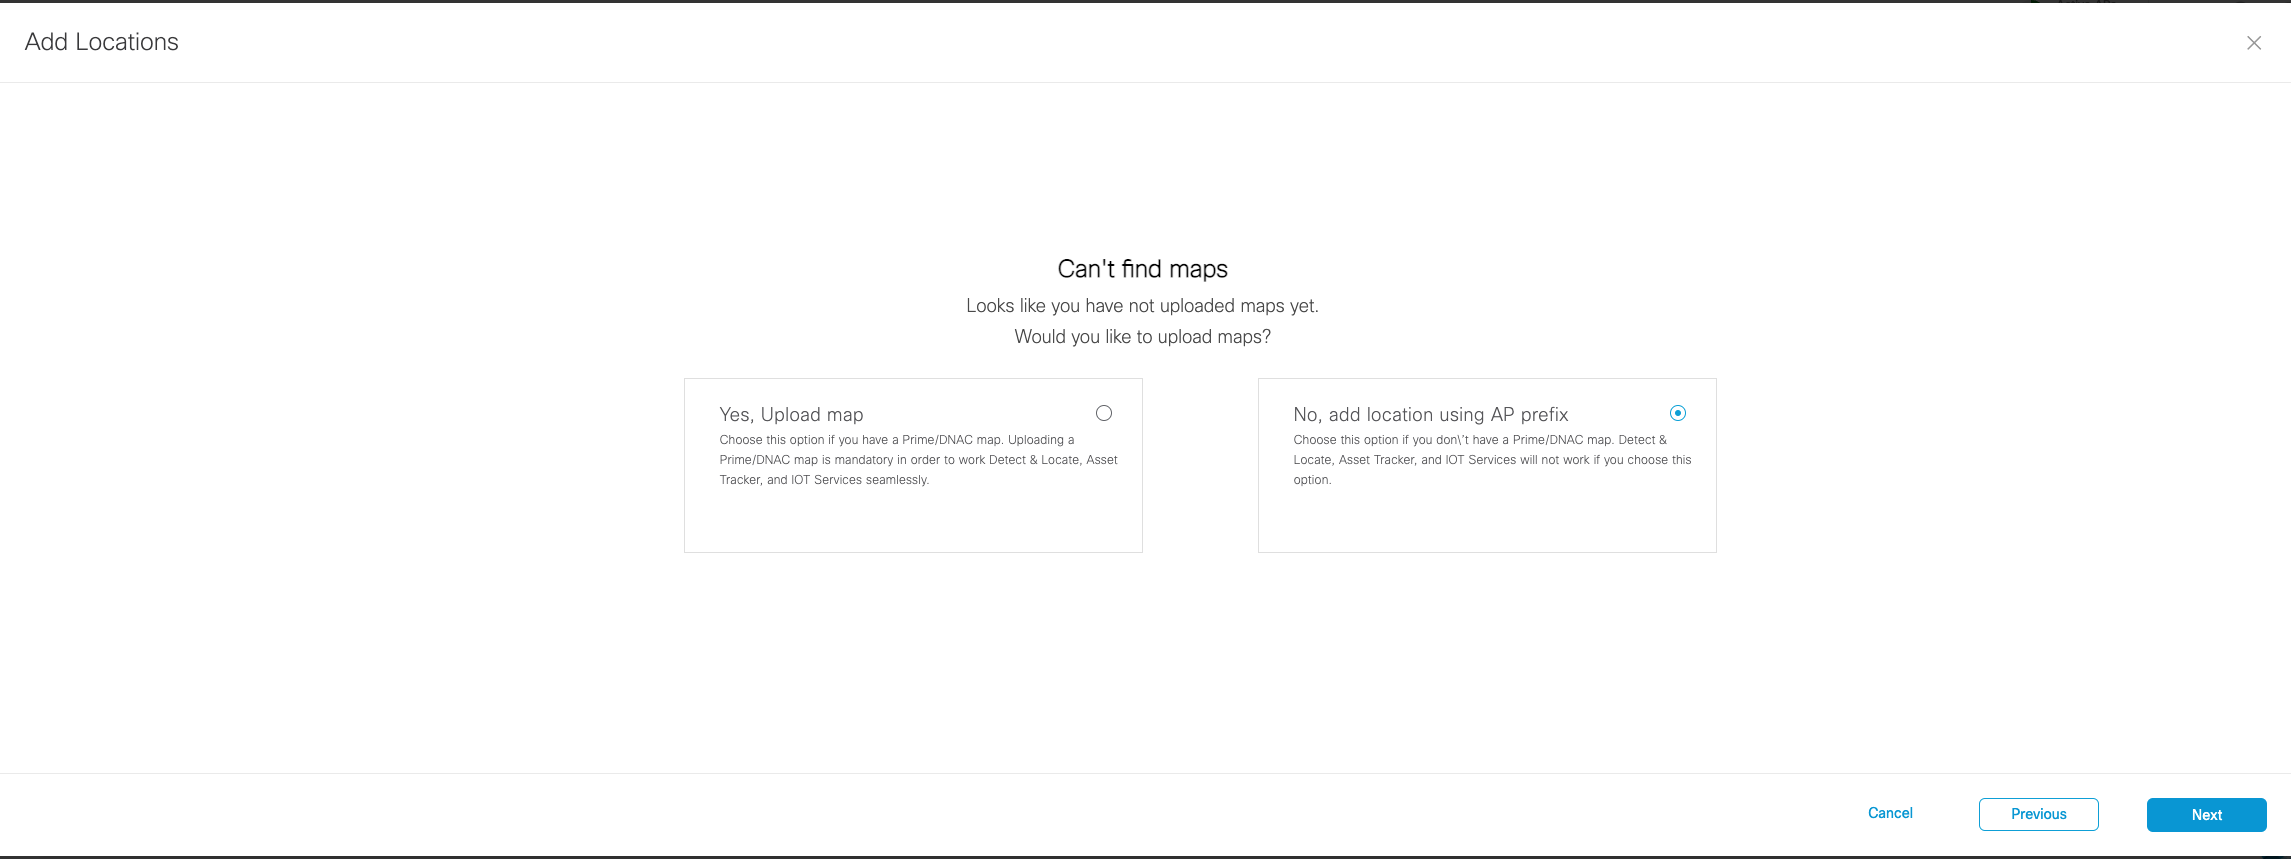
How to Import Location Hierarchy manually?
Go to Setup > Wireless networks > step 5 “Setup location hierarchy”, click on “Add Locations”

If you have maps, please follow the steps in option 1:
http://dnaspaces.dev-dnaspaces.io/setupguide/location-hierarchy/
If you have no maps, select “No, add location using AP prefix”
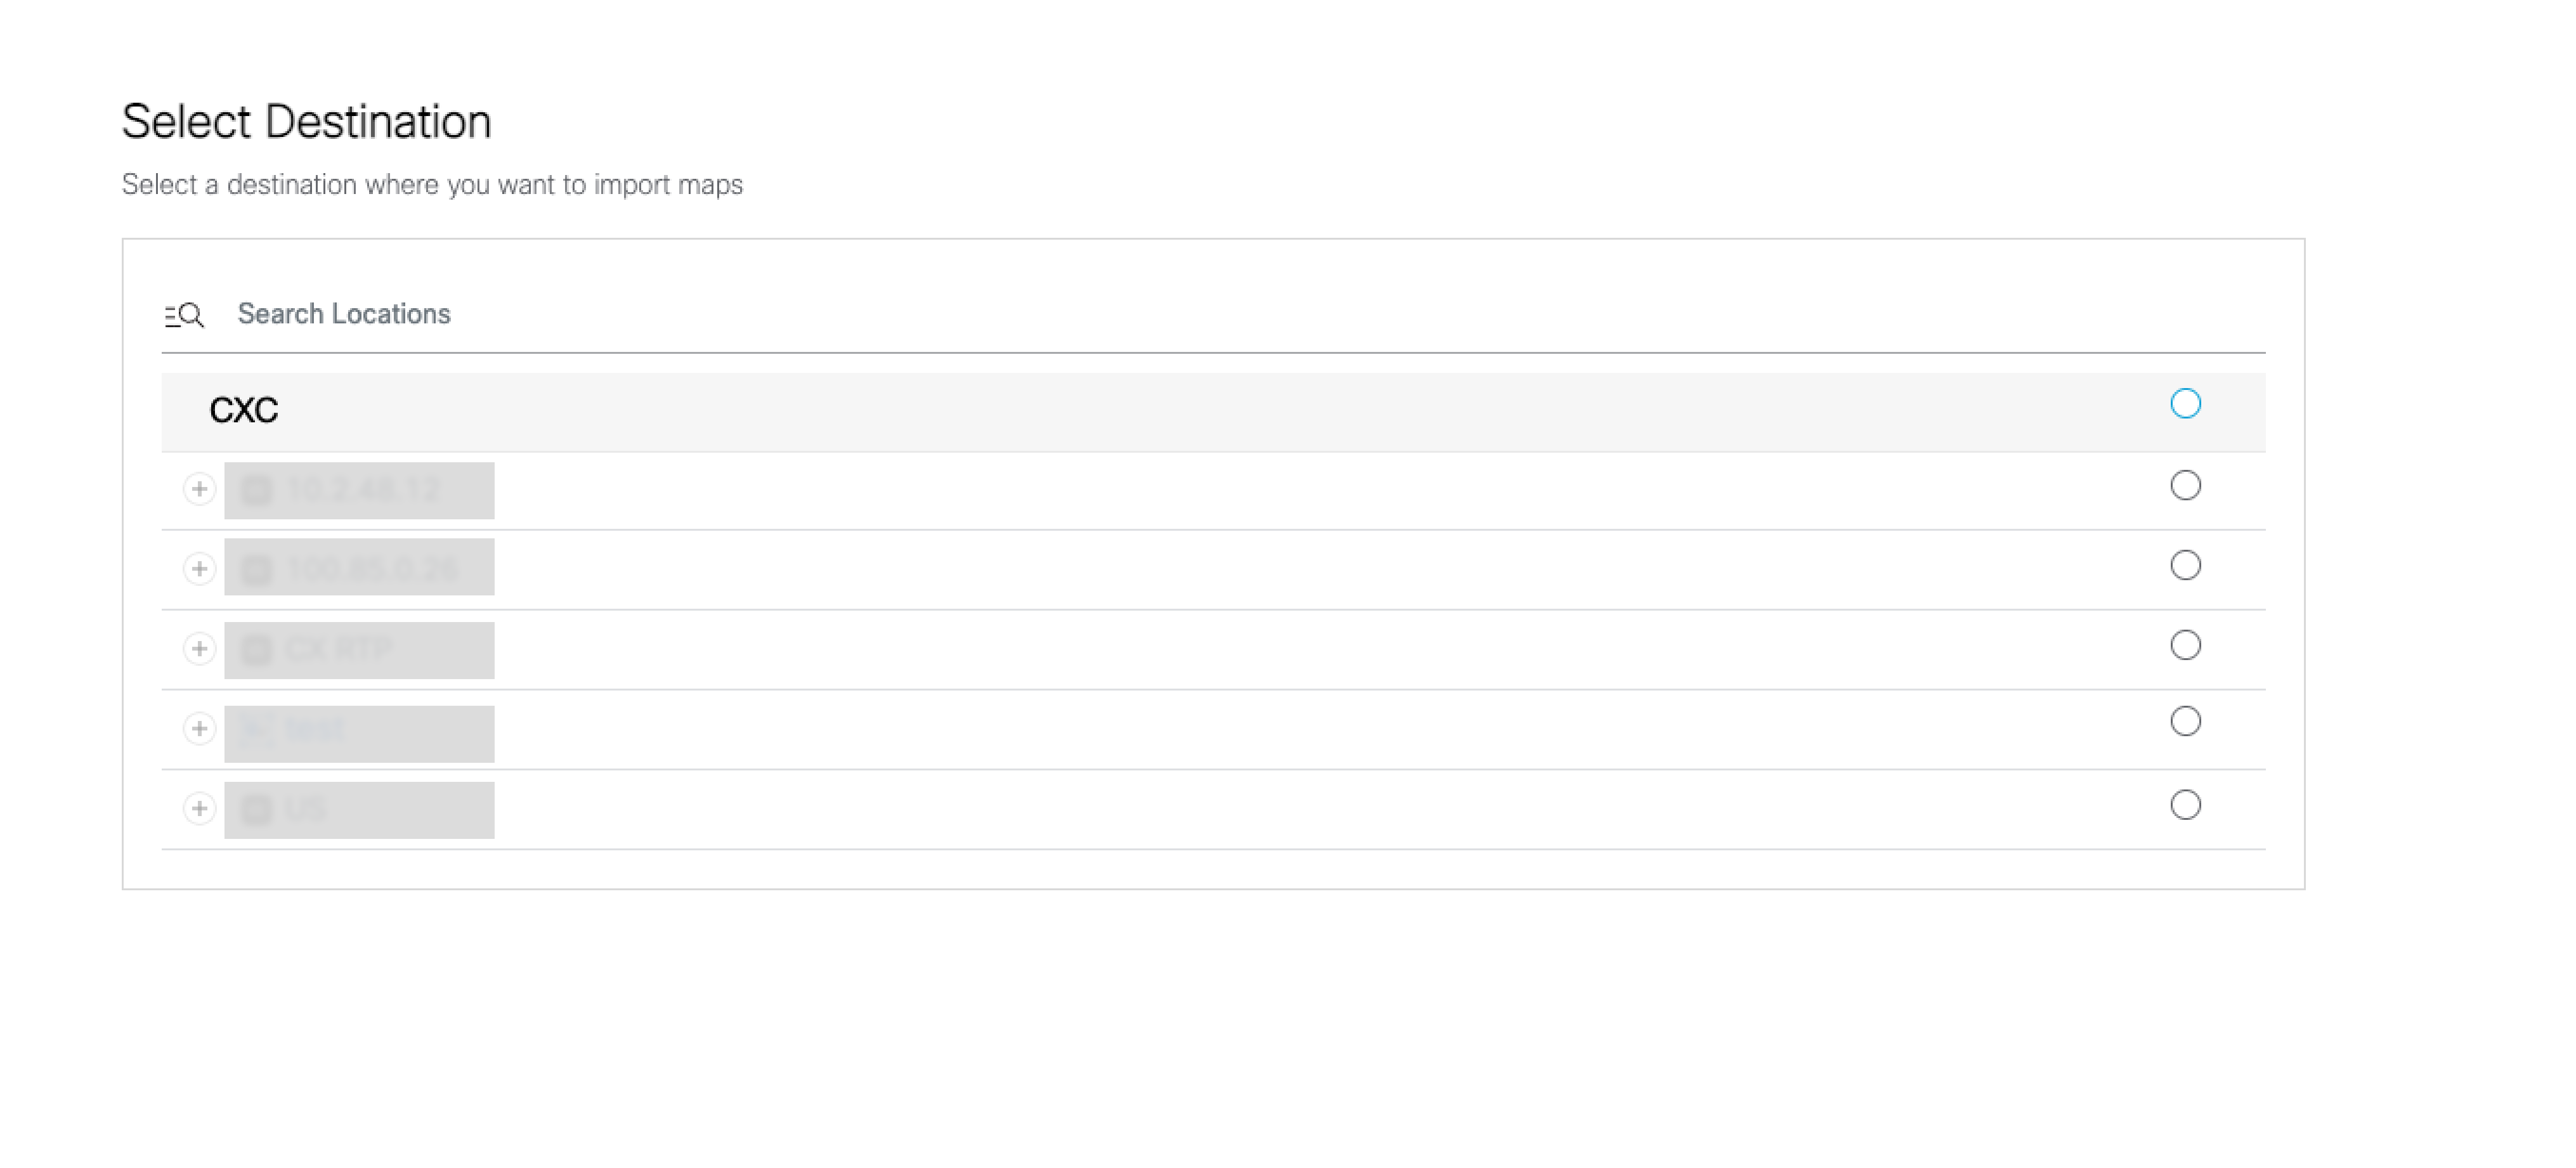
Choose the location where you want to import controllers and click “Next”. (If importing controllers for the first time, you will see the default location i.e. your Cisco Spaces account name. if not, you will also see the controllers you’ve imported earlier)
Choose the applicable controllers to import and click next.

Review the locations auto discovered by Cisco Spaces.
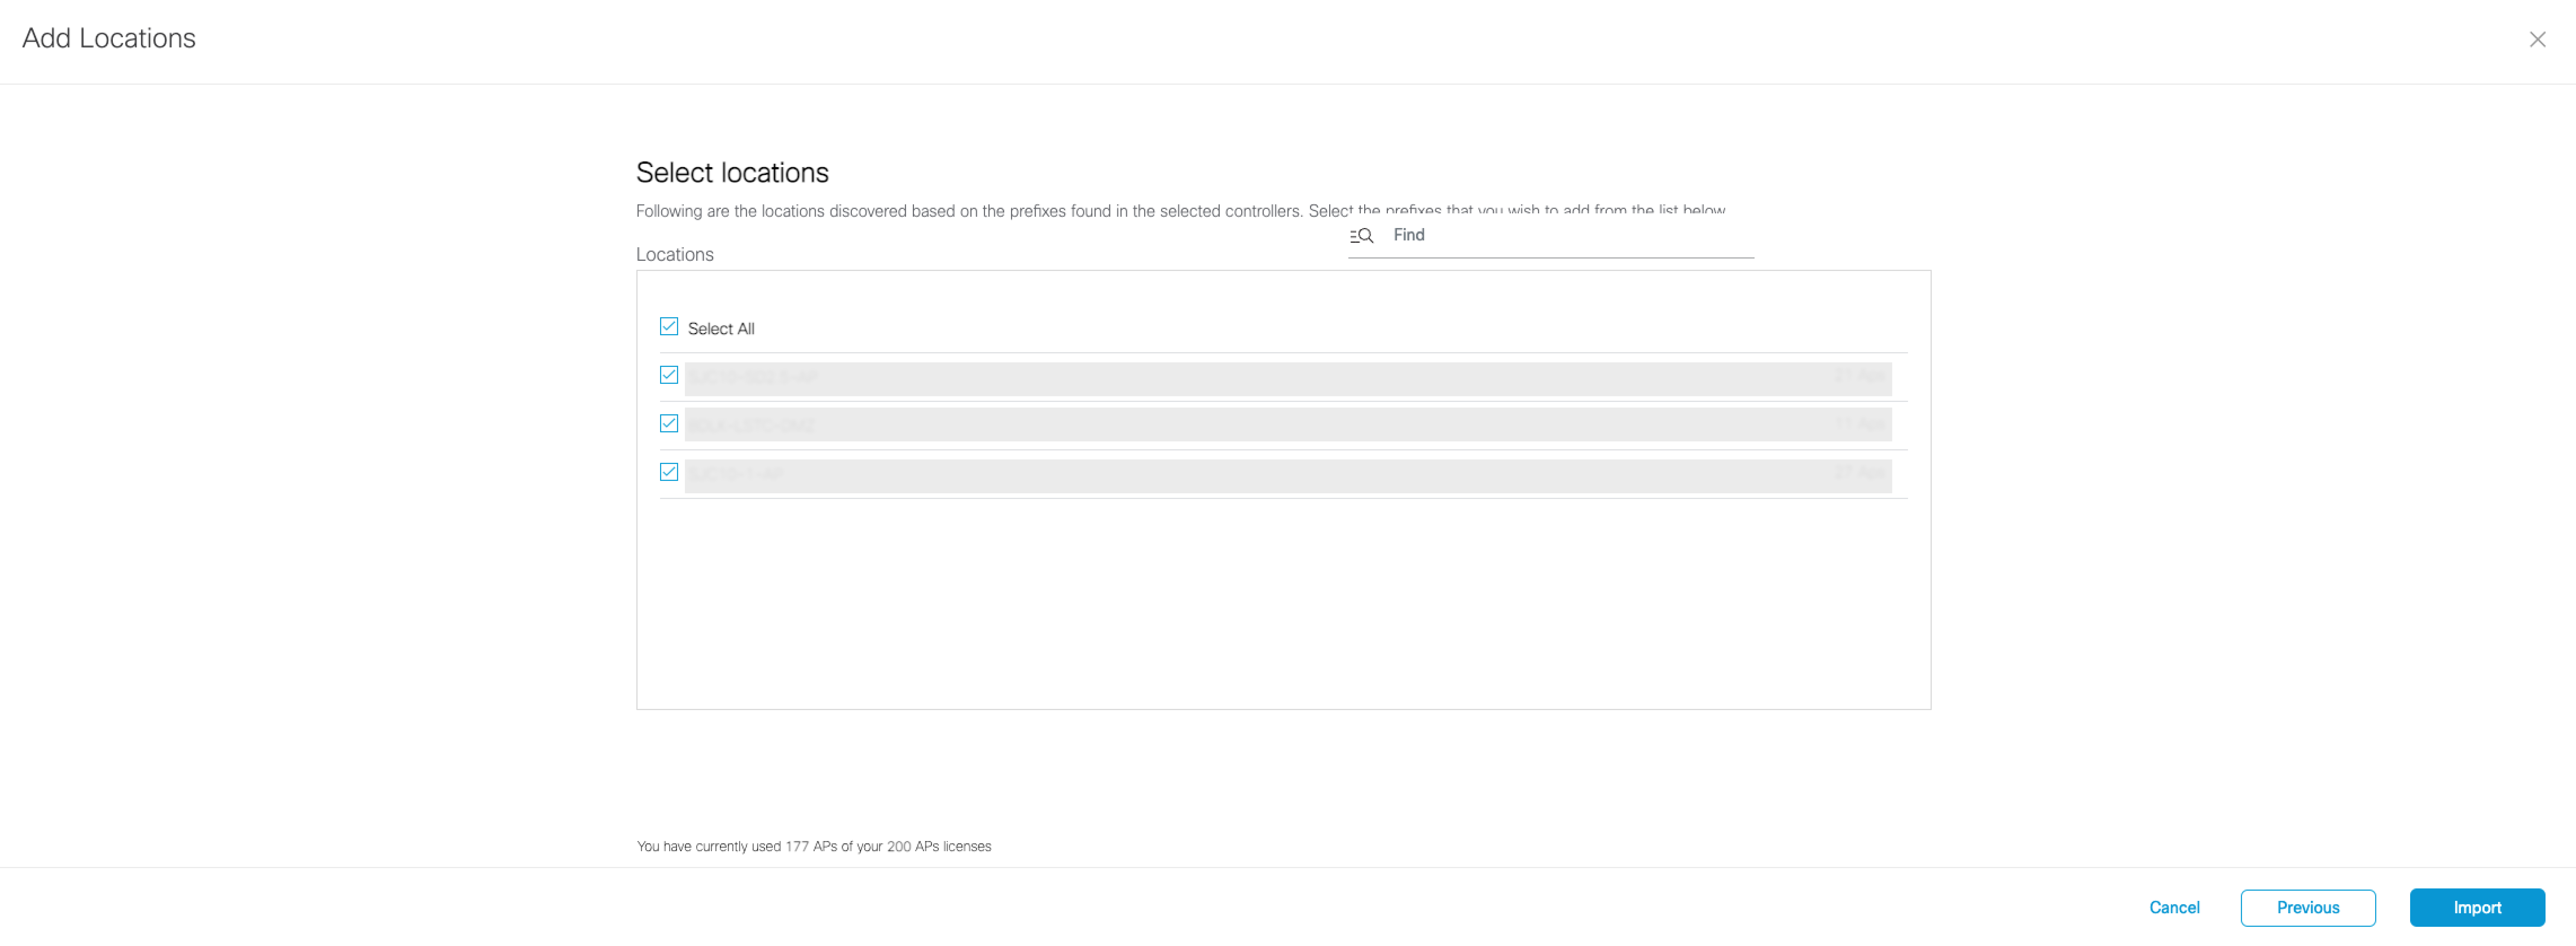
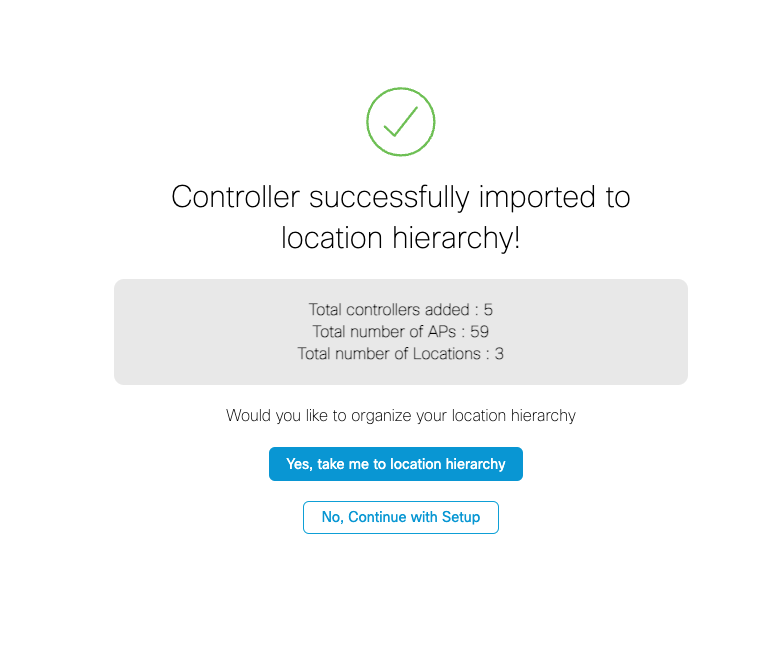
Click “Yes, take me to location hierarchy” to add your time zones. Go to the next step in this setup guide to Add Time Zones.
If you want to add additional controllers, click on “No, Continue with Setup” button, and repeat steps 1-5
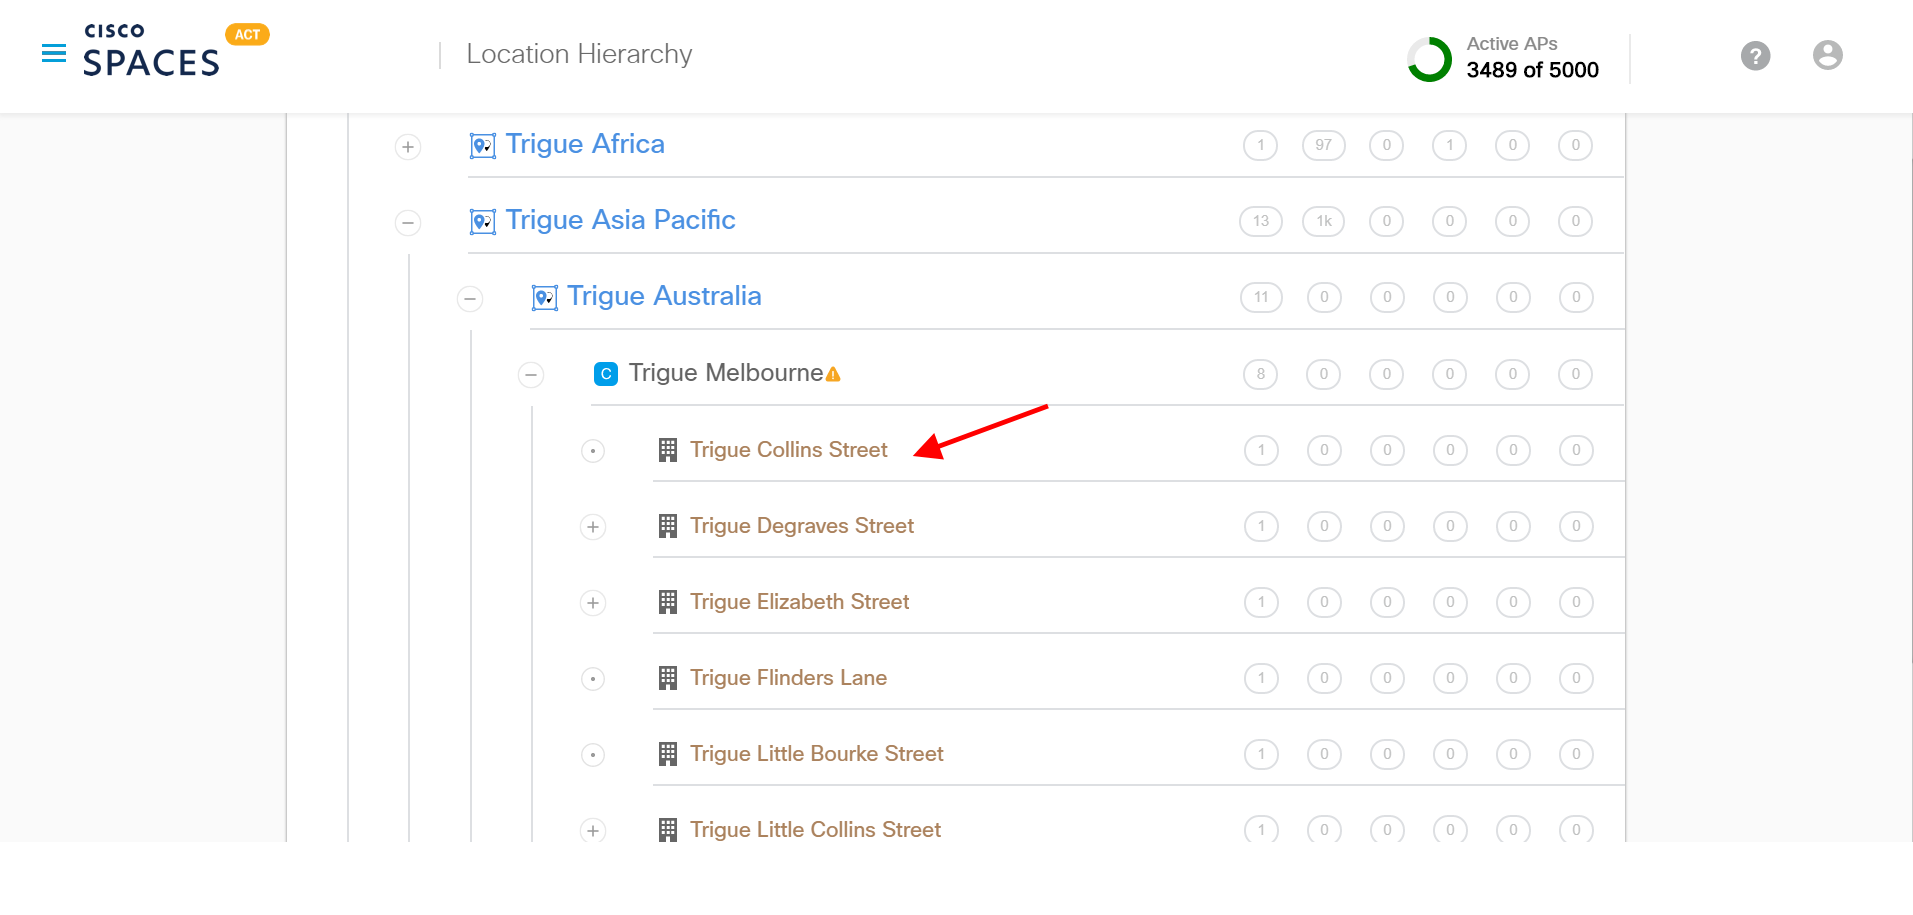
How to delete a Location?
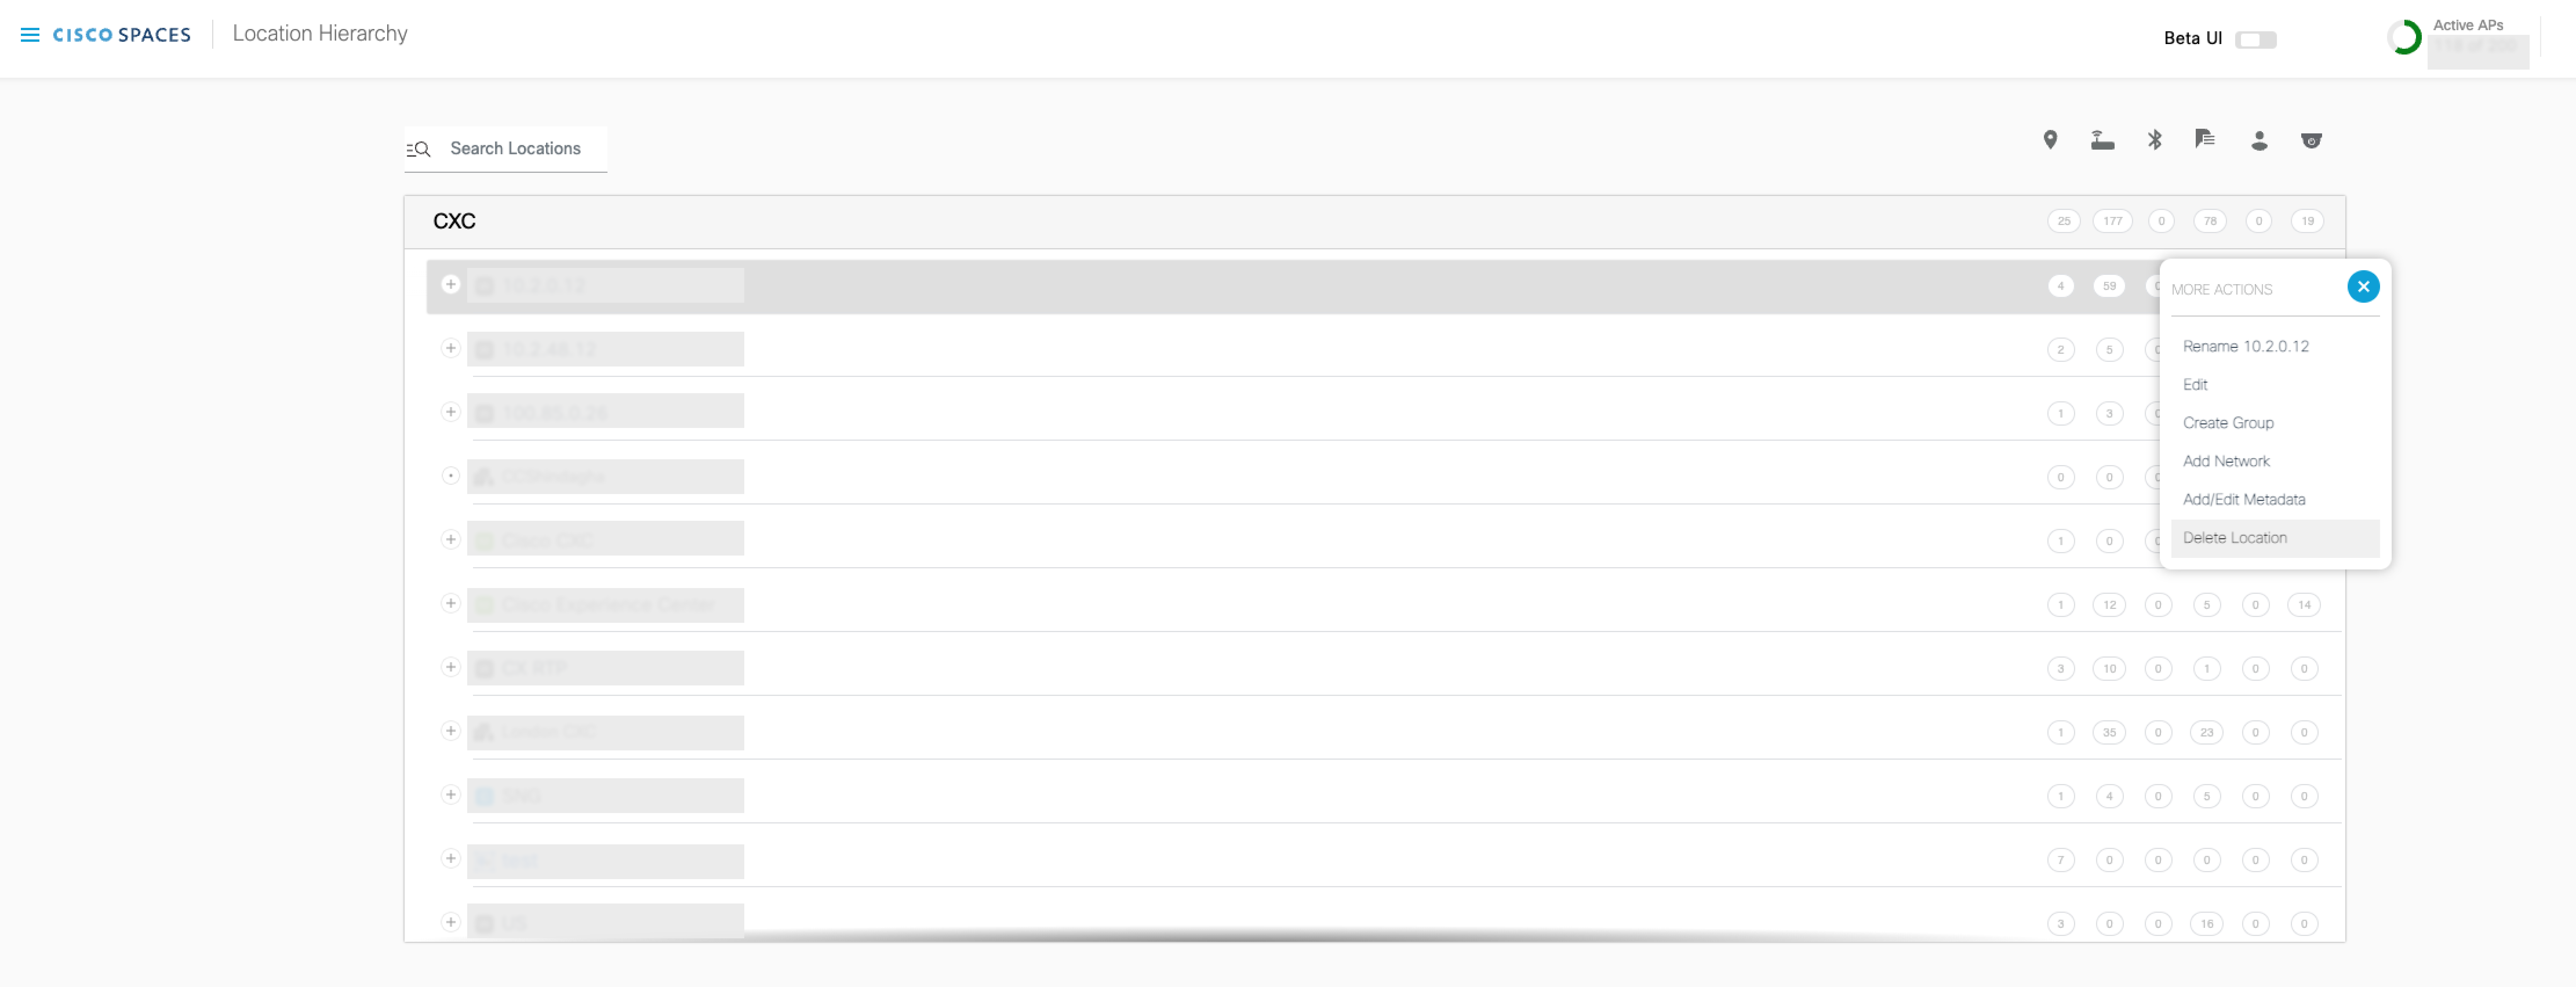
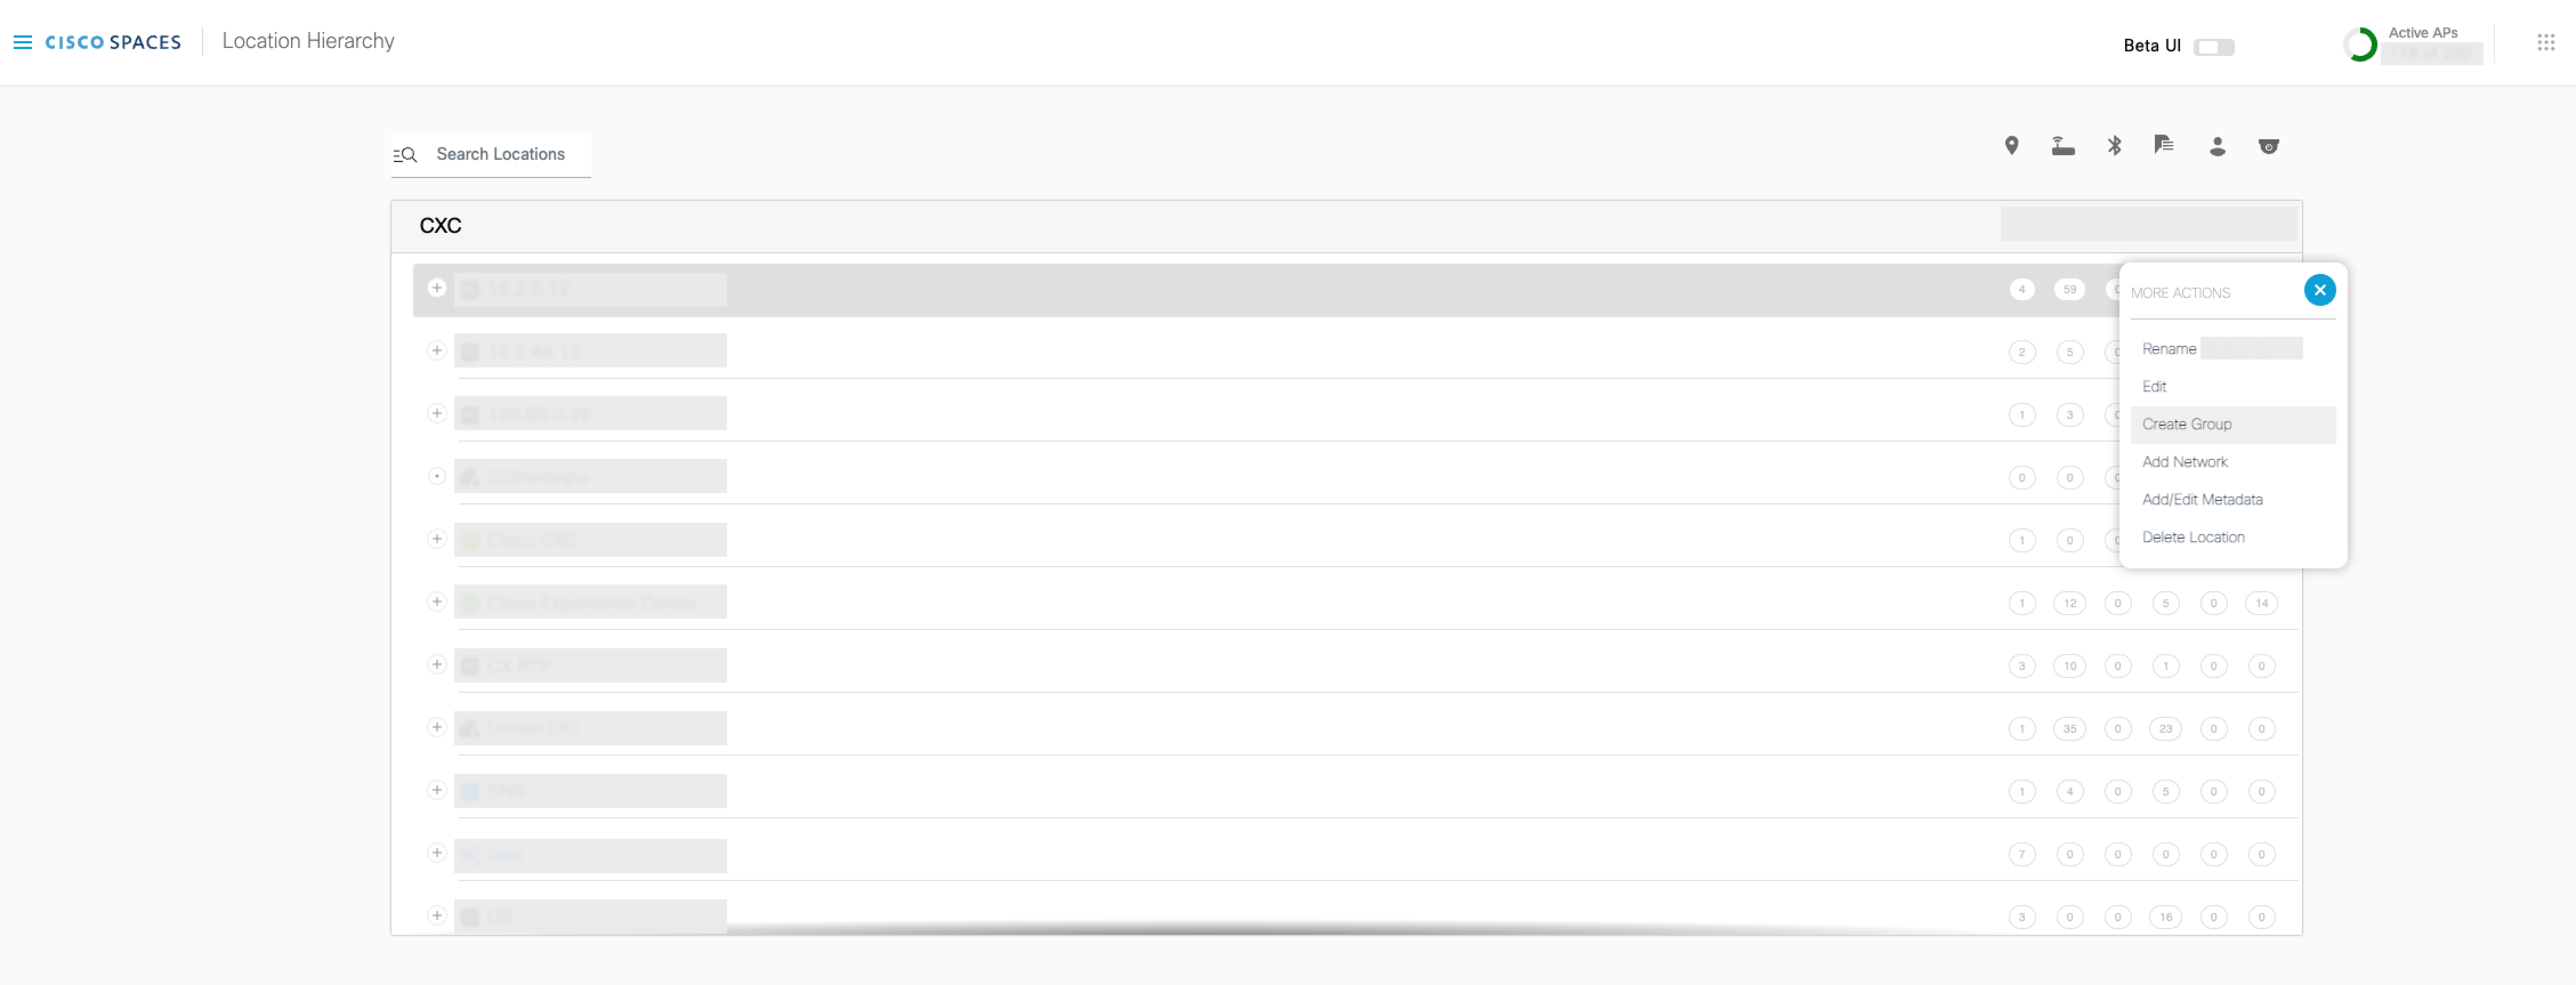
In the Location Hierarchy page, mouse hover on the Location node that you want to delete and click More Actions represented by 3 dots on the far-right corner.
Choose Delete Location.
Click Delete on the confirmation screen that appears.
How to create a Group?
In the Location Hierarchy page, mouse hover on the Account Name, Wireless Controller, or Location node where you want to create a group and click More Actions represented by 3 dots on the far-right corner.
Choose Create Group.
Enter name of the Group in the screen that appears.
Select Wireless Networks, Locations, or Groups and click Add.
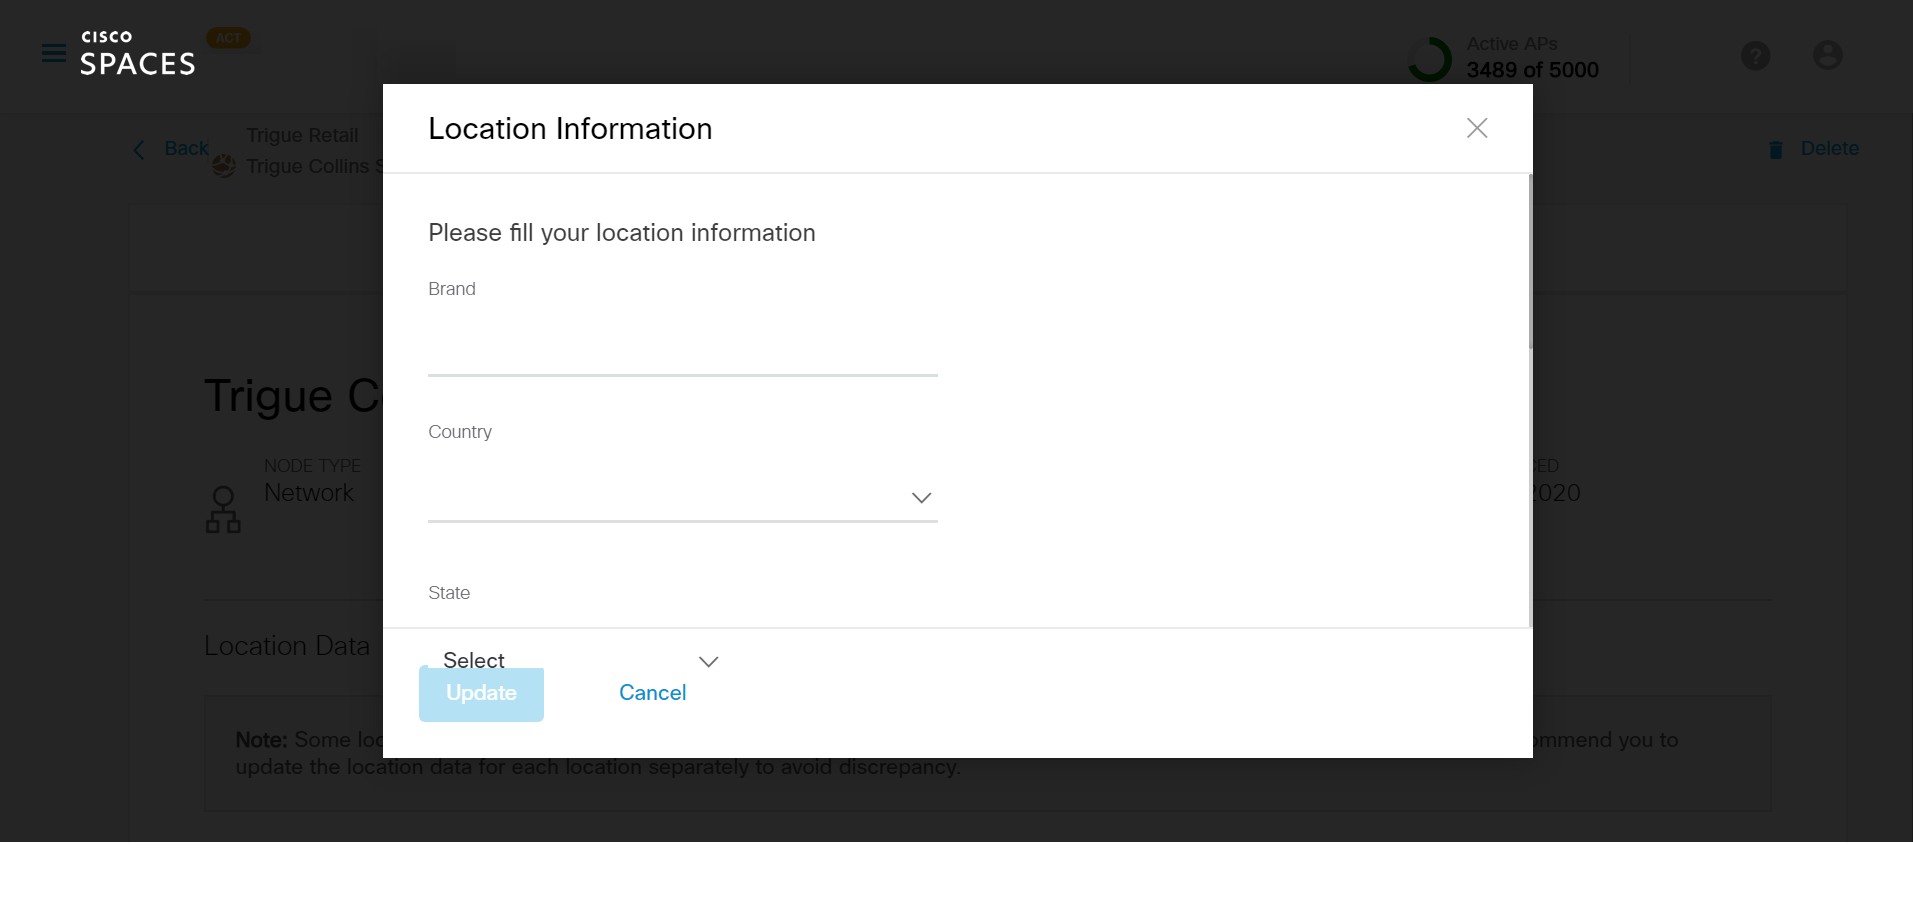
In the Location Hierarchy page, click on the Location where you want to add location info. Select the highest node if all of your locations are in the same time zone.
Click “Edit” on Location Data.
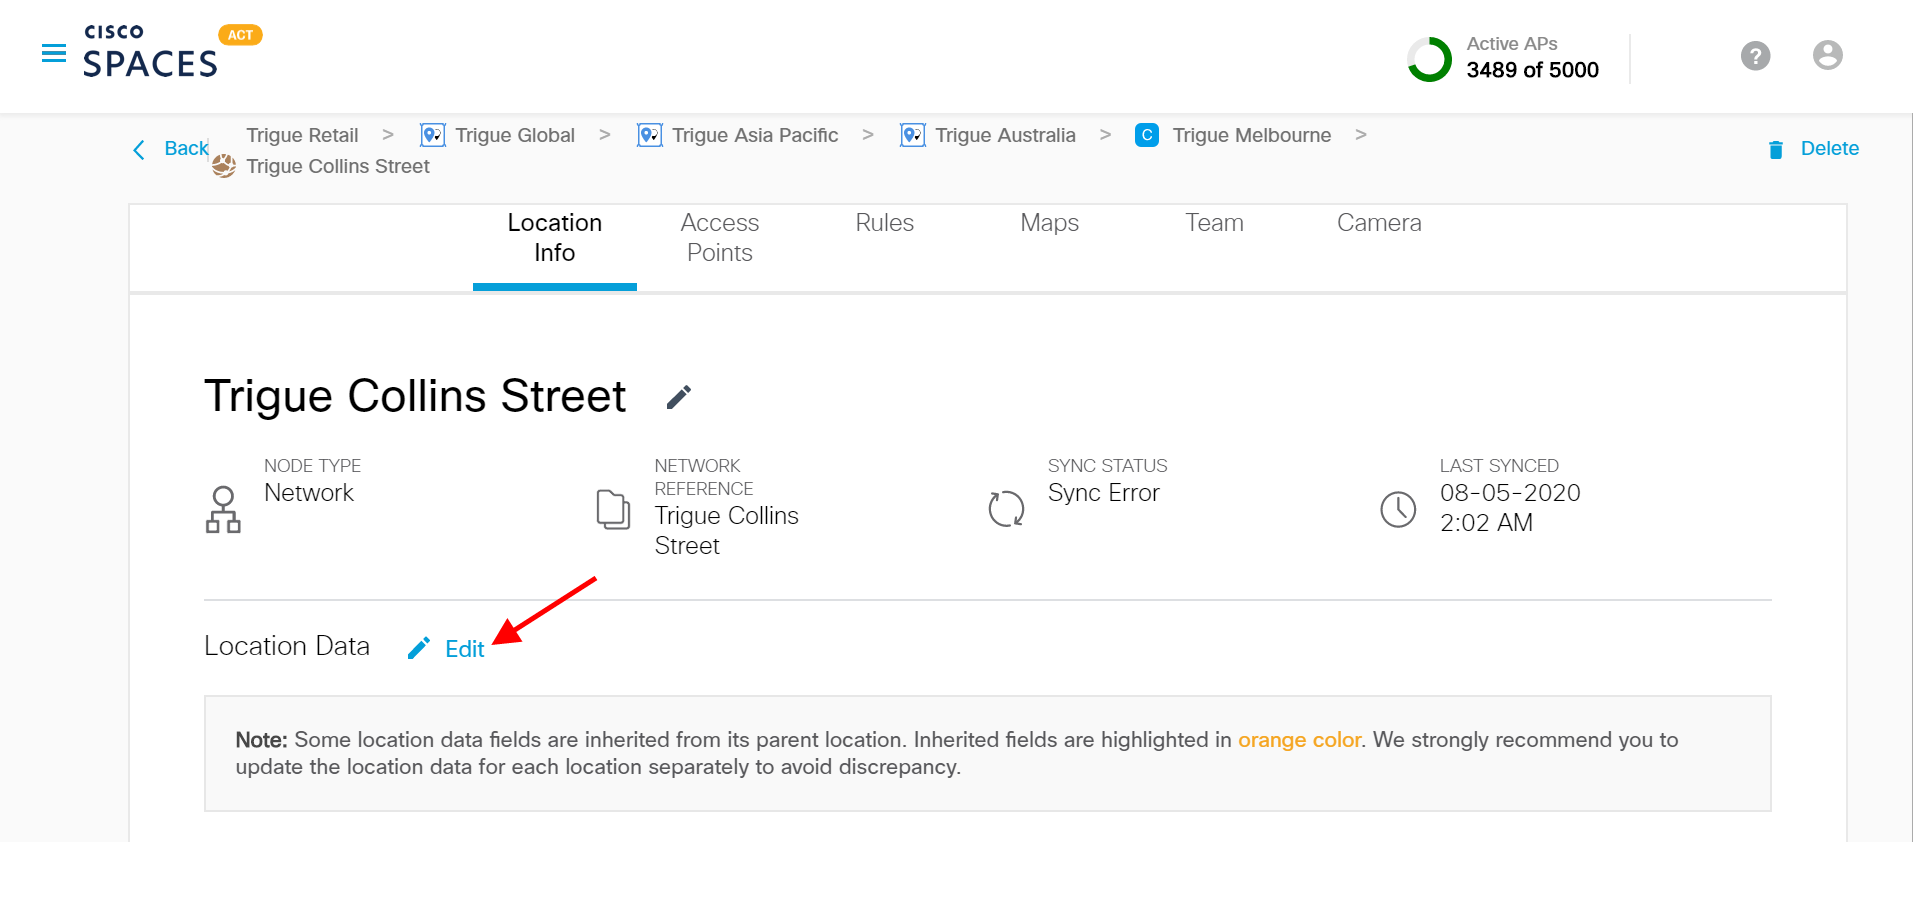
Enter Location Info such as Brand Name, Country, City, Address, Timezone, area units in Sq. Ft/Sq. Mt and click Update.