Talk to an Expert
We will help you get your DNA Spaces dashboard up and running in no time.
Tell us how we can assist you?
Please make sure you have covered all the prerequisites before you start the configuration.
Virtual Machine requirements
In order to connect your wireless network with Cisco Spaces, Cisco Spaces Connector should be installed on a virtual machine. The Spaces Connector supports VMware ESXi 6.5 or above versions, as well as AMI and HyperV
The connector supports Standard/Advanced 1/Advanced 2 configurations with the VM requirements as follows:
| Standard/Advanced 1/Advanced 2 | |
| vCPU | 2/4/8 |
| RAM | 4/8/16 GB |
| Hard Disk | 120GB |
Note: It is highly recommended that 8 vCPU be used when possible. Using fewer resources is possible but may restrict the ability to run certain services.
Tested VMware Environments
Spaces Connector and Cisco Spaces endpoints
The Cisco Spaces Connector should be able to reach out to the Cisco Spaces endpoints for establishing data connectivity with Cisco Spaces.)
For Global Setup
The Cisco Spaces Connector must be able to reach out to https://connector.dnaspaces.io/
| Primary IP Address | 52.20.144.155, 34.231.154.95 |
| Disaster Recovery | 54.176.92.81, 54.183.58.225 |
For EU Setup
The Cisco Spaces Connector must be able to reach out to https://connector.dnaspaces.eu/
| Primary IP Address | 63.33.127.190, 63.33.175.64 |
| Disaster Recovery | 3.122.15.26, 3.122.15.7 |
For Singapore Setup
The Cisco Spaces Connector must be able to reach out to https://connector.ciscospaces.sg/
| Primary IP Address | 13.228.159.49, 54.179.105.241 |
| Disaster Recovery | 13.214.251.223, 54.255.57.46 |
The Cisco Spaces Connector must be able to communicate to the WLC on ports:
– 16113 TCP (NMSP)
– 161/162 UDP (SNMP) – only for AirOS
– 830 TCP (NETCONF) – only for Catalyst Controllers
– 22 TCP (SSH)Ed
– Information about Open Ports: https://www.cisco.com/c/en/us/td/docs/wireless/spaces/connector/2-x/config/b_connector/m_open-ports.html
Ensure that the CMX Cloud Services are disabled on the WLC. Execute the following command to disable your CMX Cloud Services: config cloud-services cmx disable
Ensure that https://www.cisco.com and cisco.com domains are white-listed.
The following connector specific control/data channels need to be whitelisted
connector.dnaspaces.io
connector.dnaspaces.eu
connector.ciscospaces.sg
SNMP Read/Write permissions are needed for AireOS based controllers and not needed for IOS-XE based controllers.
The WLC Controller IP you configure in the Cisco Spaces dashboard must be able to reach out to the Cisco Spaces Connector. Refer to Step 3 above.
Note: The Cisco Spaces Connector is tested to operate on the internet links with less than 0.1% packet loss.
Download the Cisco Spaces Connector OVA from here: Cisco Spaces OVA
Deploy the downloaded Cisco Spaces OVA file on your virtual machine.
Once the OVA is deployed, you can log into the VMware console using the default username and password provided in the console, username: root Password:root 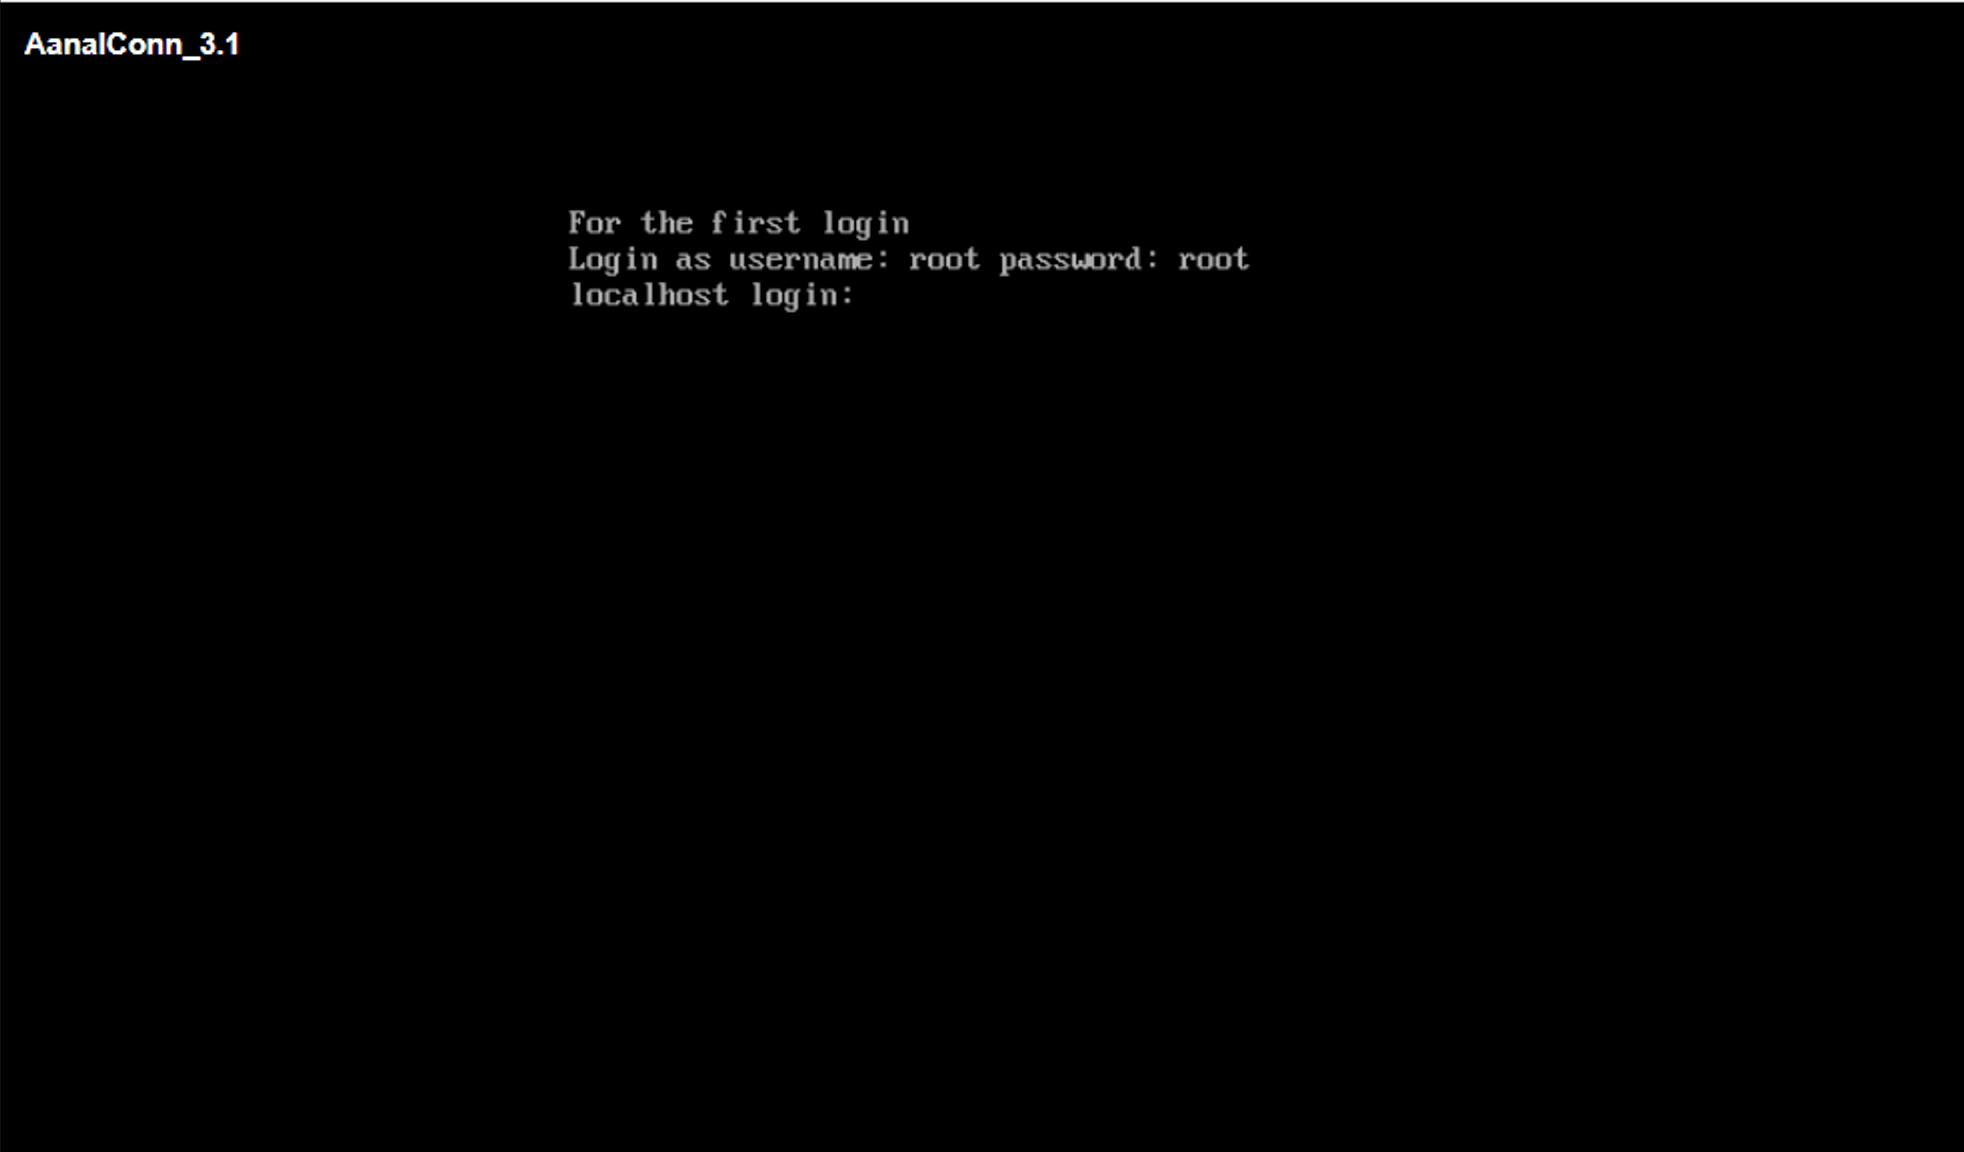
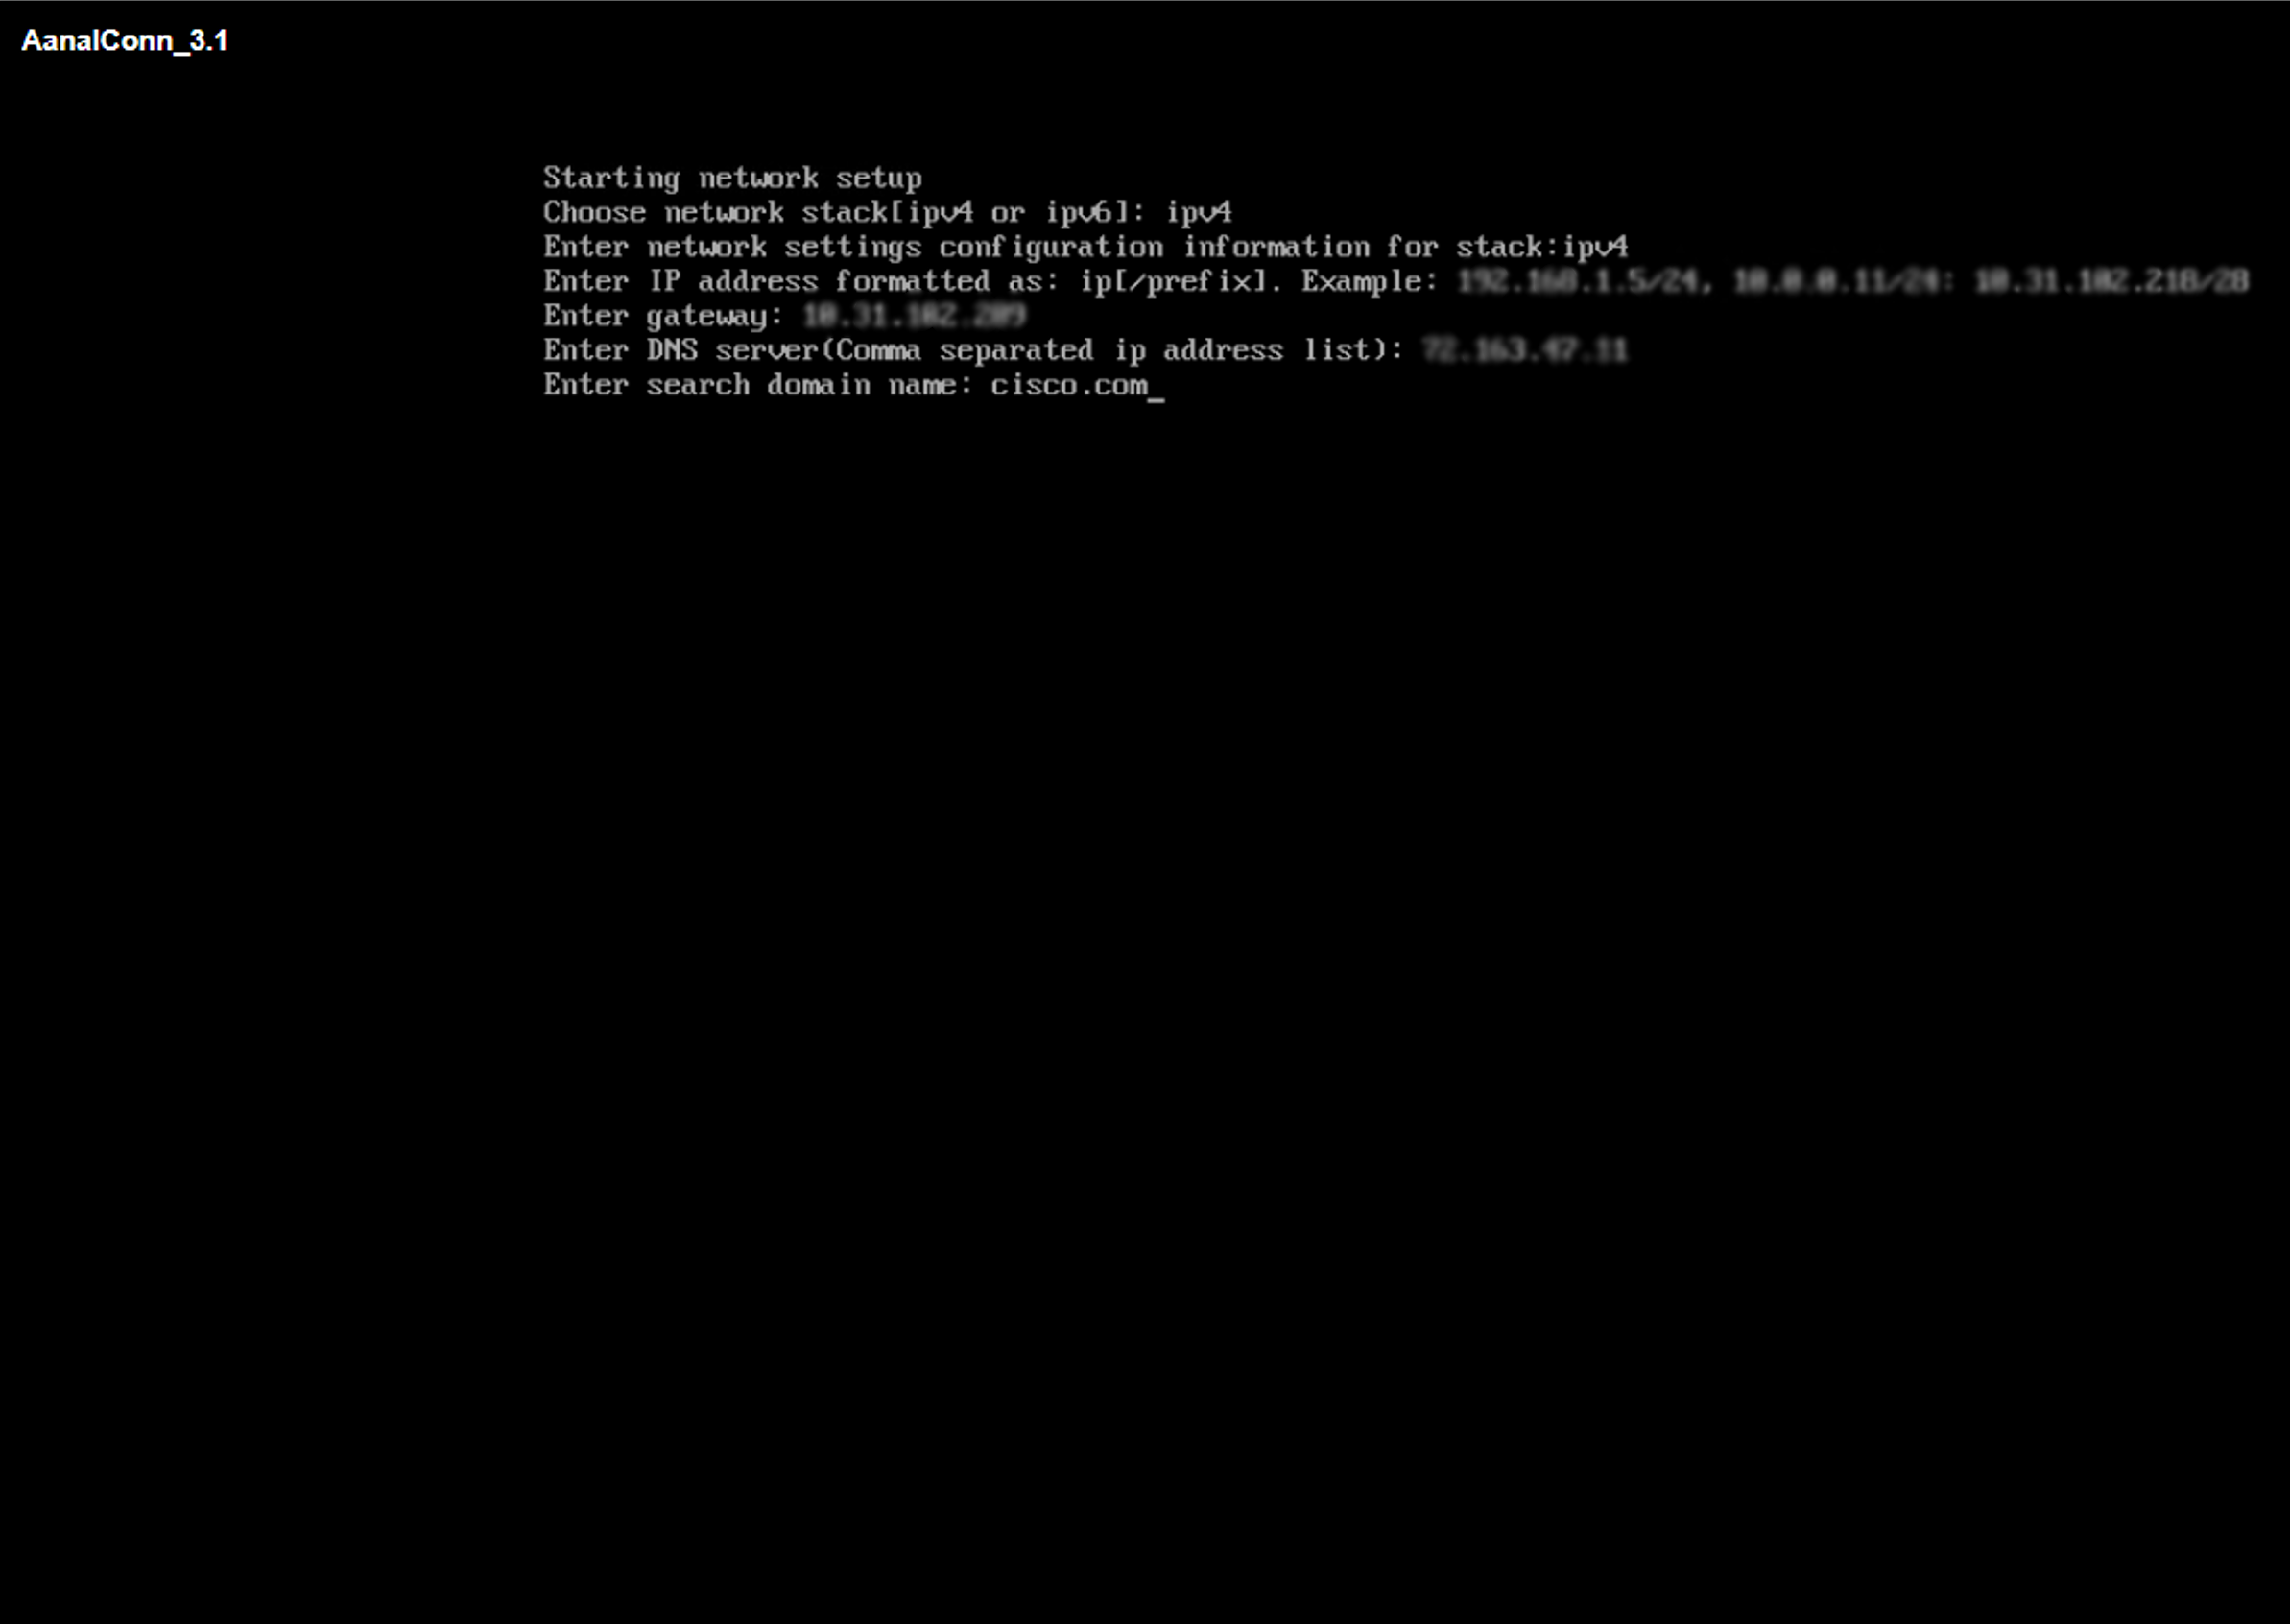
Enter the network settings.
Enter NTP settings or leave it blank. 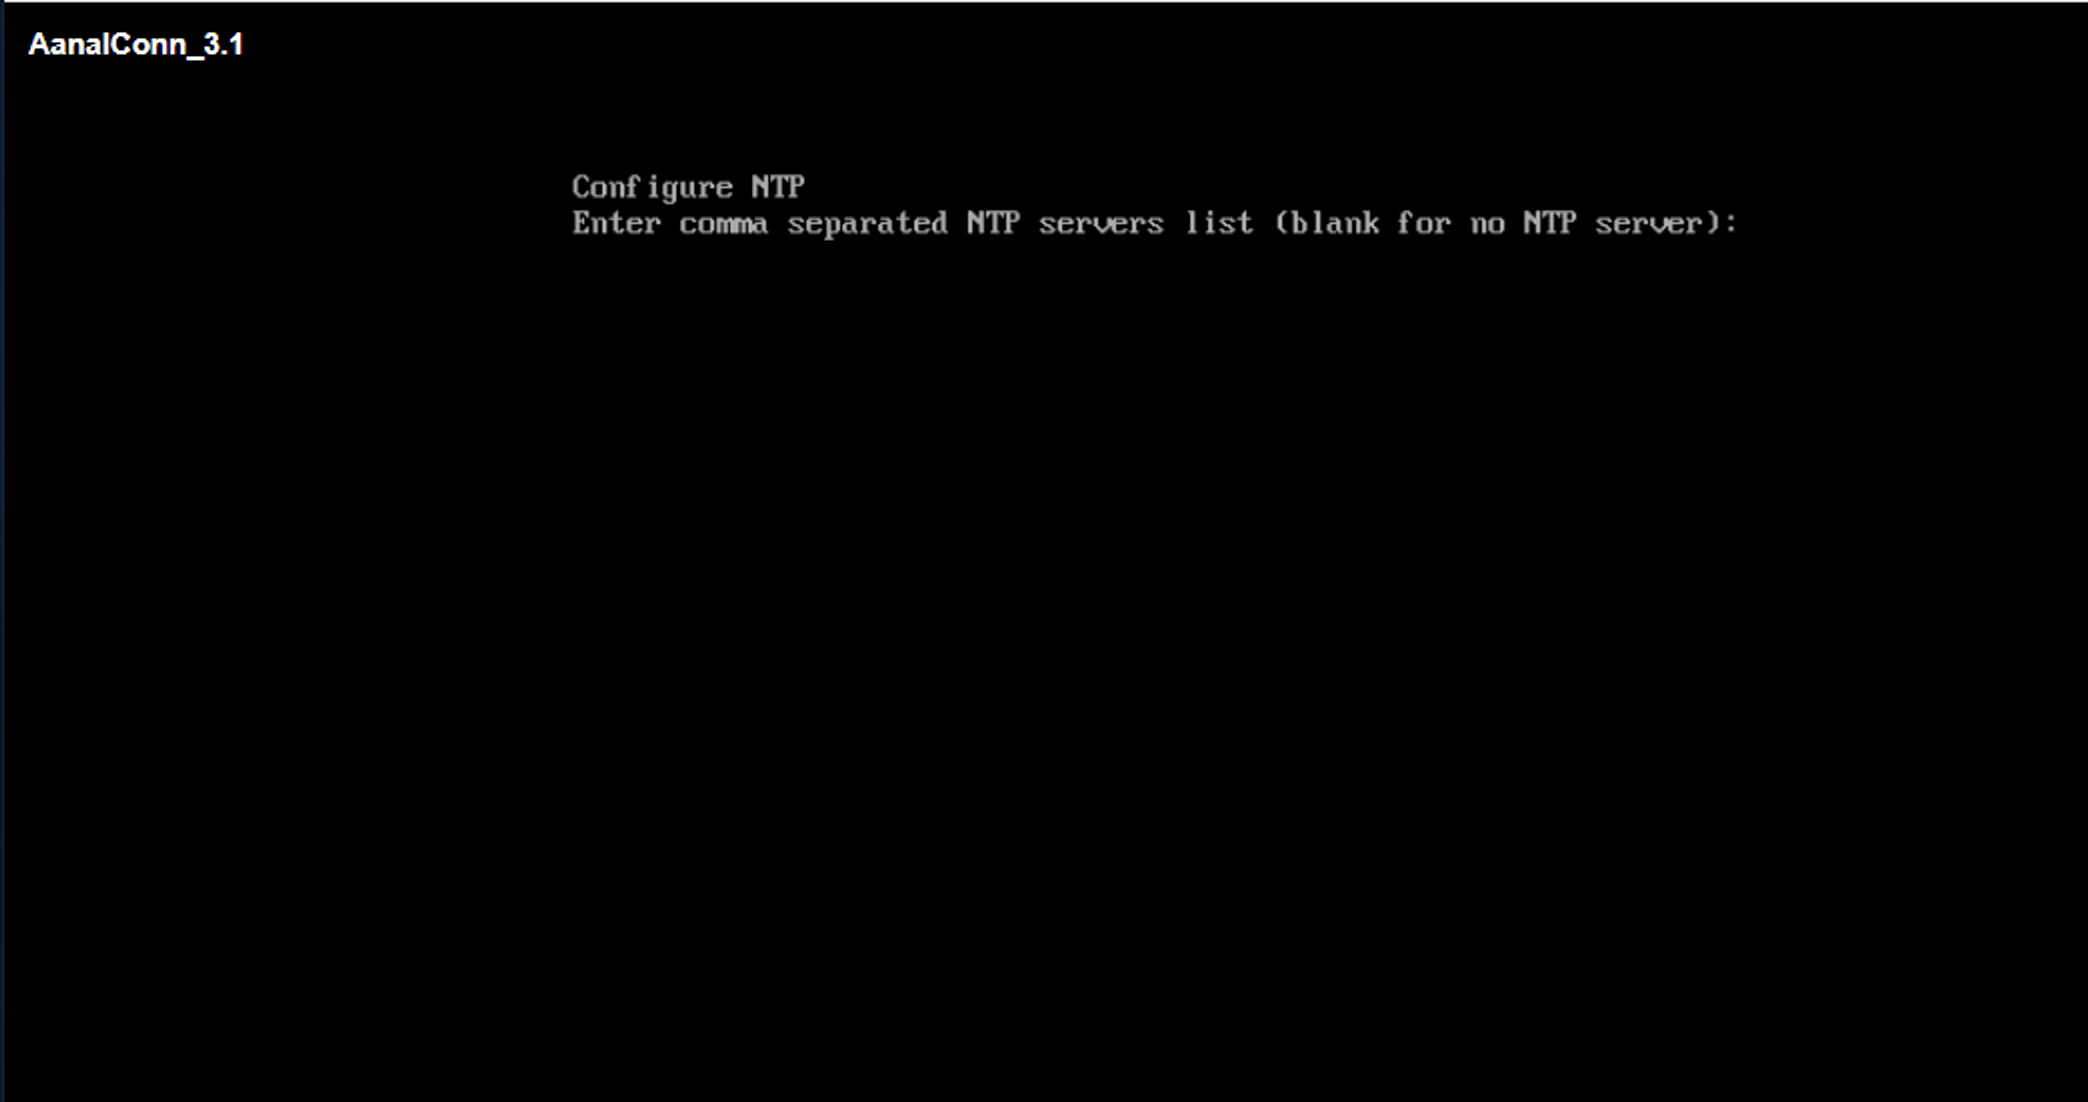
Set the password for spacesadmin user

When prompted, reboot the device and open the WebUI using the address provided.
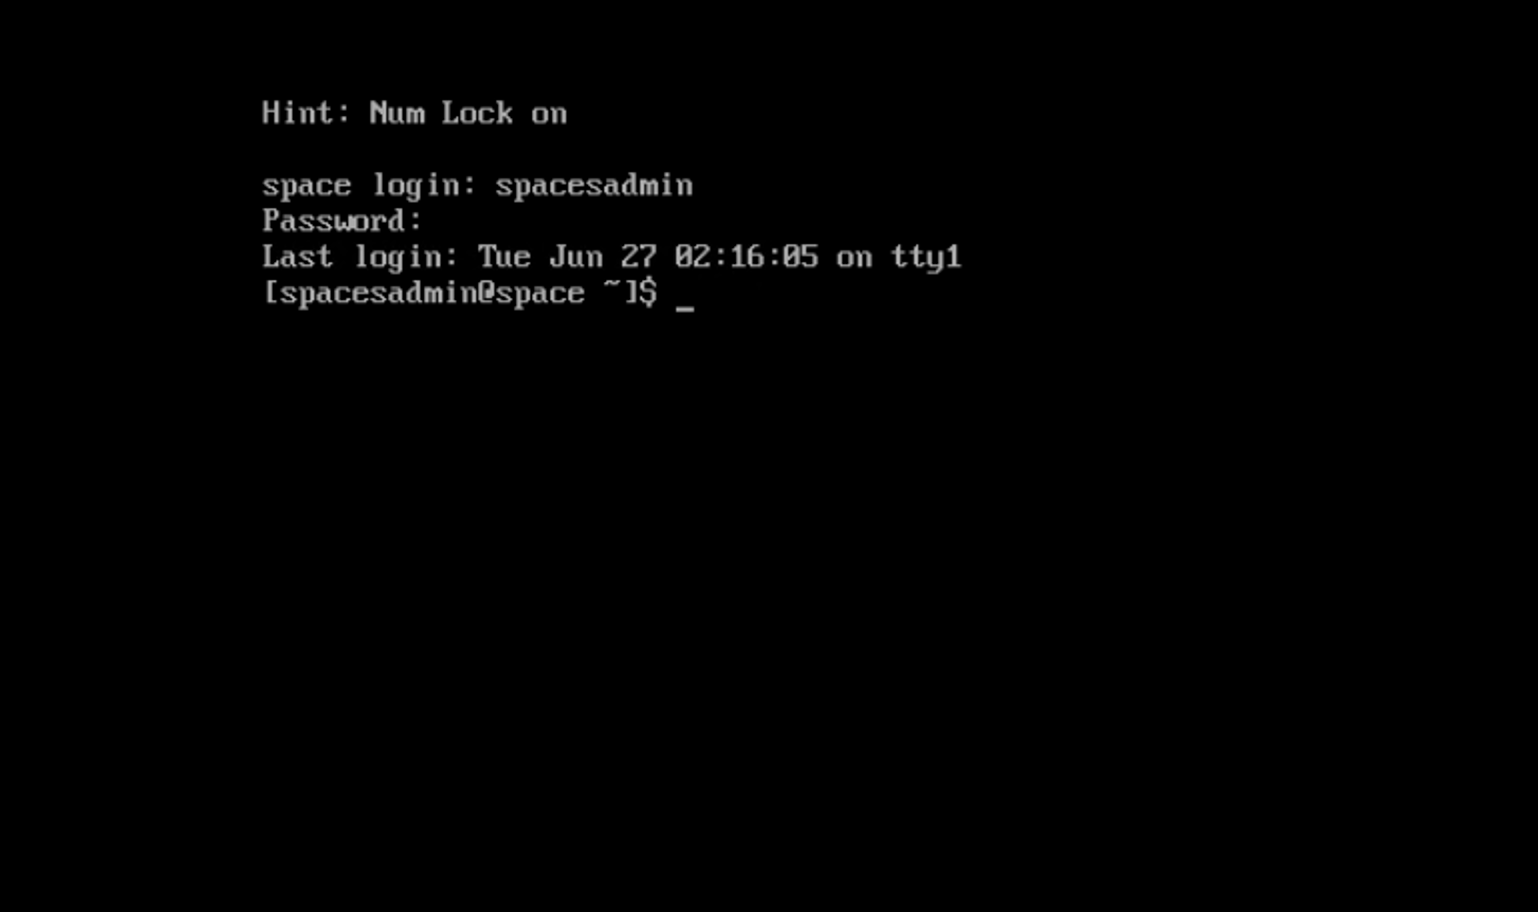
NOTE:
2.x will use dnasadmin
3.x will use spacesadmin
2.x and 3.x is selected when the customer selects the ova file download
Connector Configuration guide: https://www.cisco.com/c/en/us/td/docs/wireless/cisco-dna-spaces/connector/config/b_connector/m_ova.html
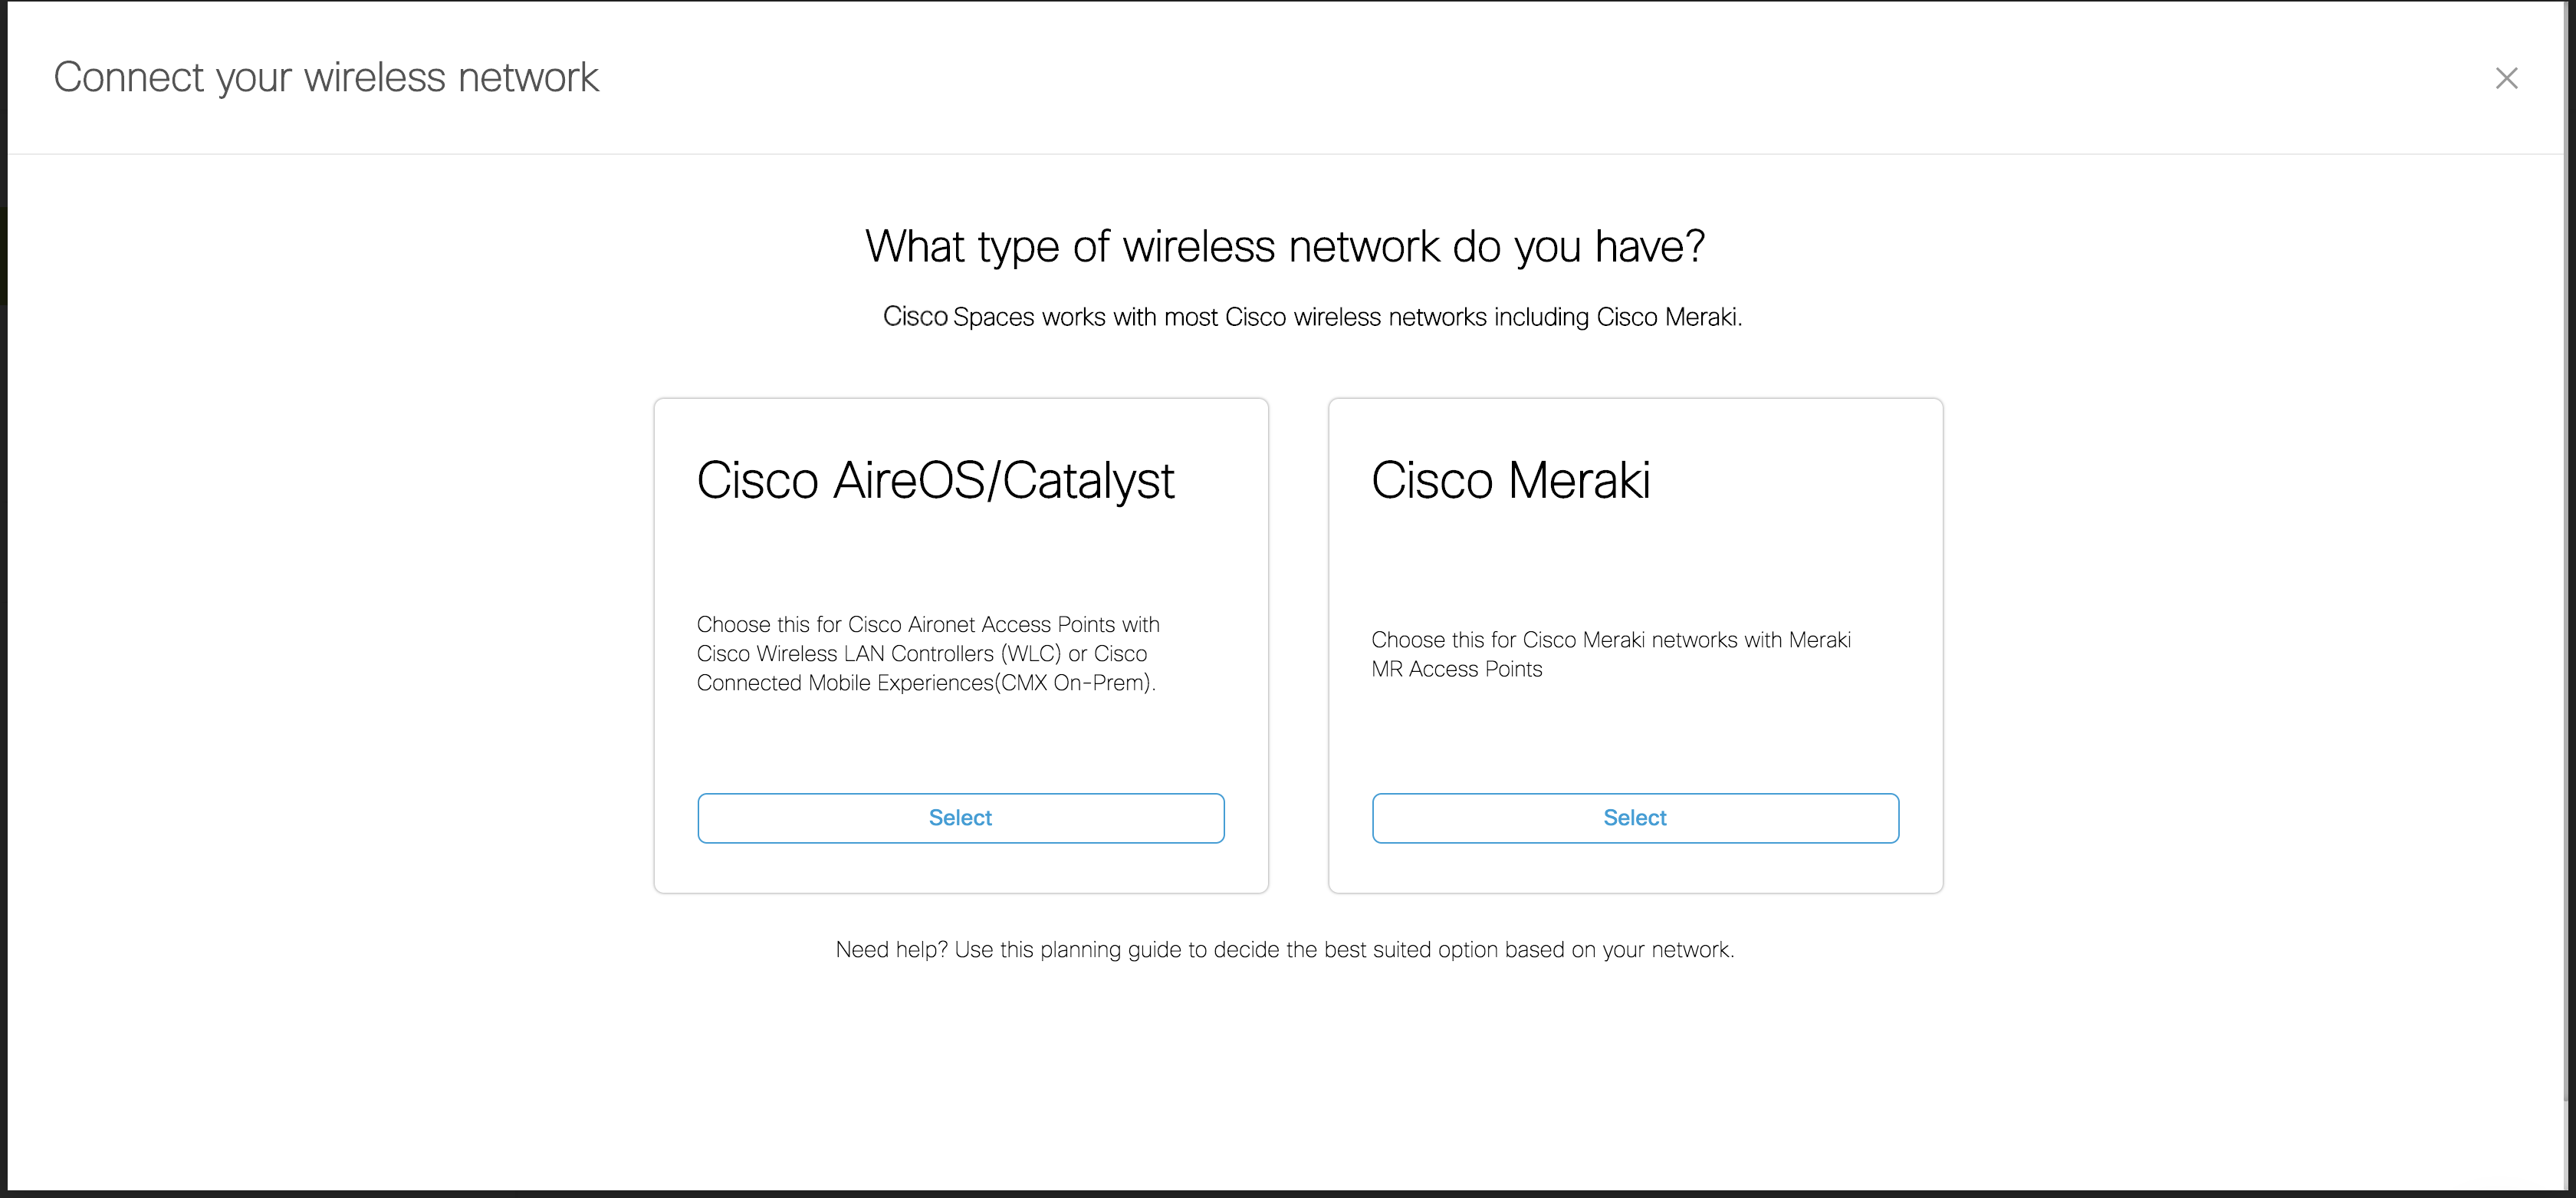
In the Cisco Spaces dashboard, click on “Setup” on the Menu
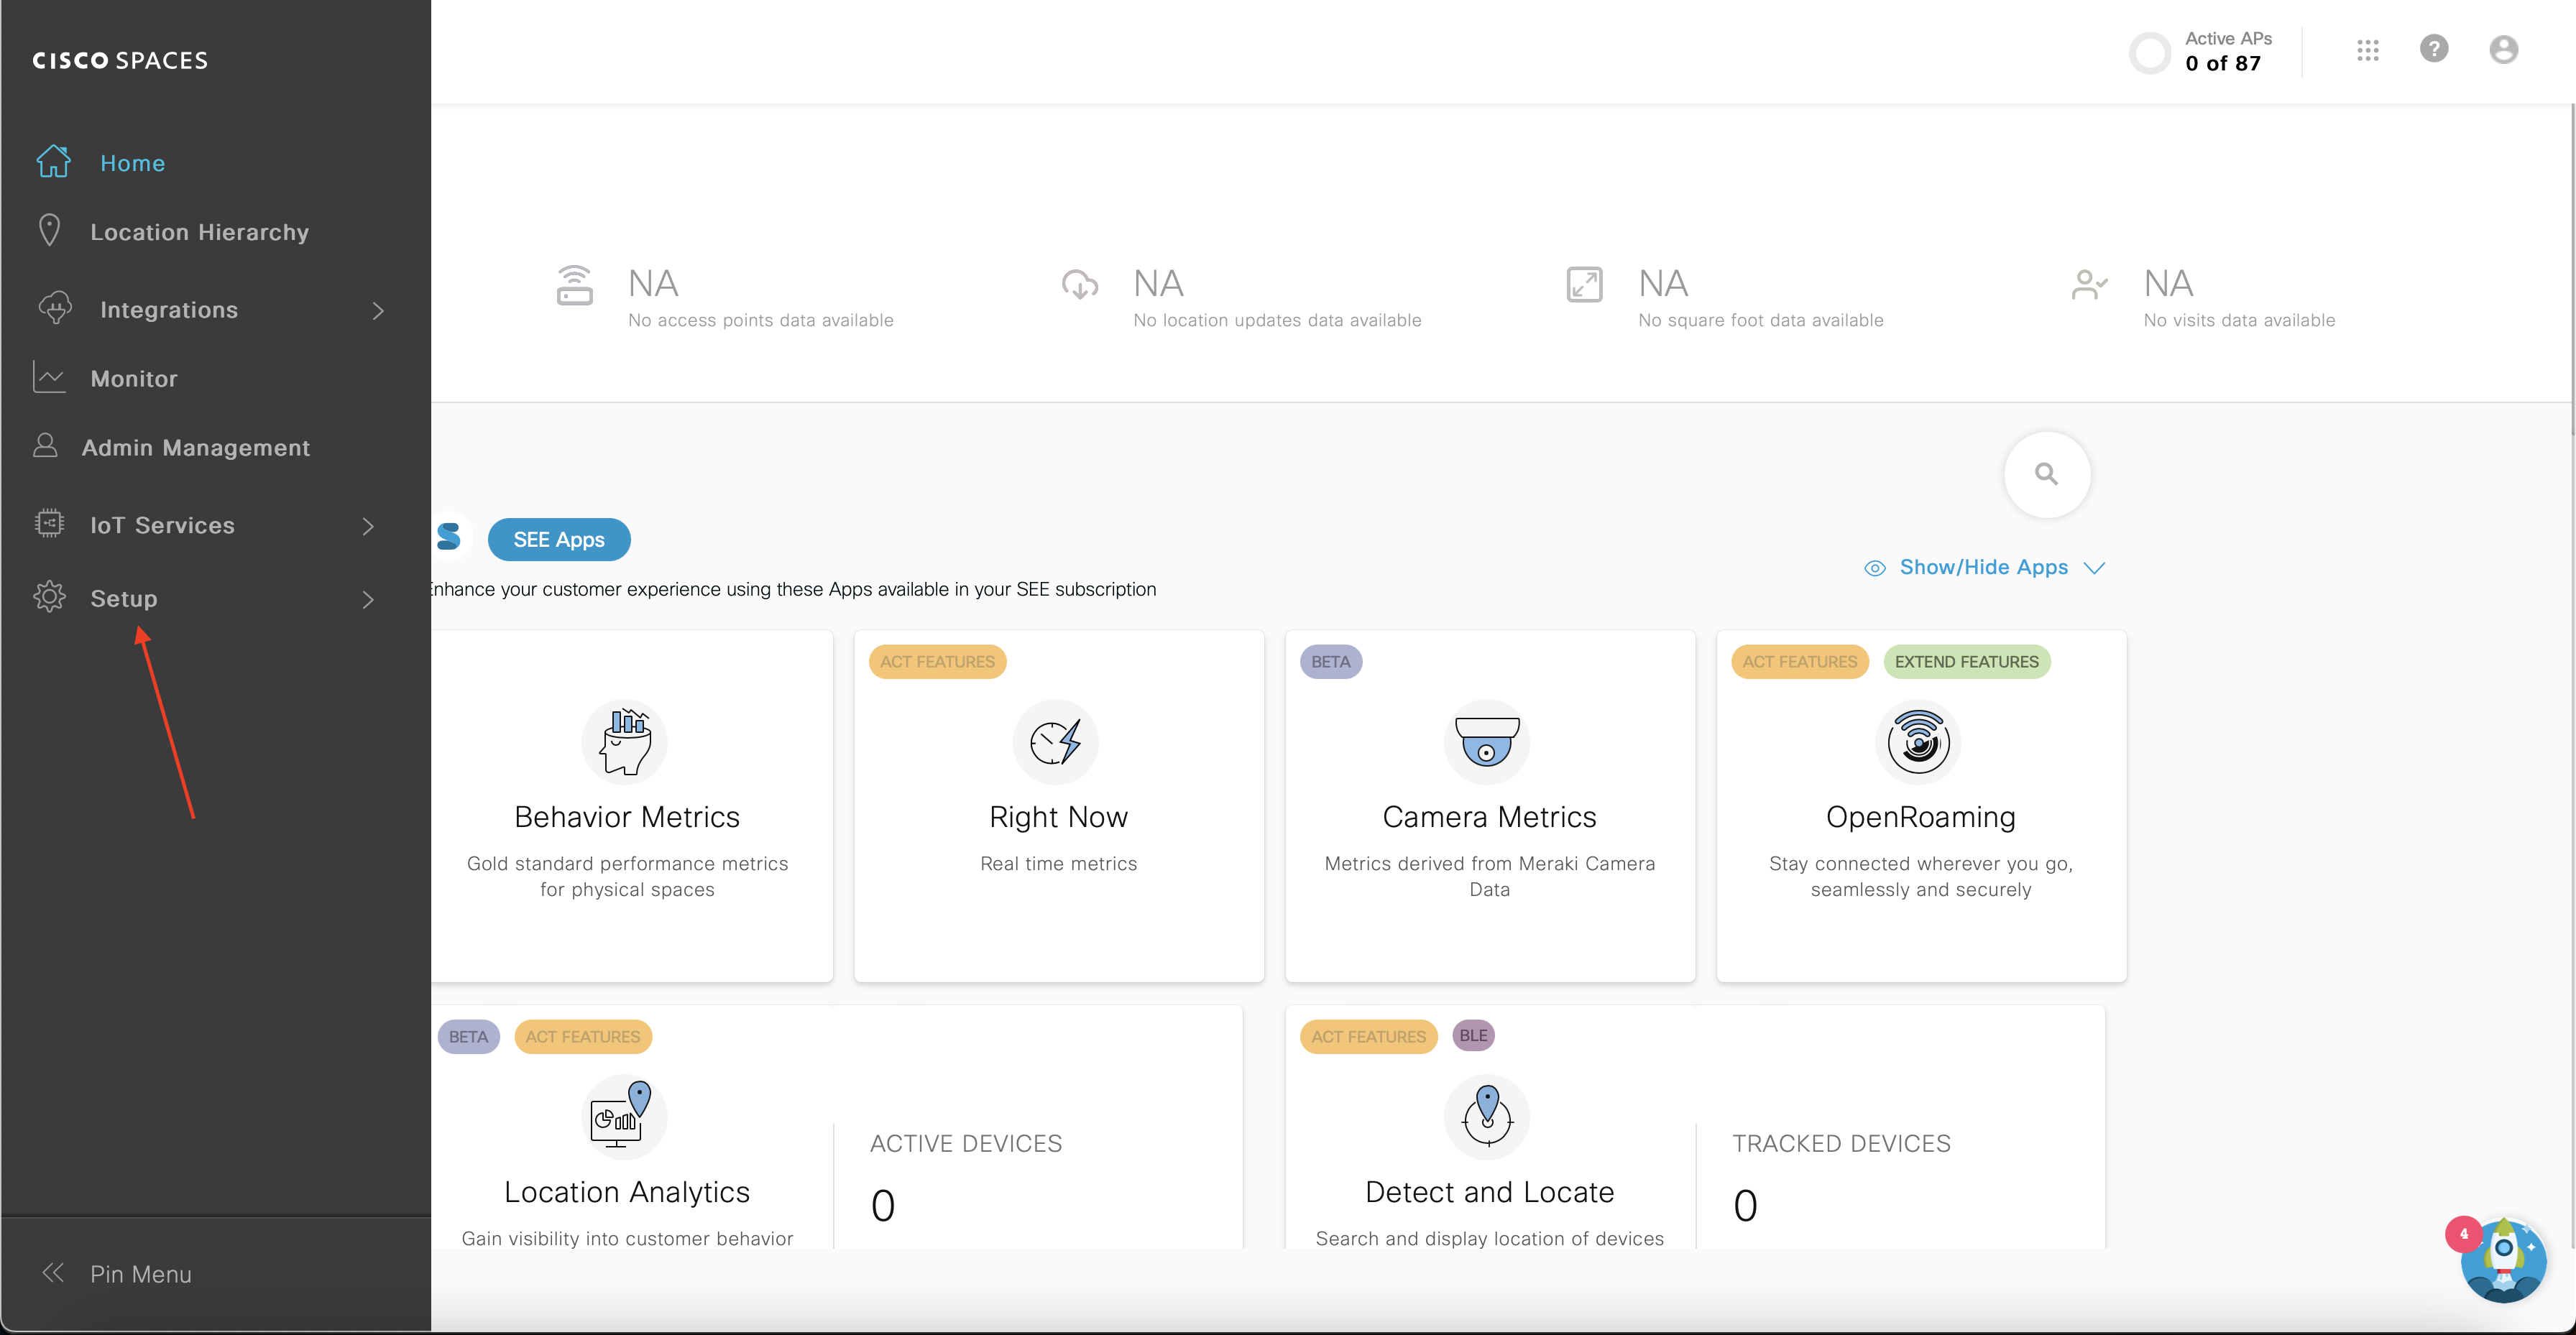
Select “Wireless Networks”
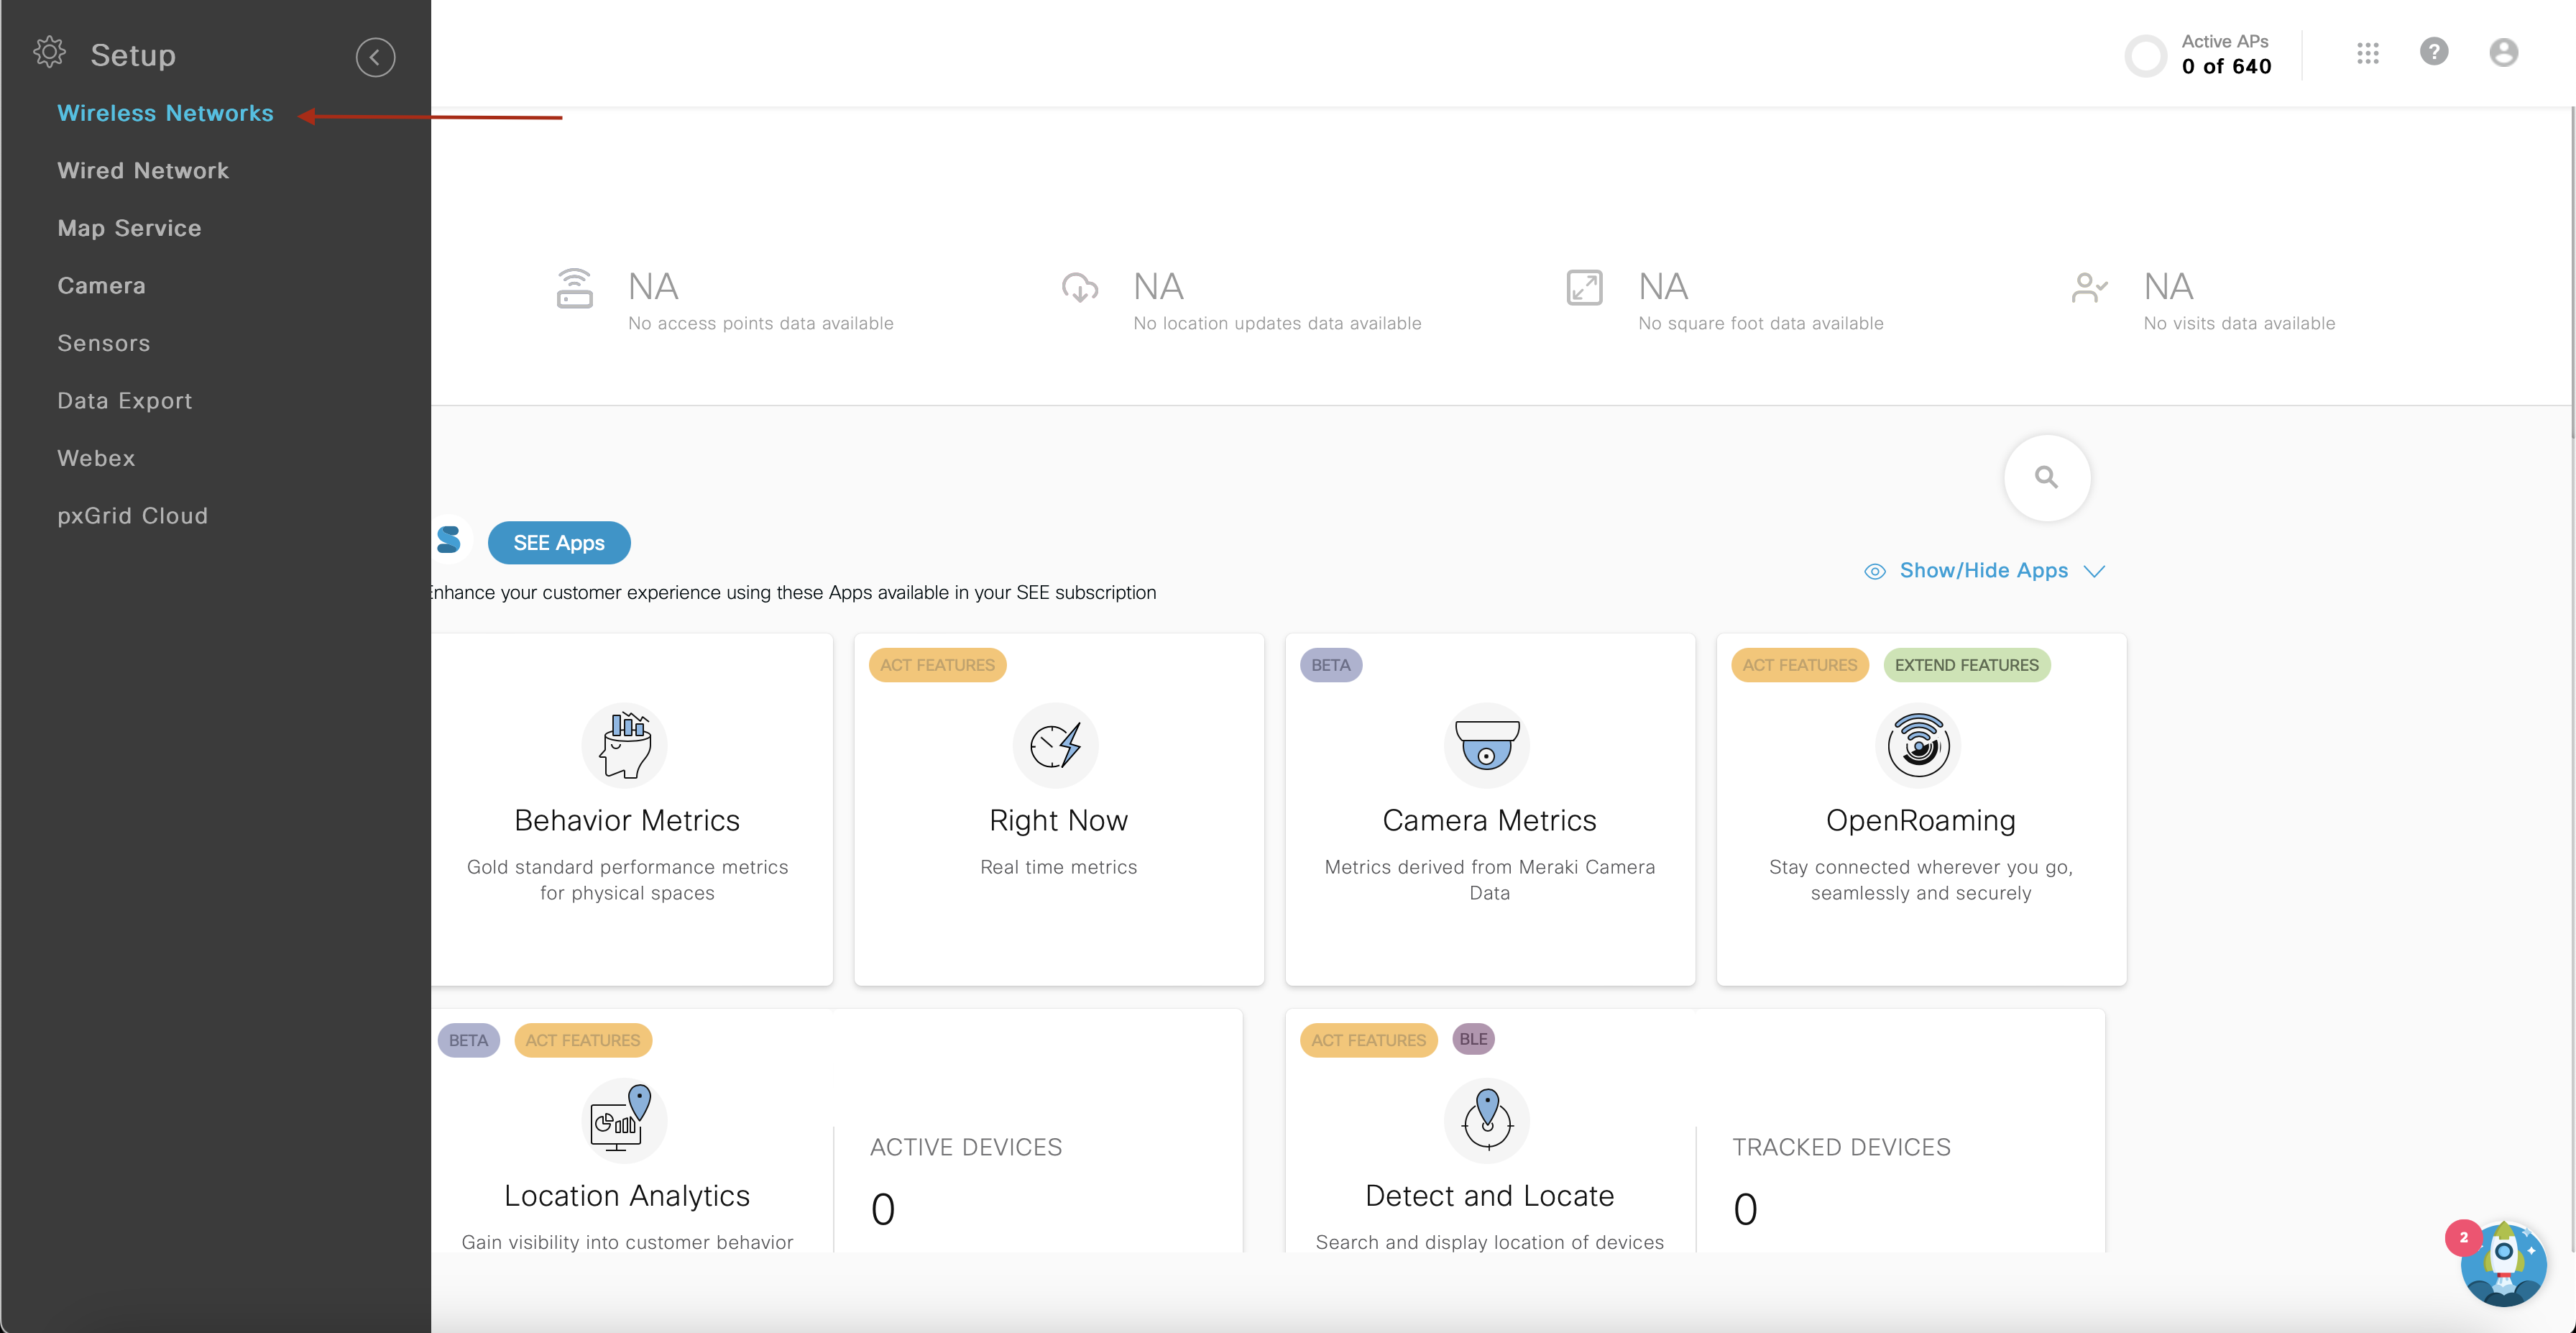
Click on “Get Started” button
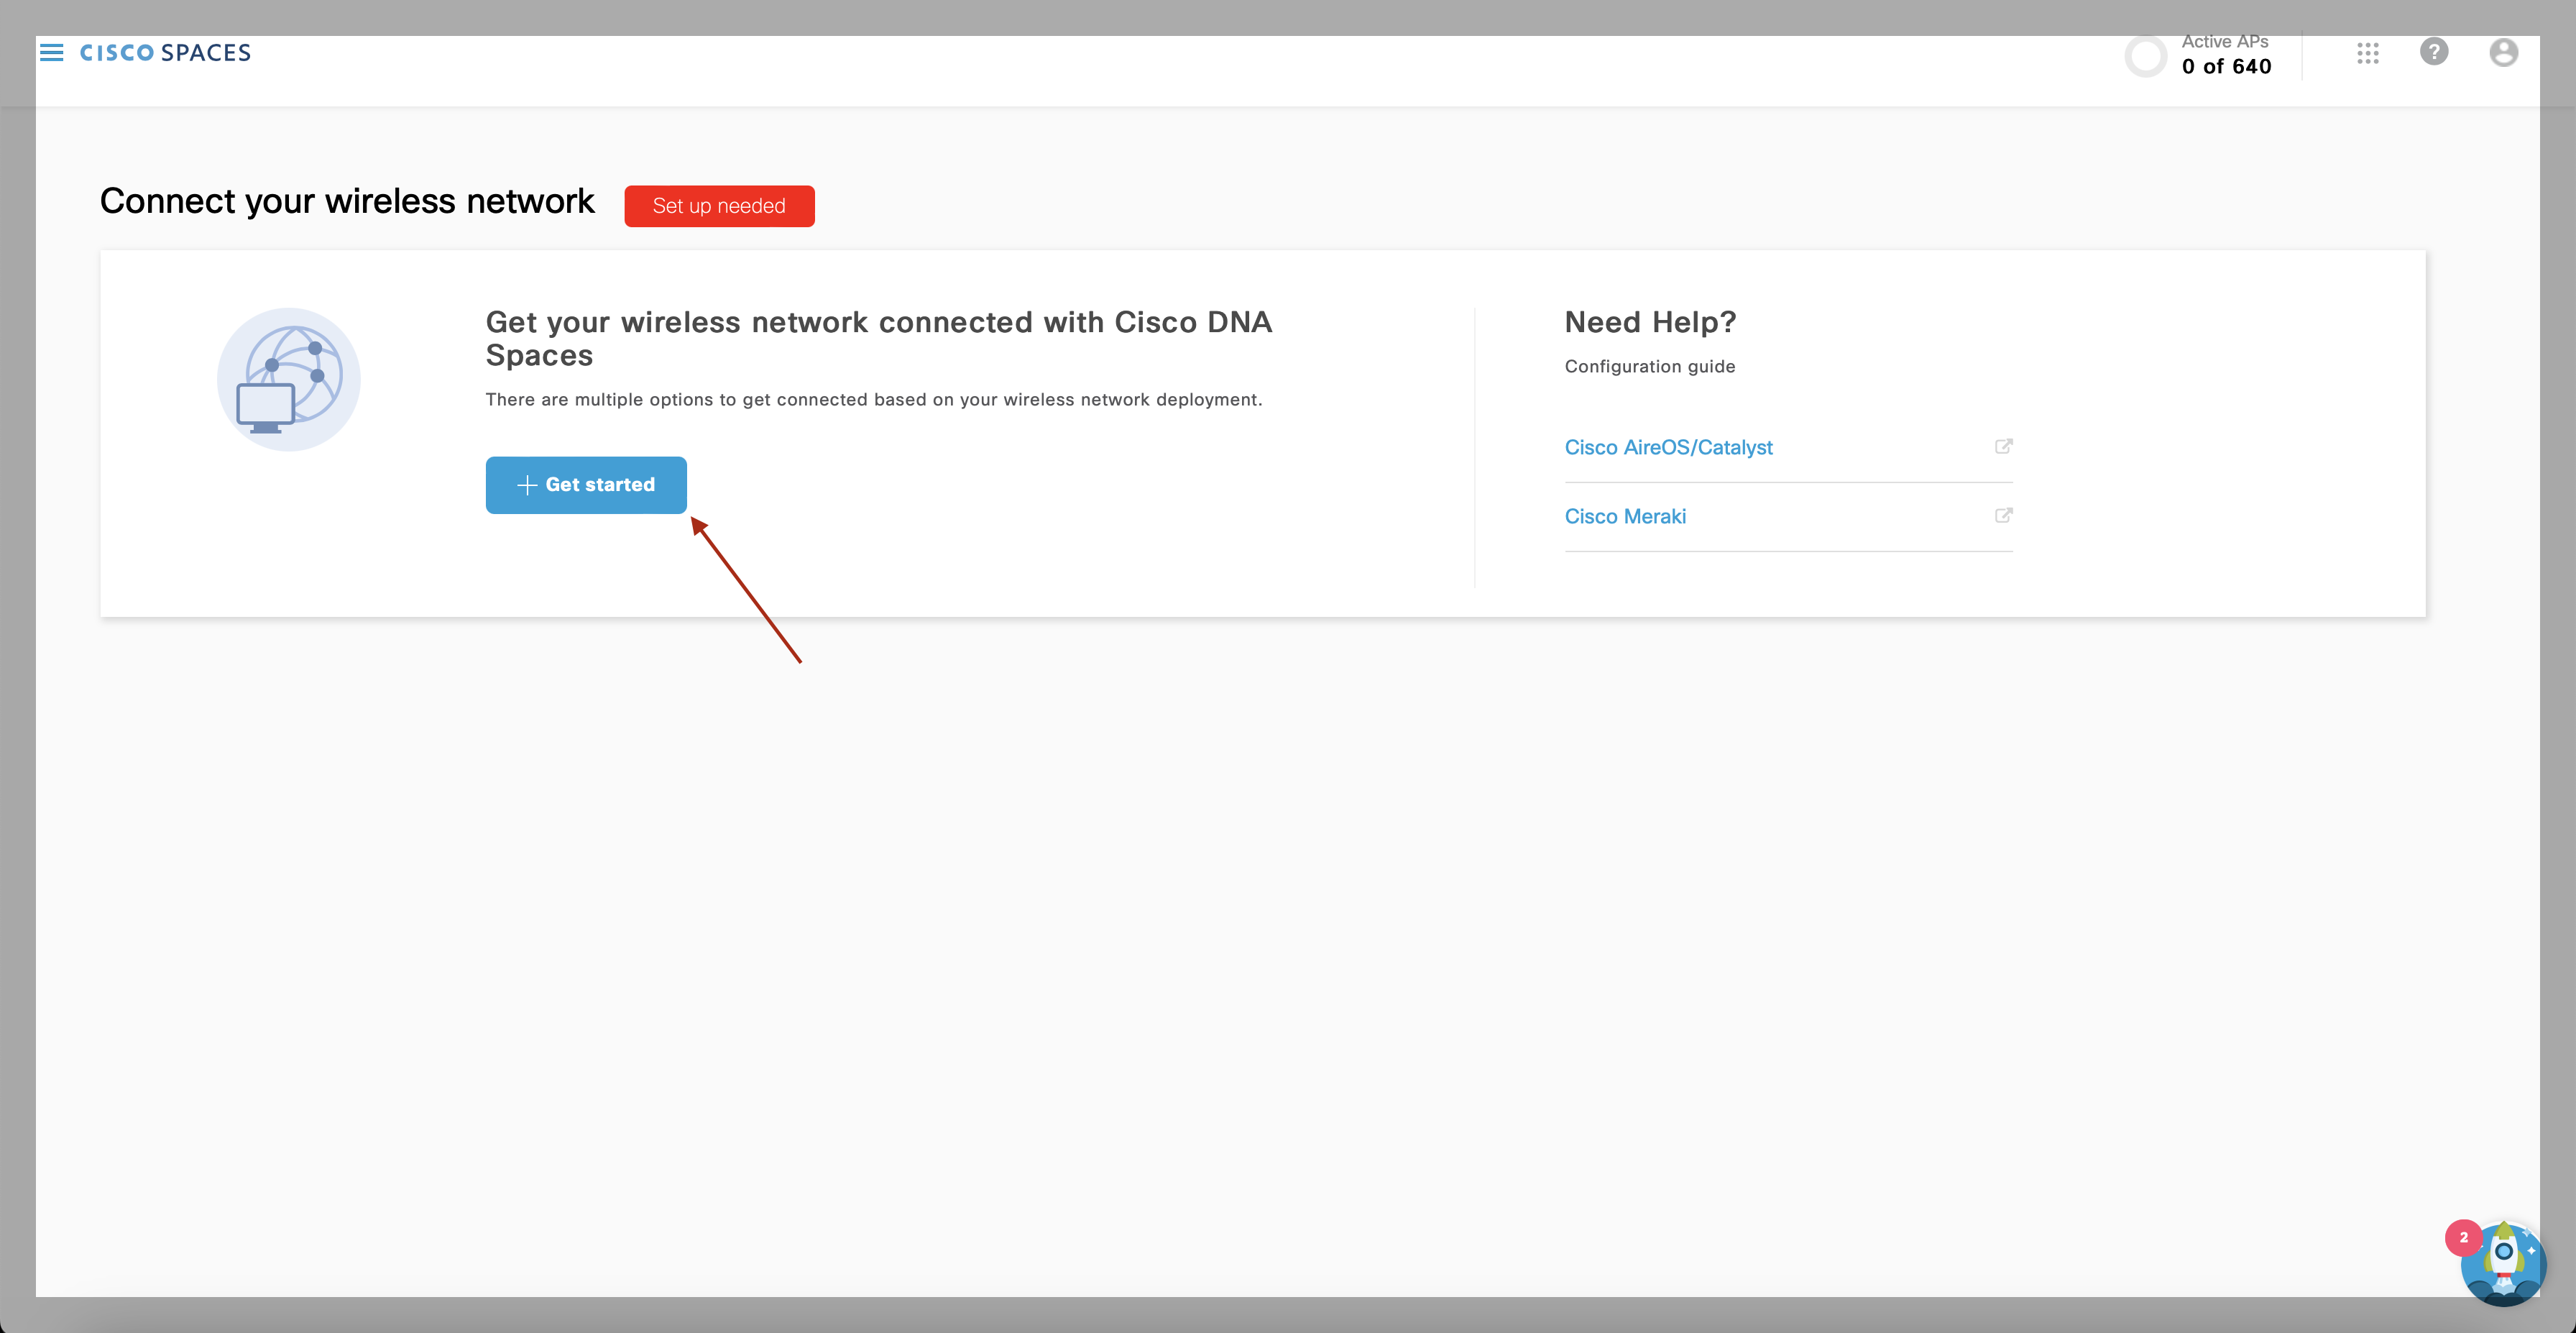
Select “Cisco AireOS/Catalyst”
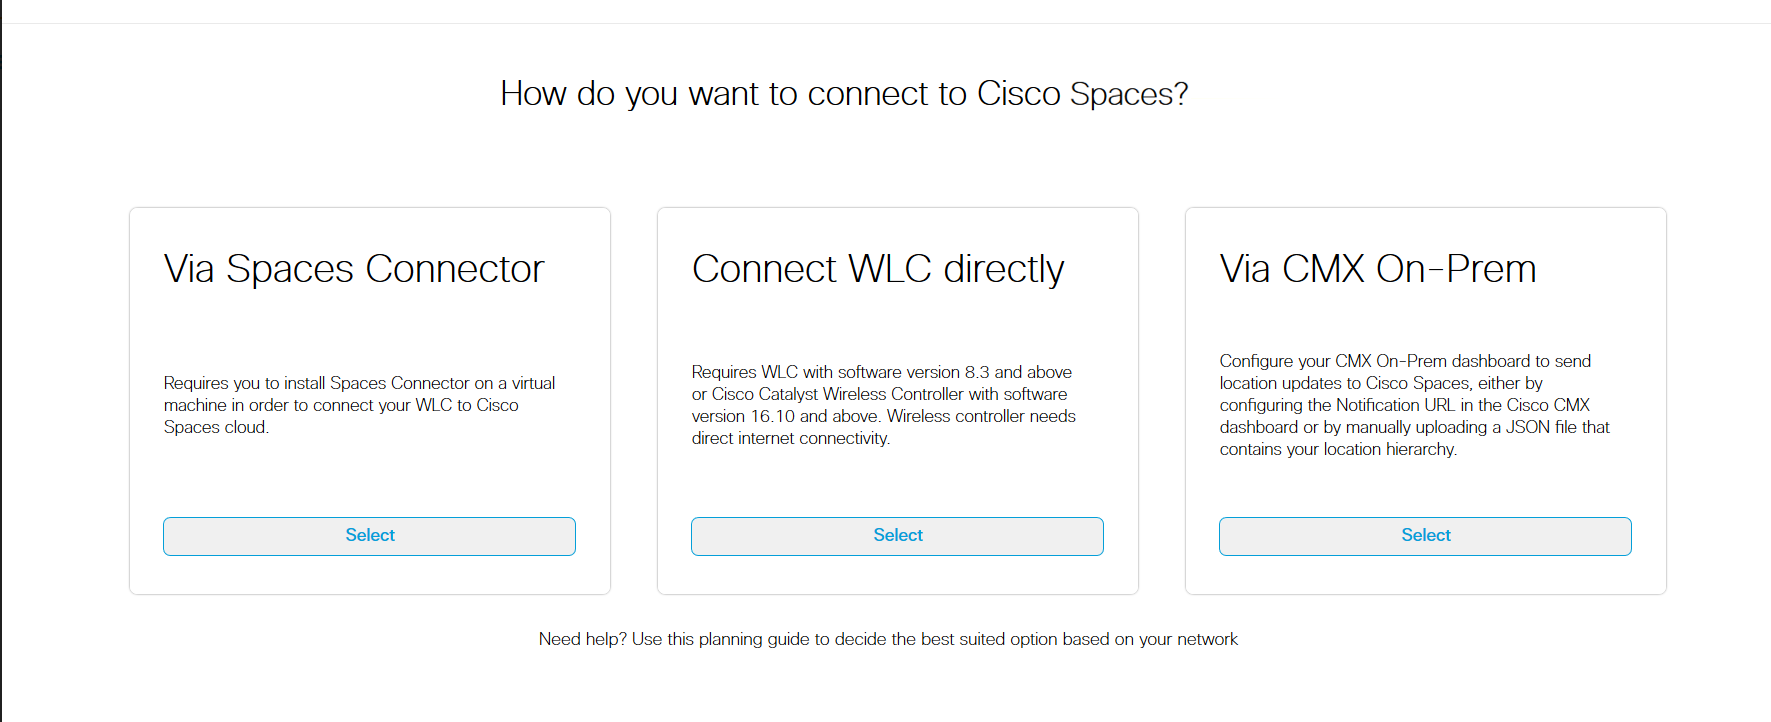
Select “via Spaces Connector”, then select “Continue Setup” button
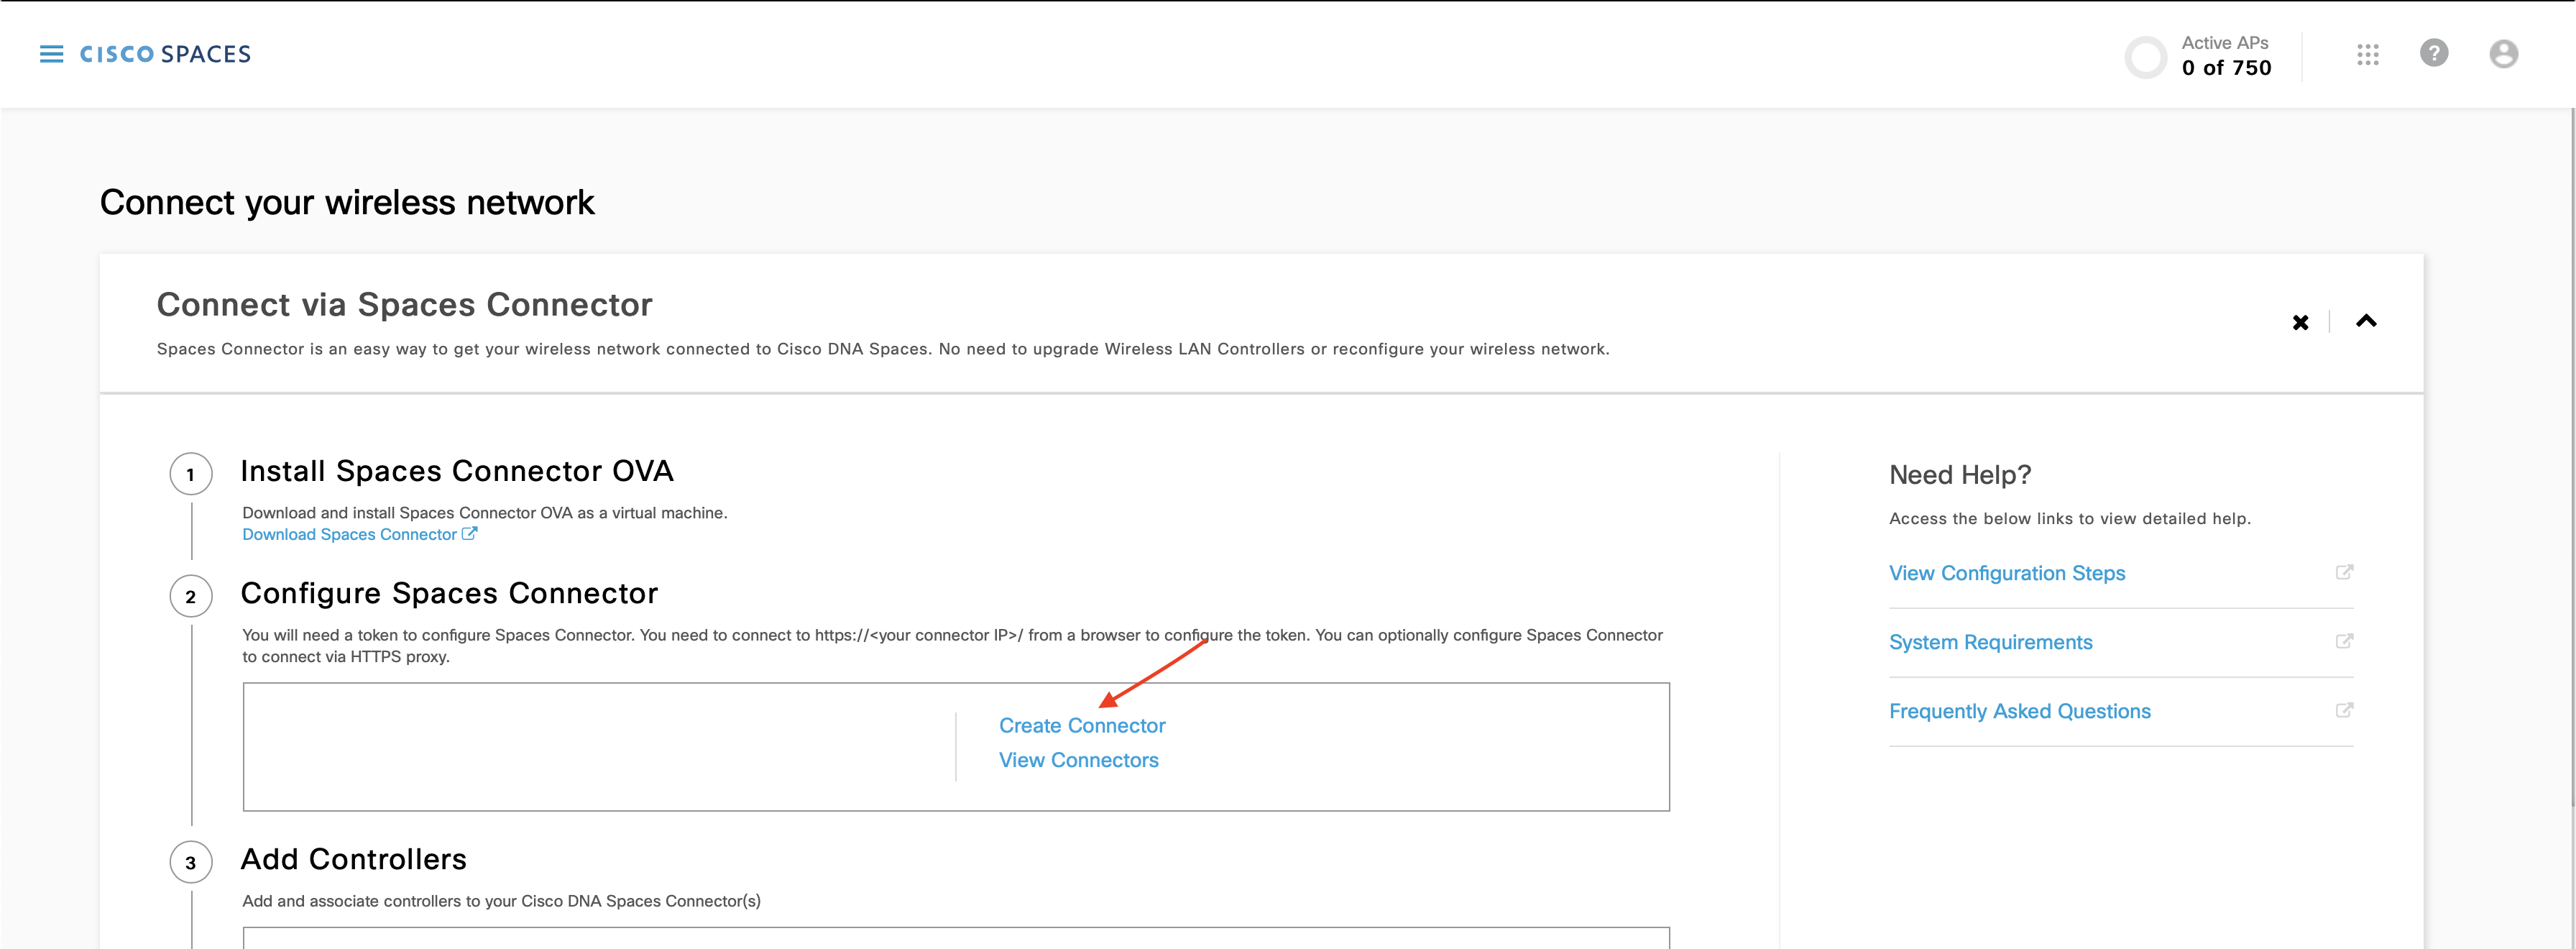
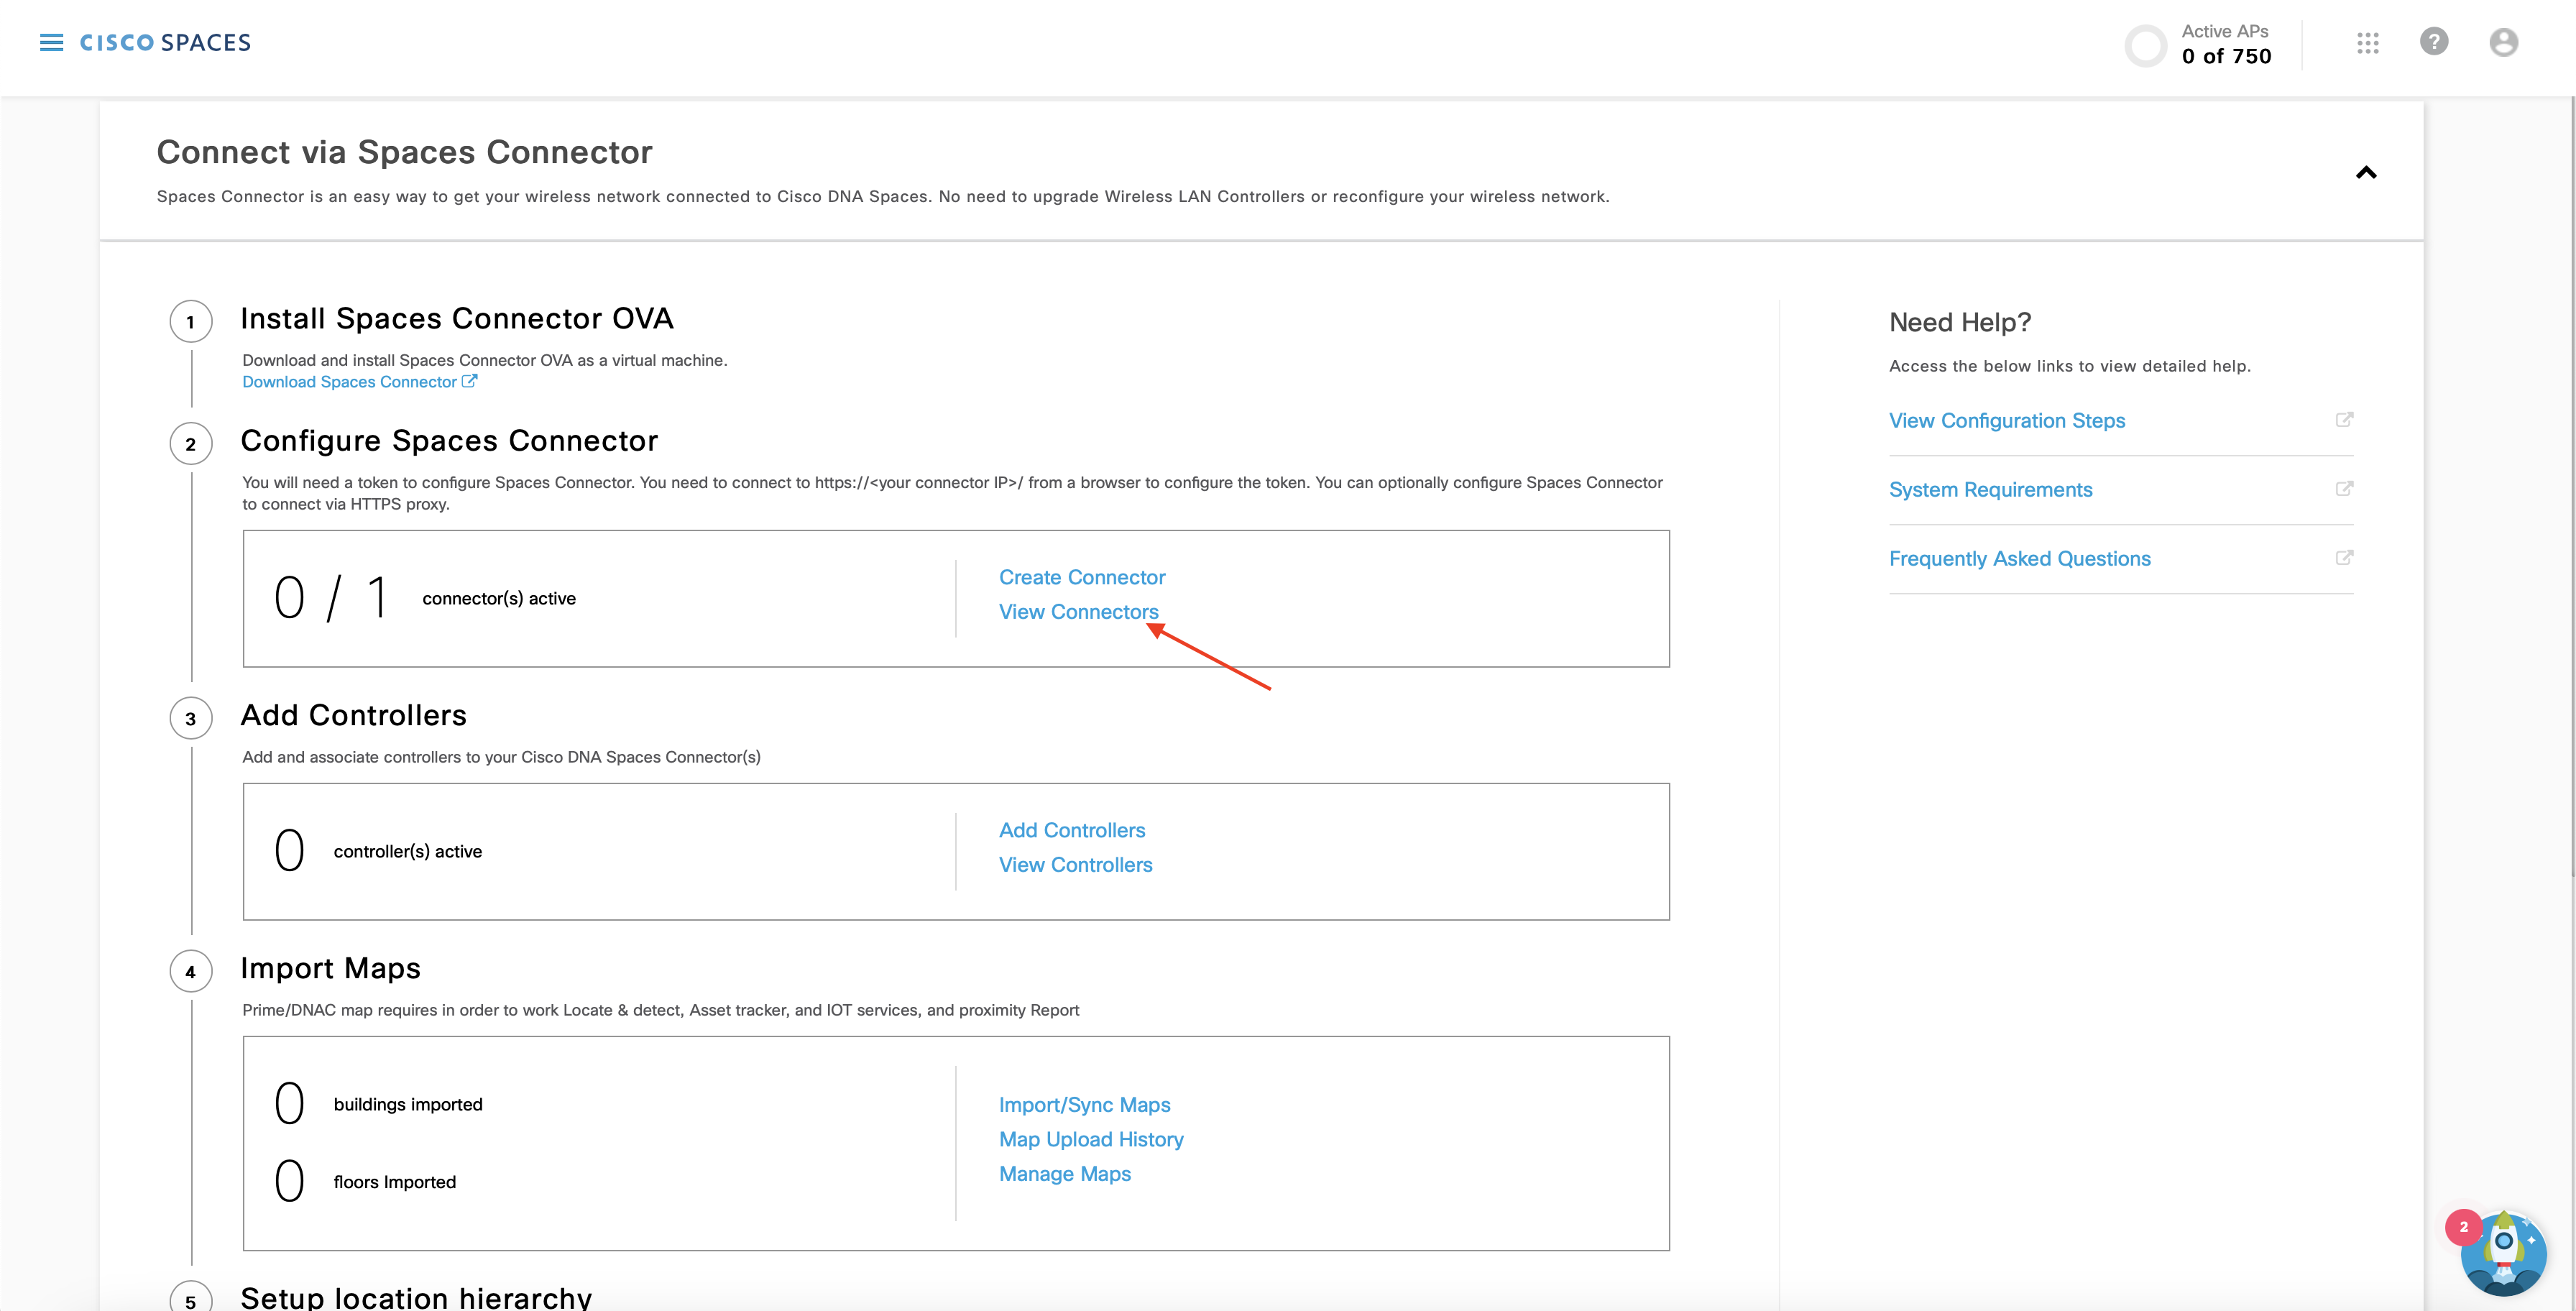
Under step 2 “Configure Spaces Connector”, click on “Create Connector”
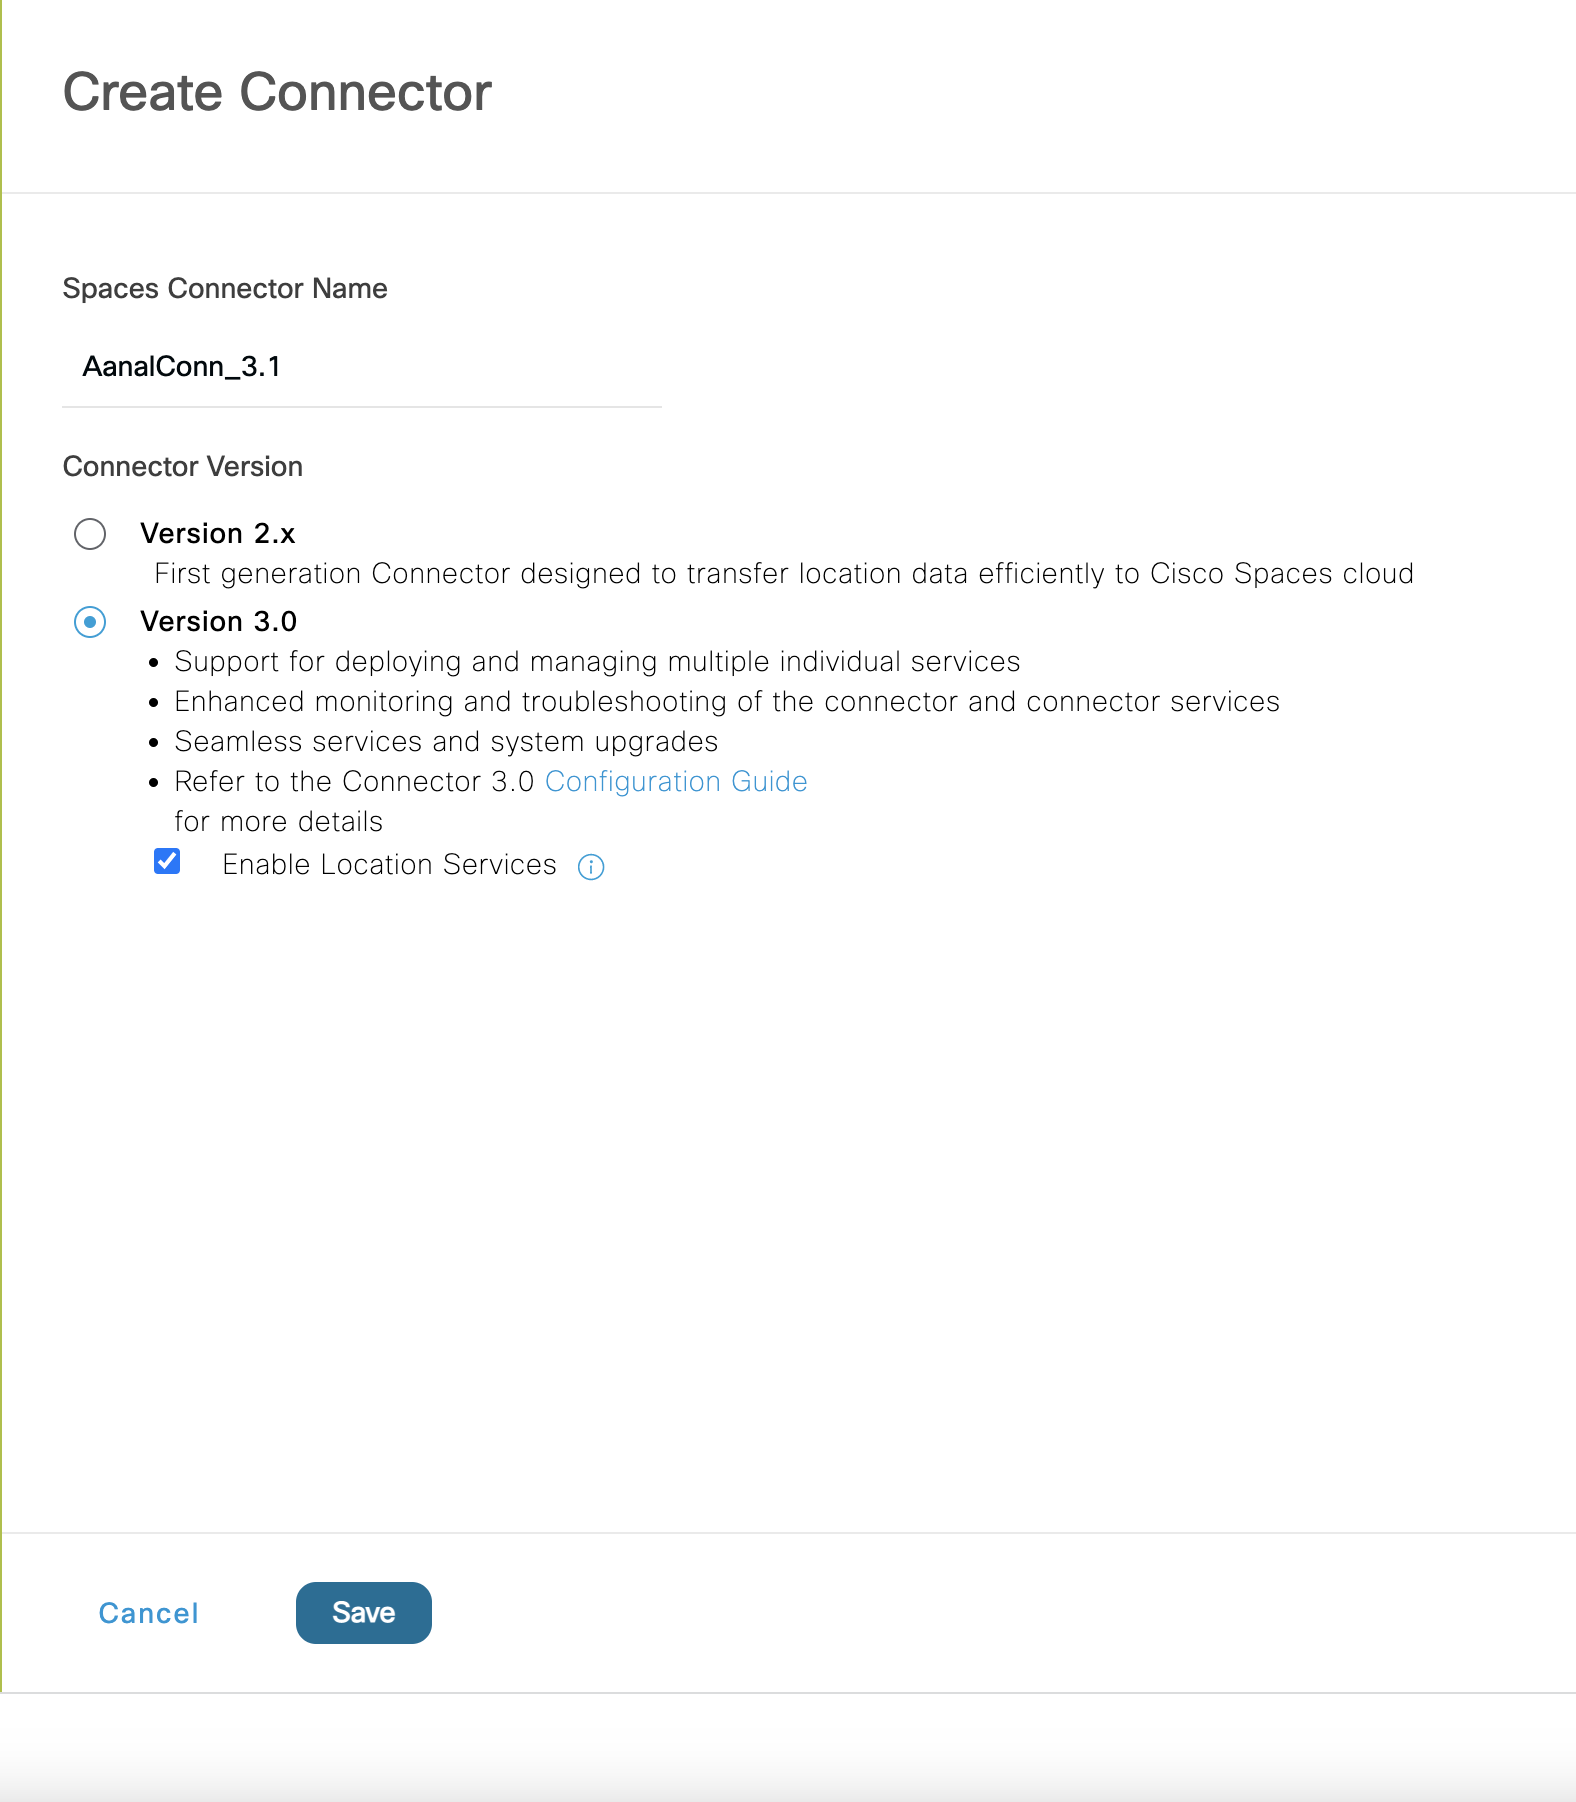
In the “Connector Name” field, enter a name for the connector and click on “Save”.
You now need to copy the Connector token from Cisco Spaces dashboard and configure it in Spaces Connector VM GUI. Follow these steps to copy the Token:
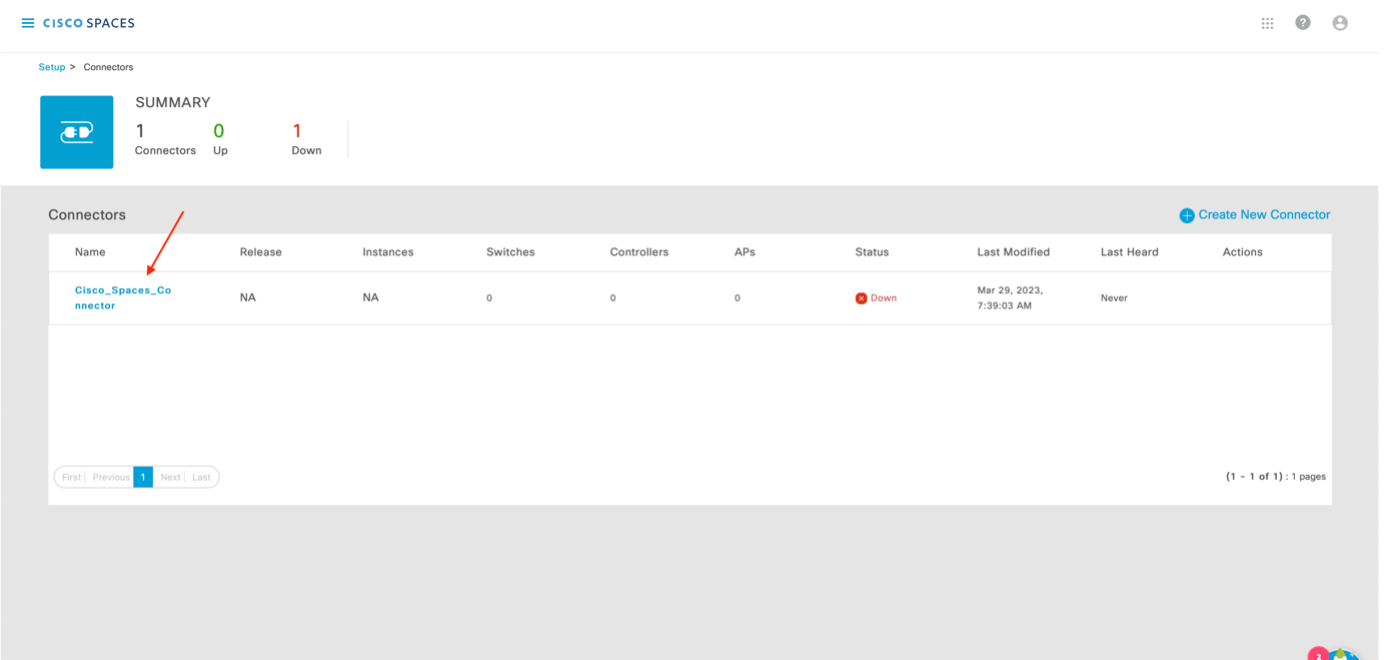
On the Customized Setup page step 2 “Configure Spaces Connector”, click on “View Connectors”
You will see the list of Connectors you’ve created. Select the desired Connector.
Click on ‘Generate Token’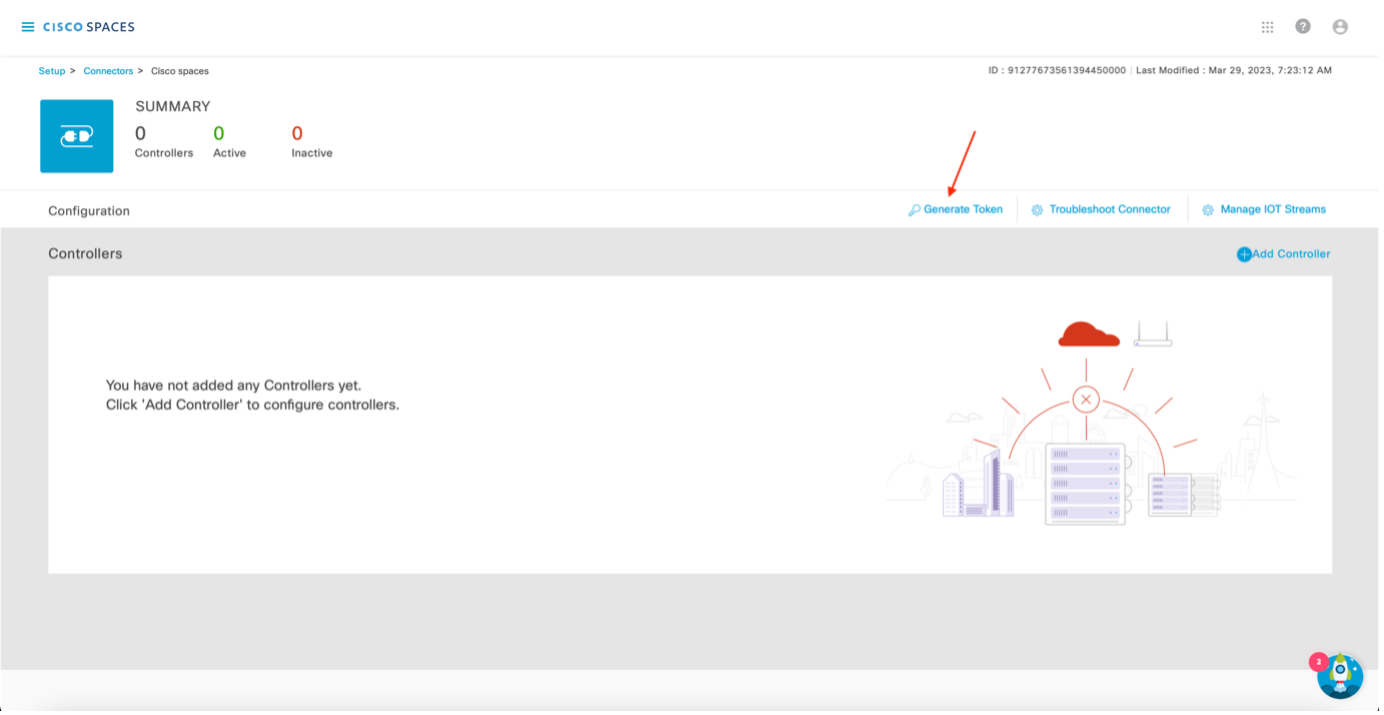
Copy the token that appears on the following screen of the Cisco Spaces dashboard

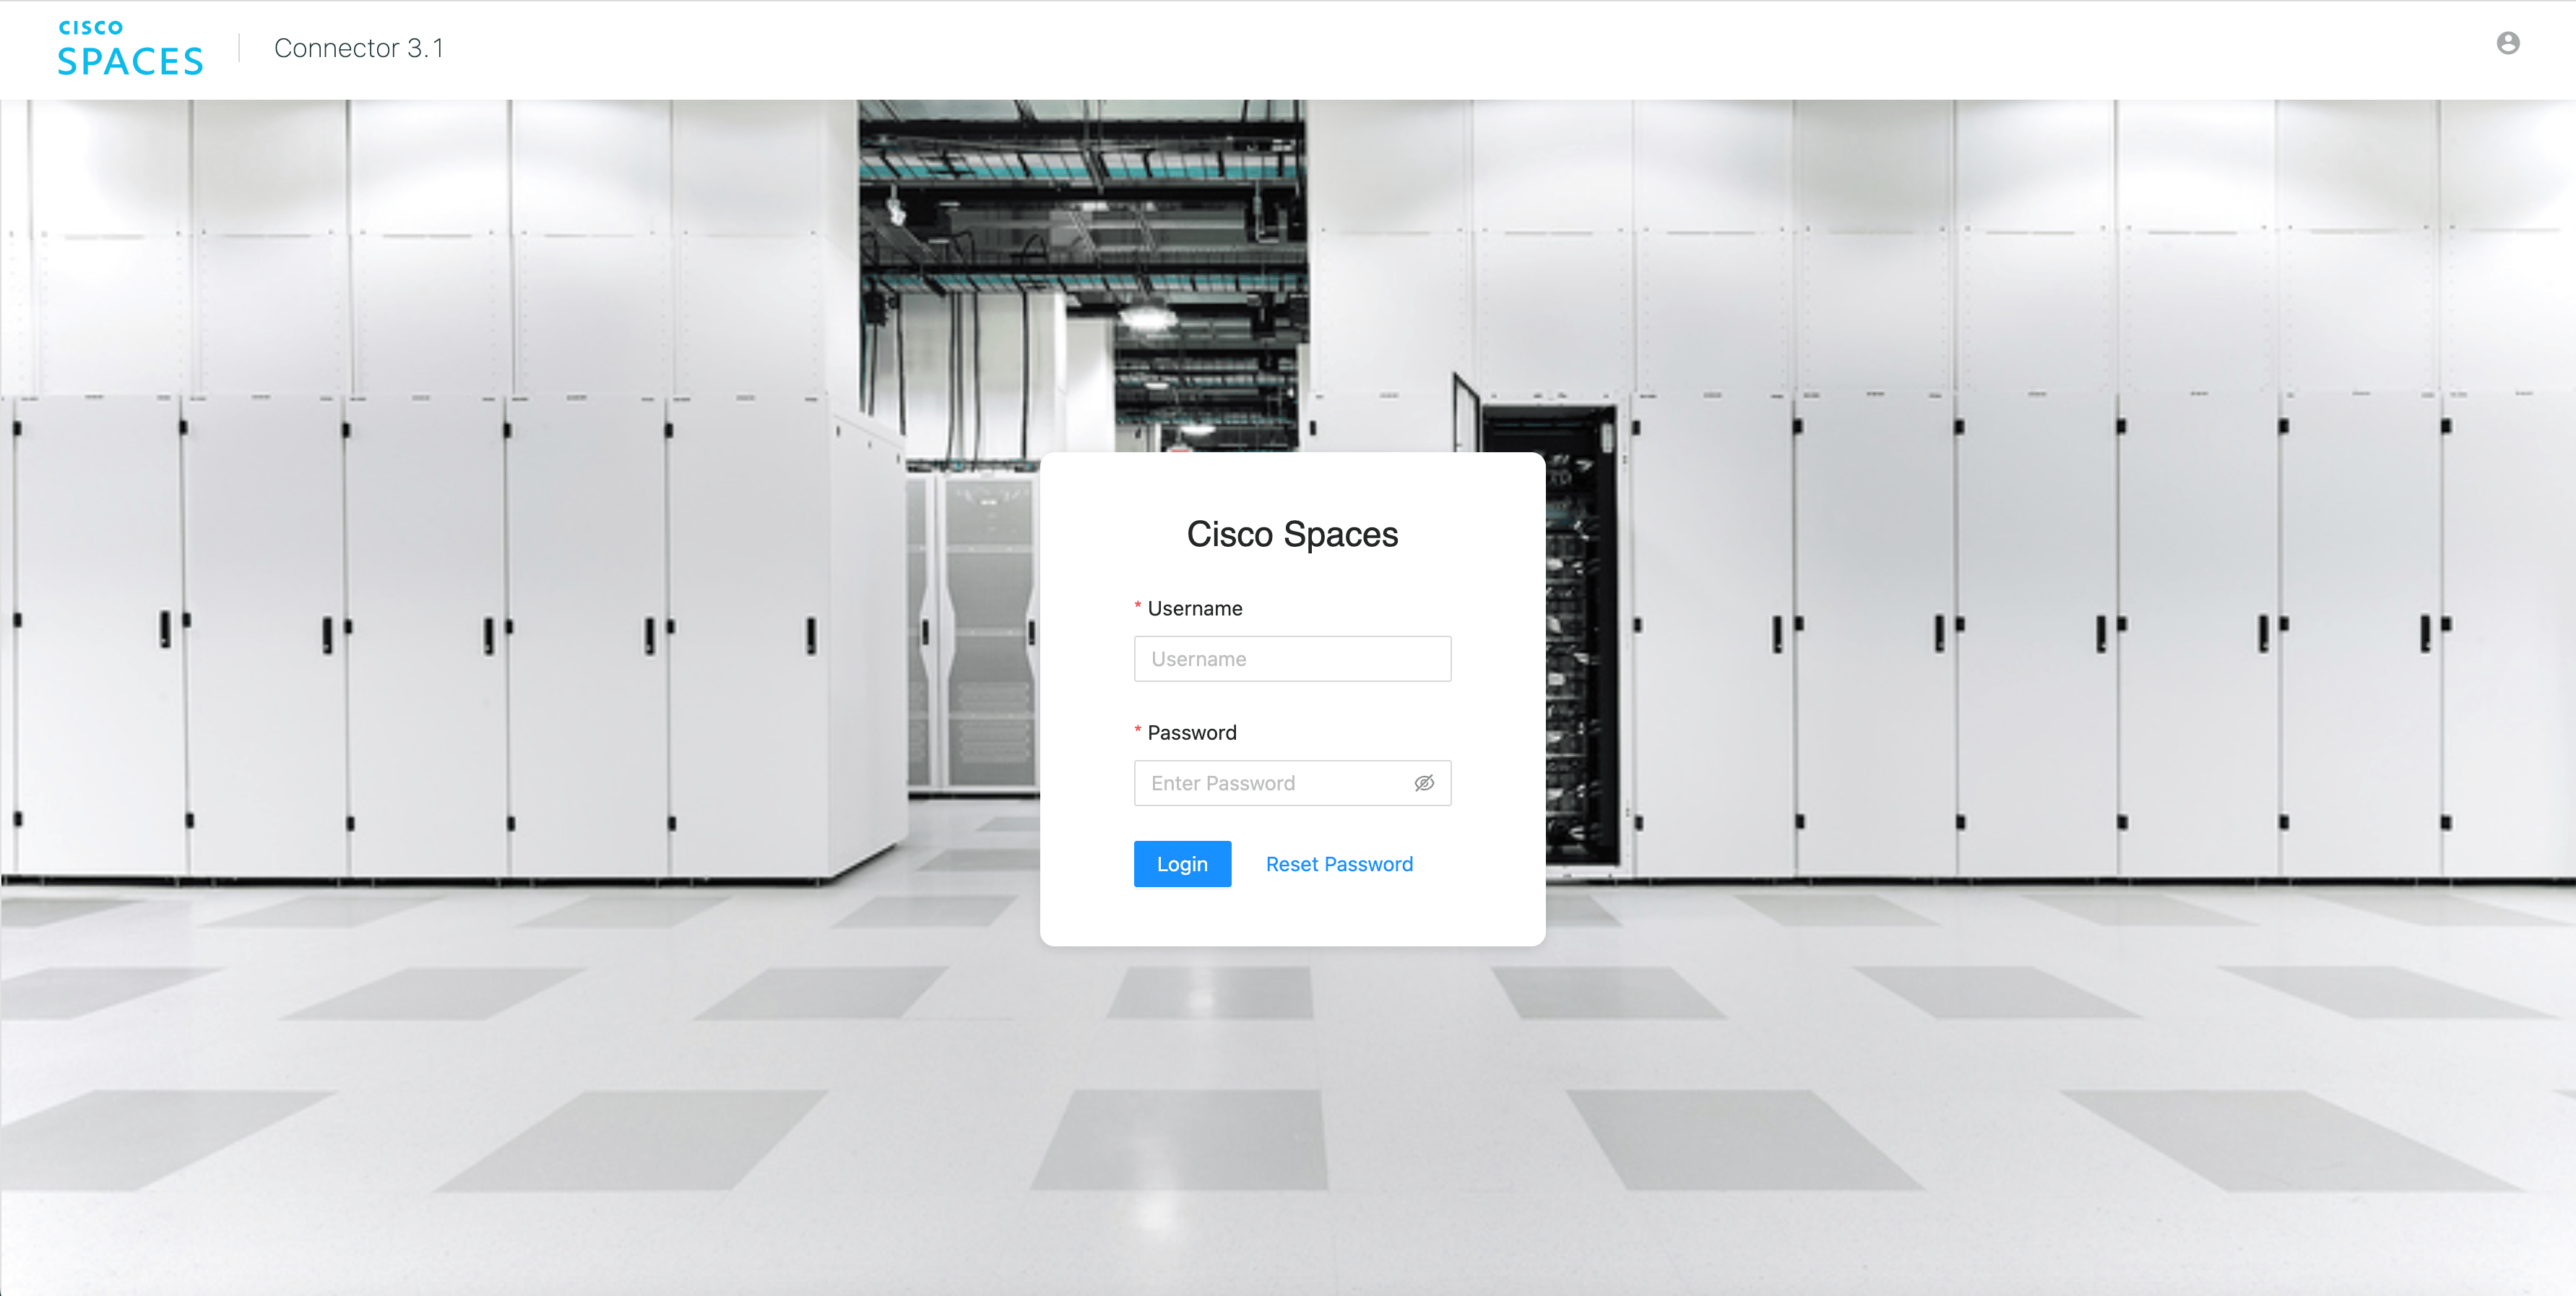
Launch the Cisco Spaces Connector using the HTTP address provided at the OVA deployment, https://< IP-address >/. In the Cisco Spaces Connector window that opens up, enter the username and password that was configured earlier.
On “Configure connector” place the token, and click ‘save’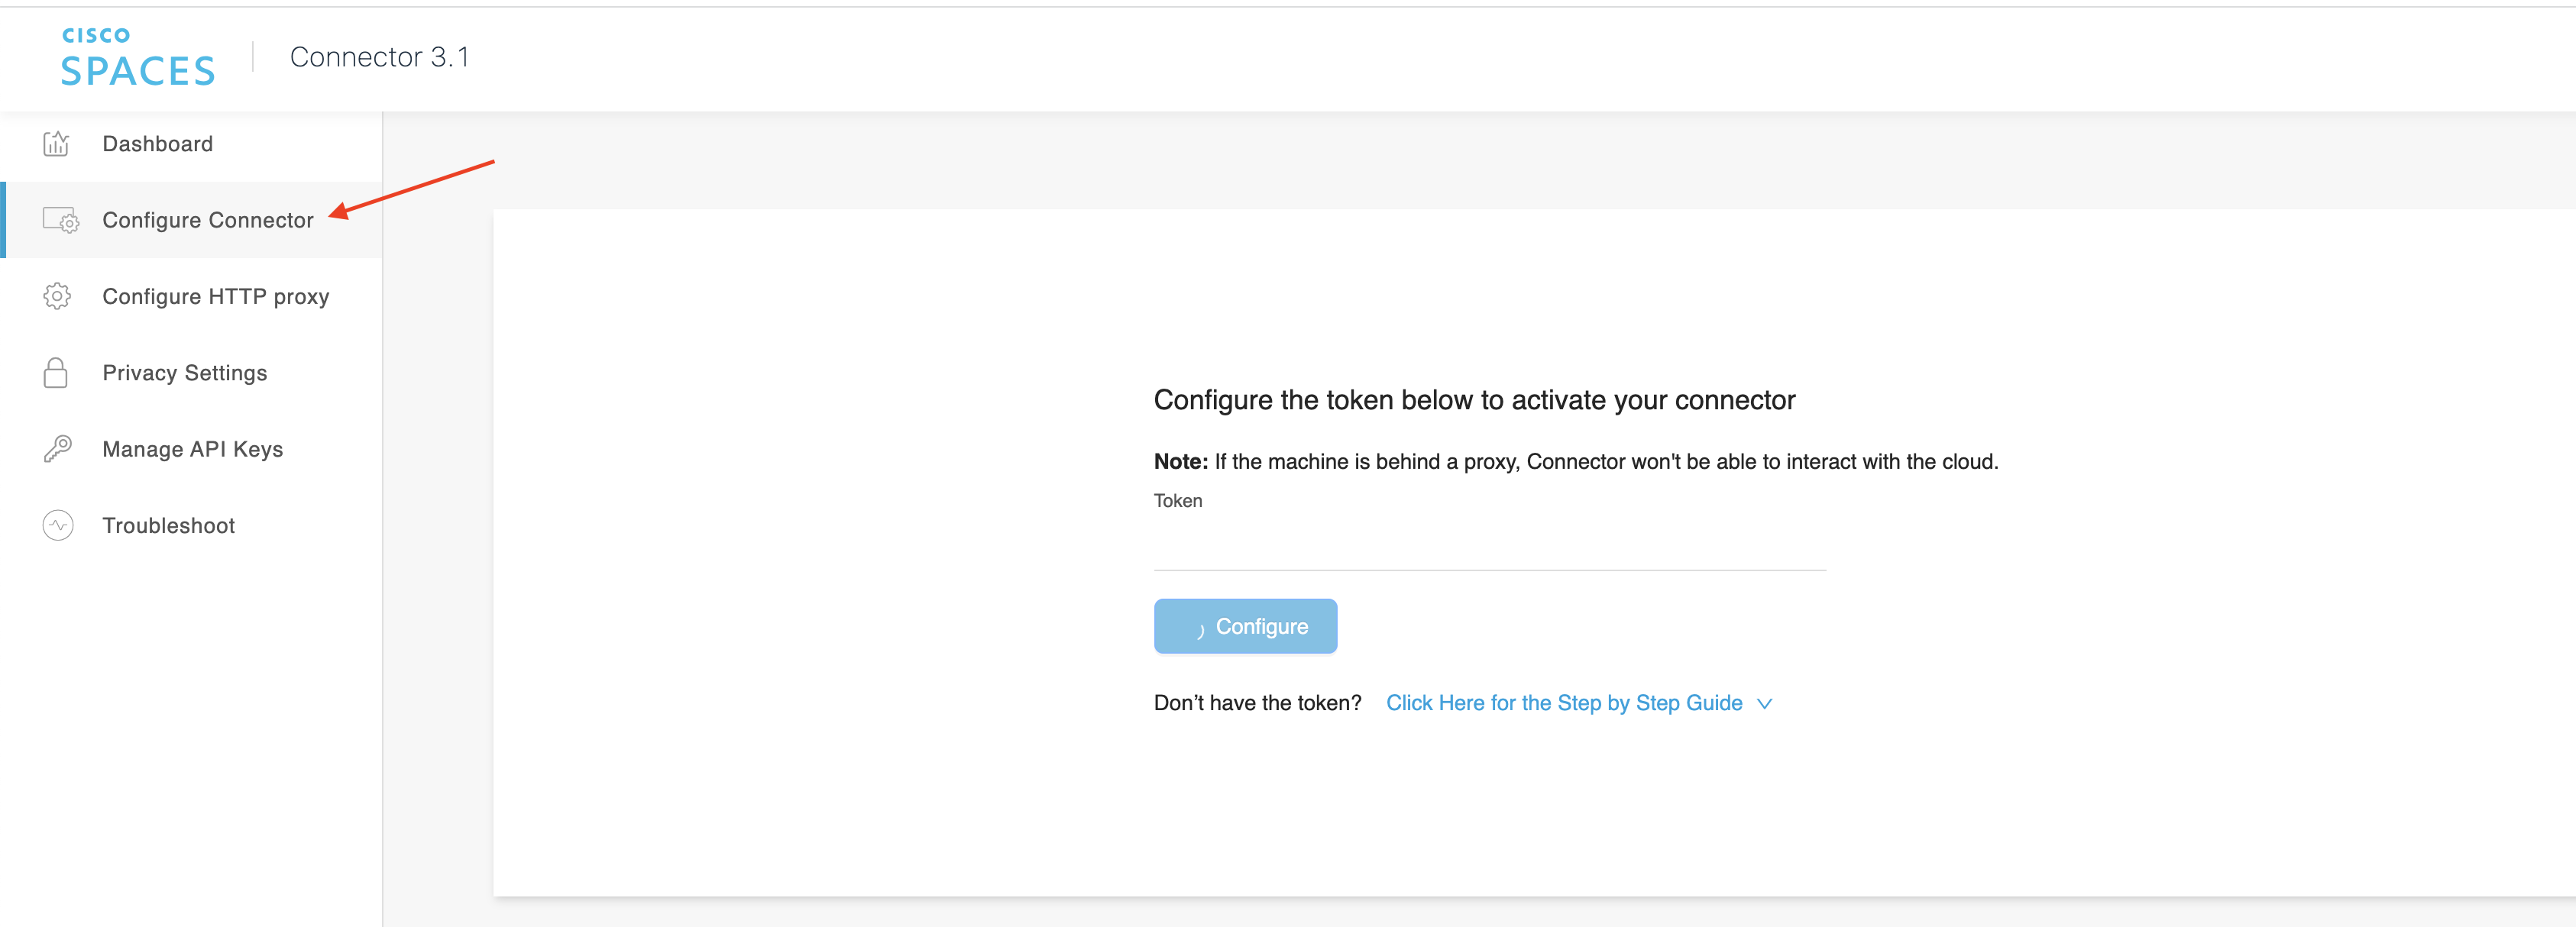
You may need to wait a few minutes for Cisco Spaces connector to start as images may take some time to download. The wait time is dependent on the speed of your connection
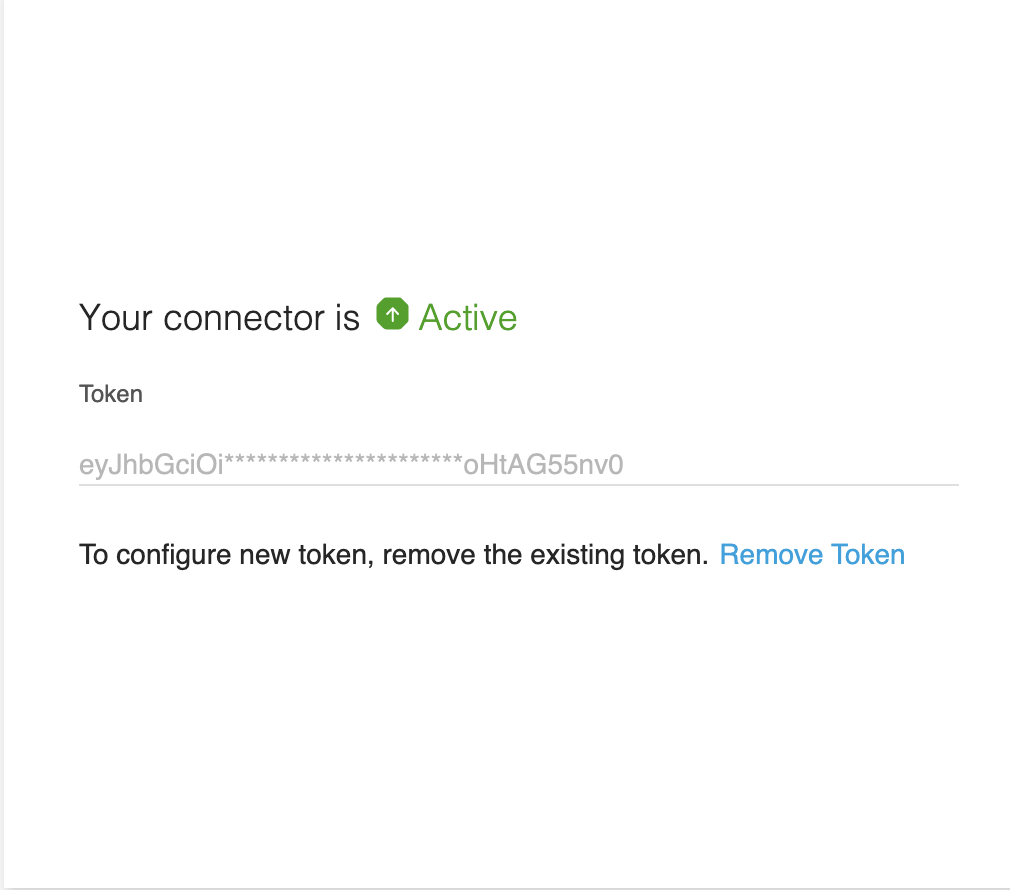
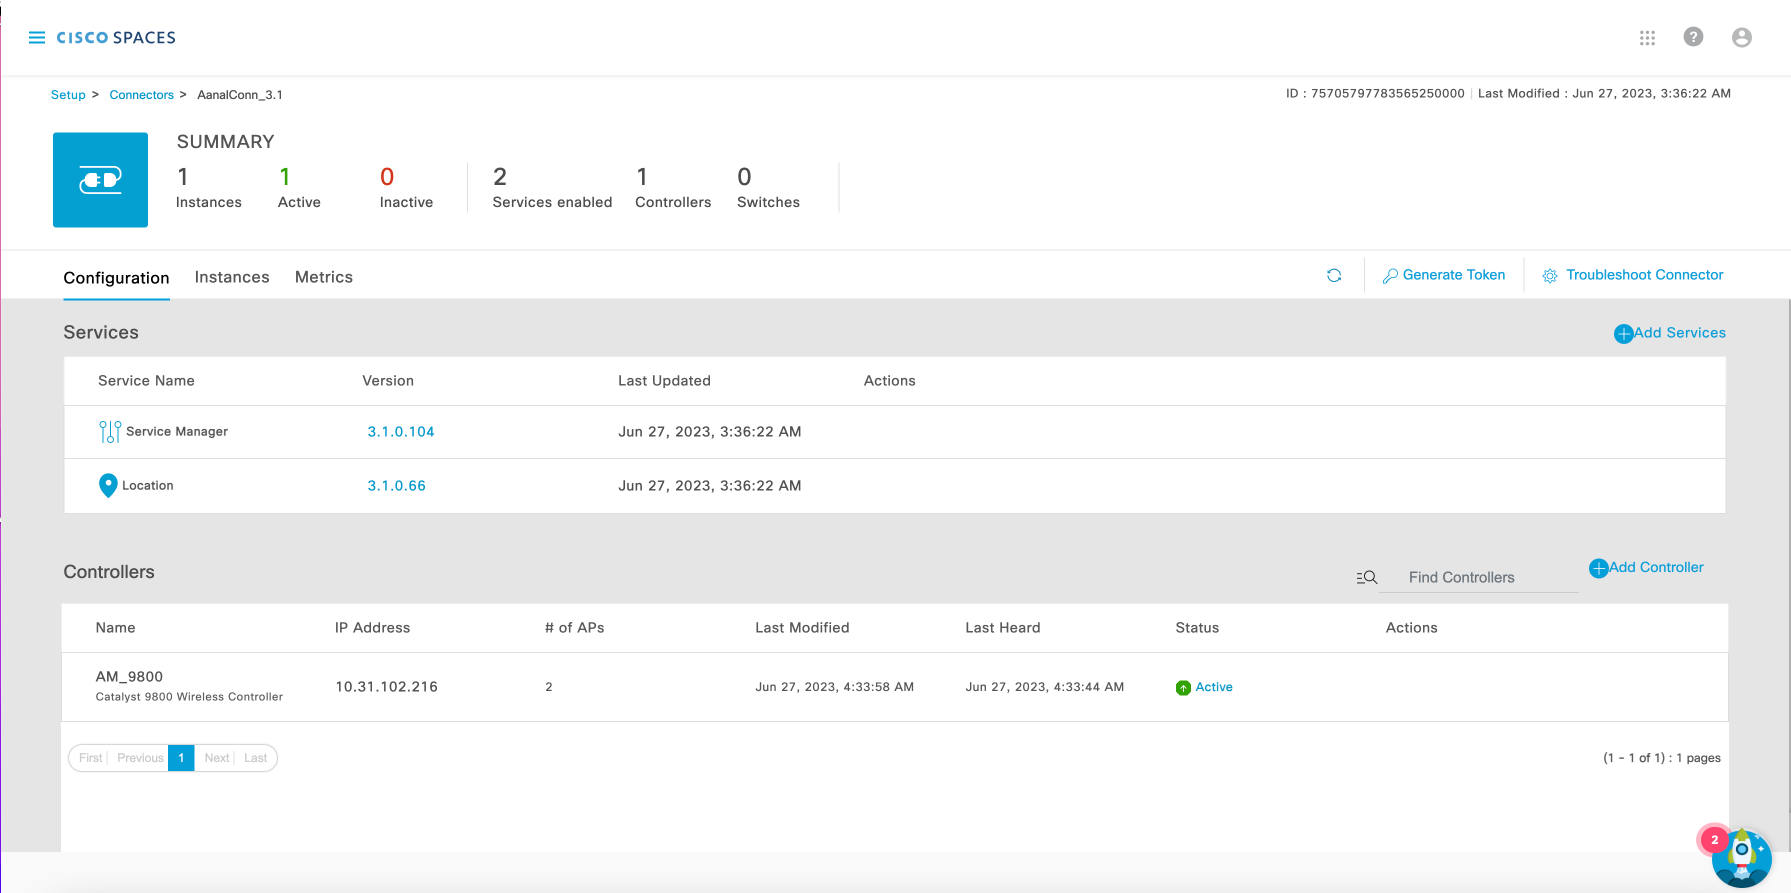
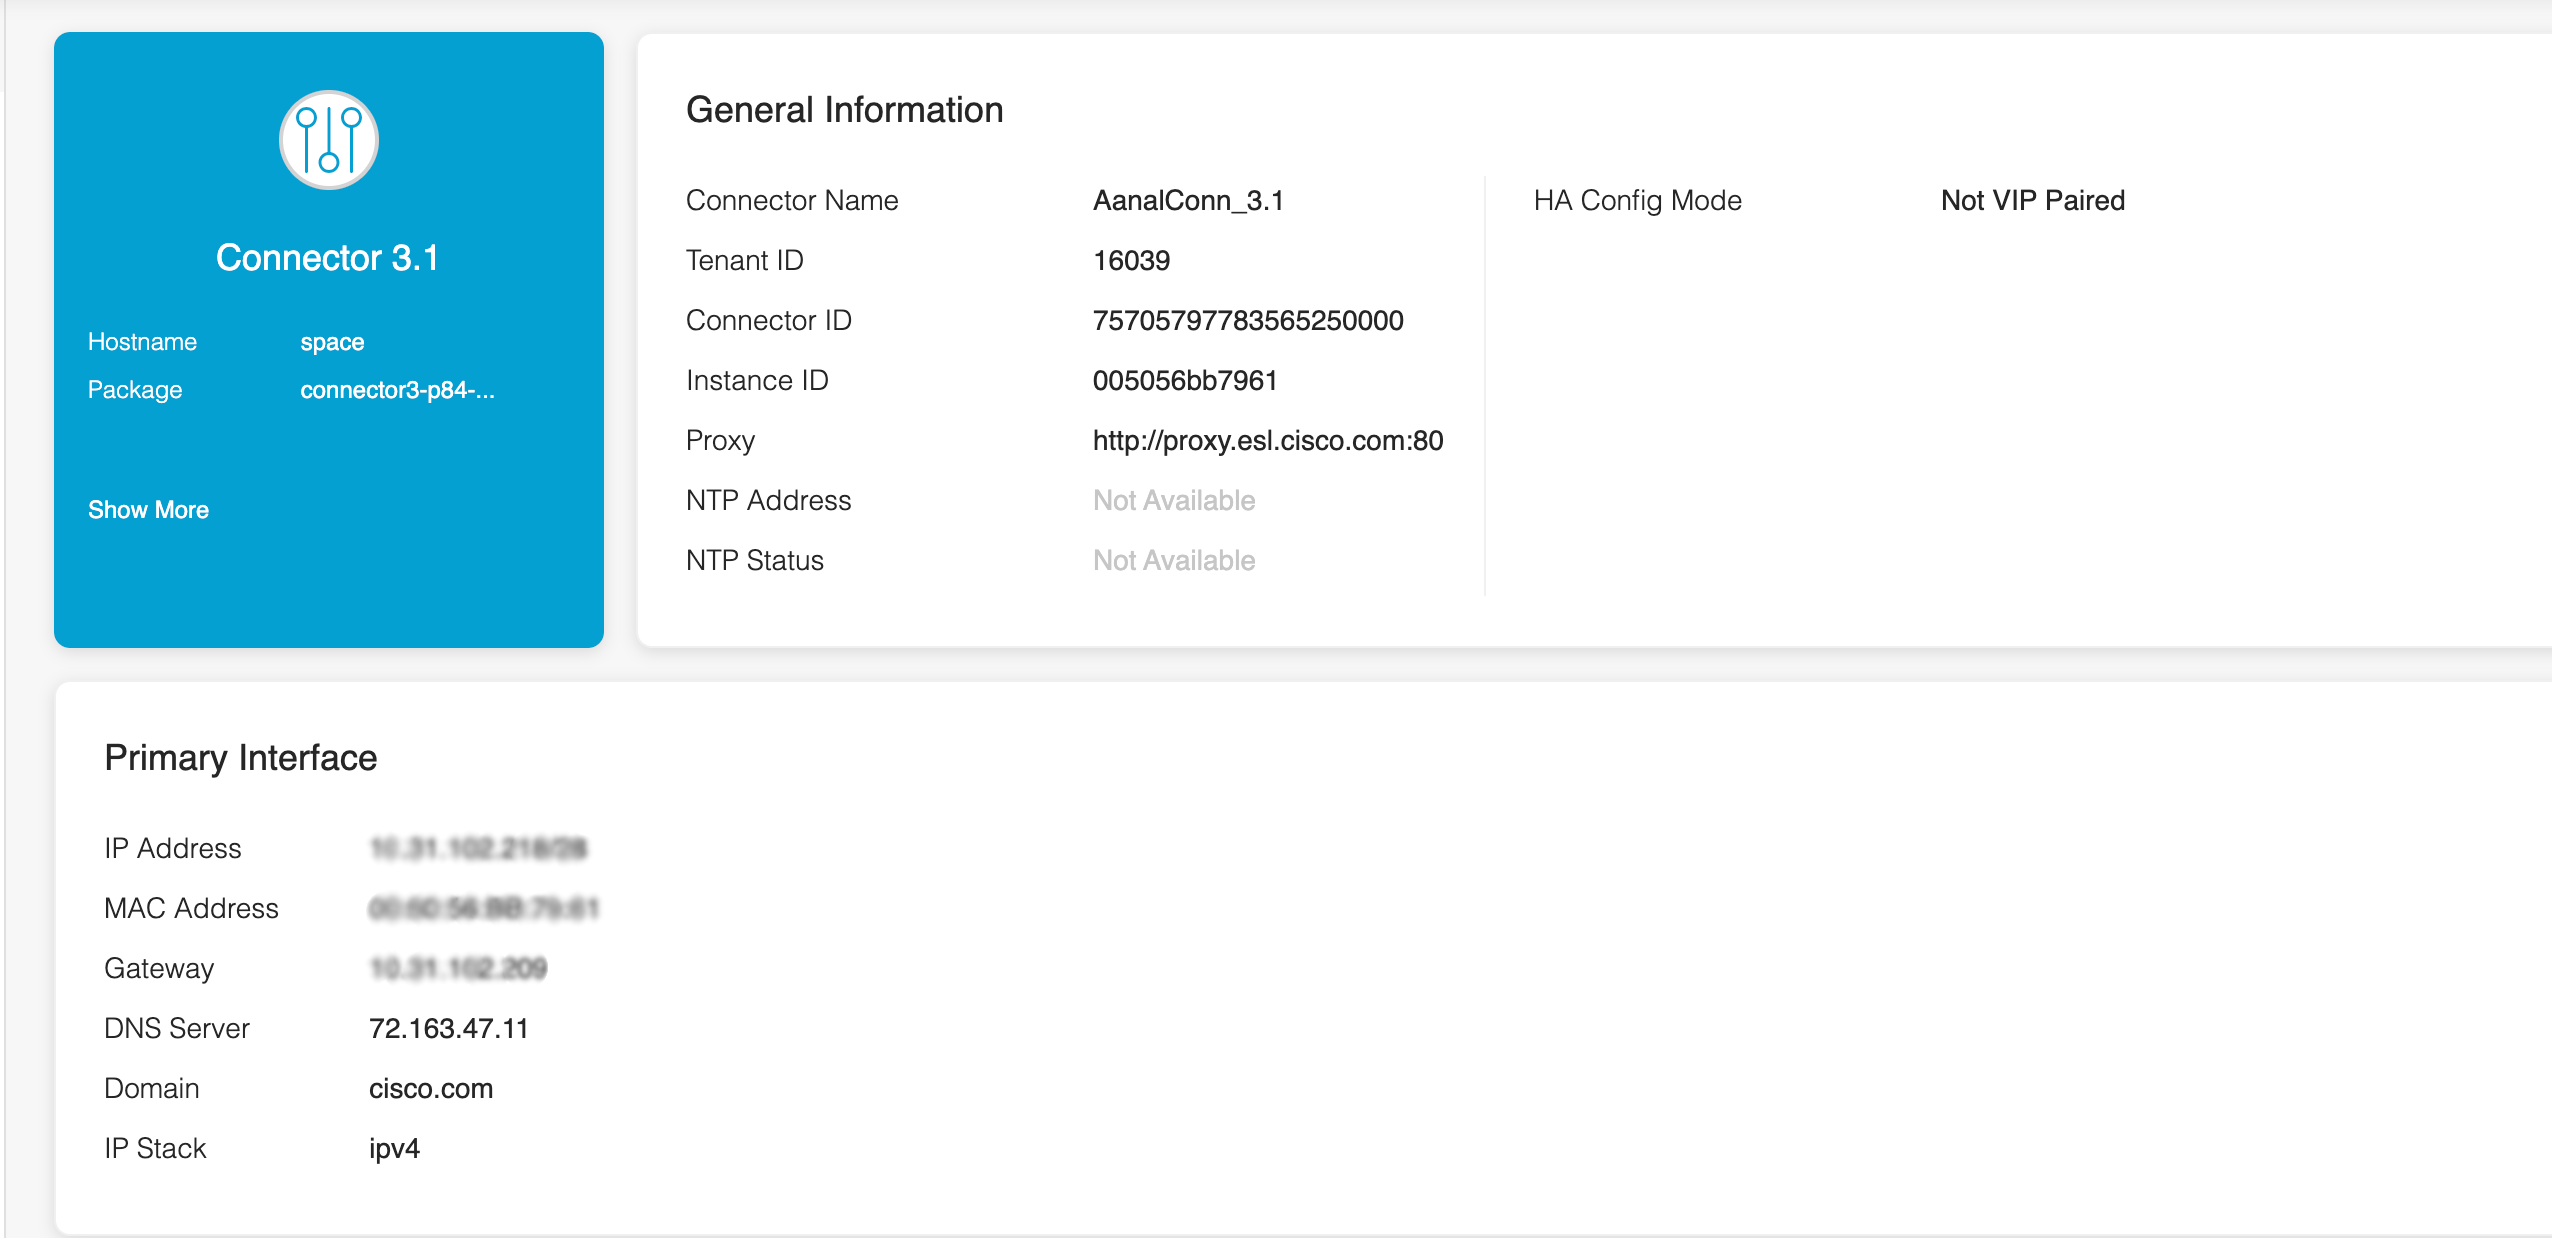
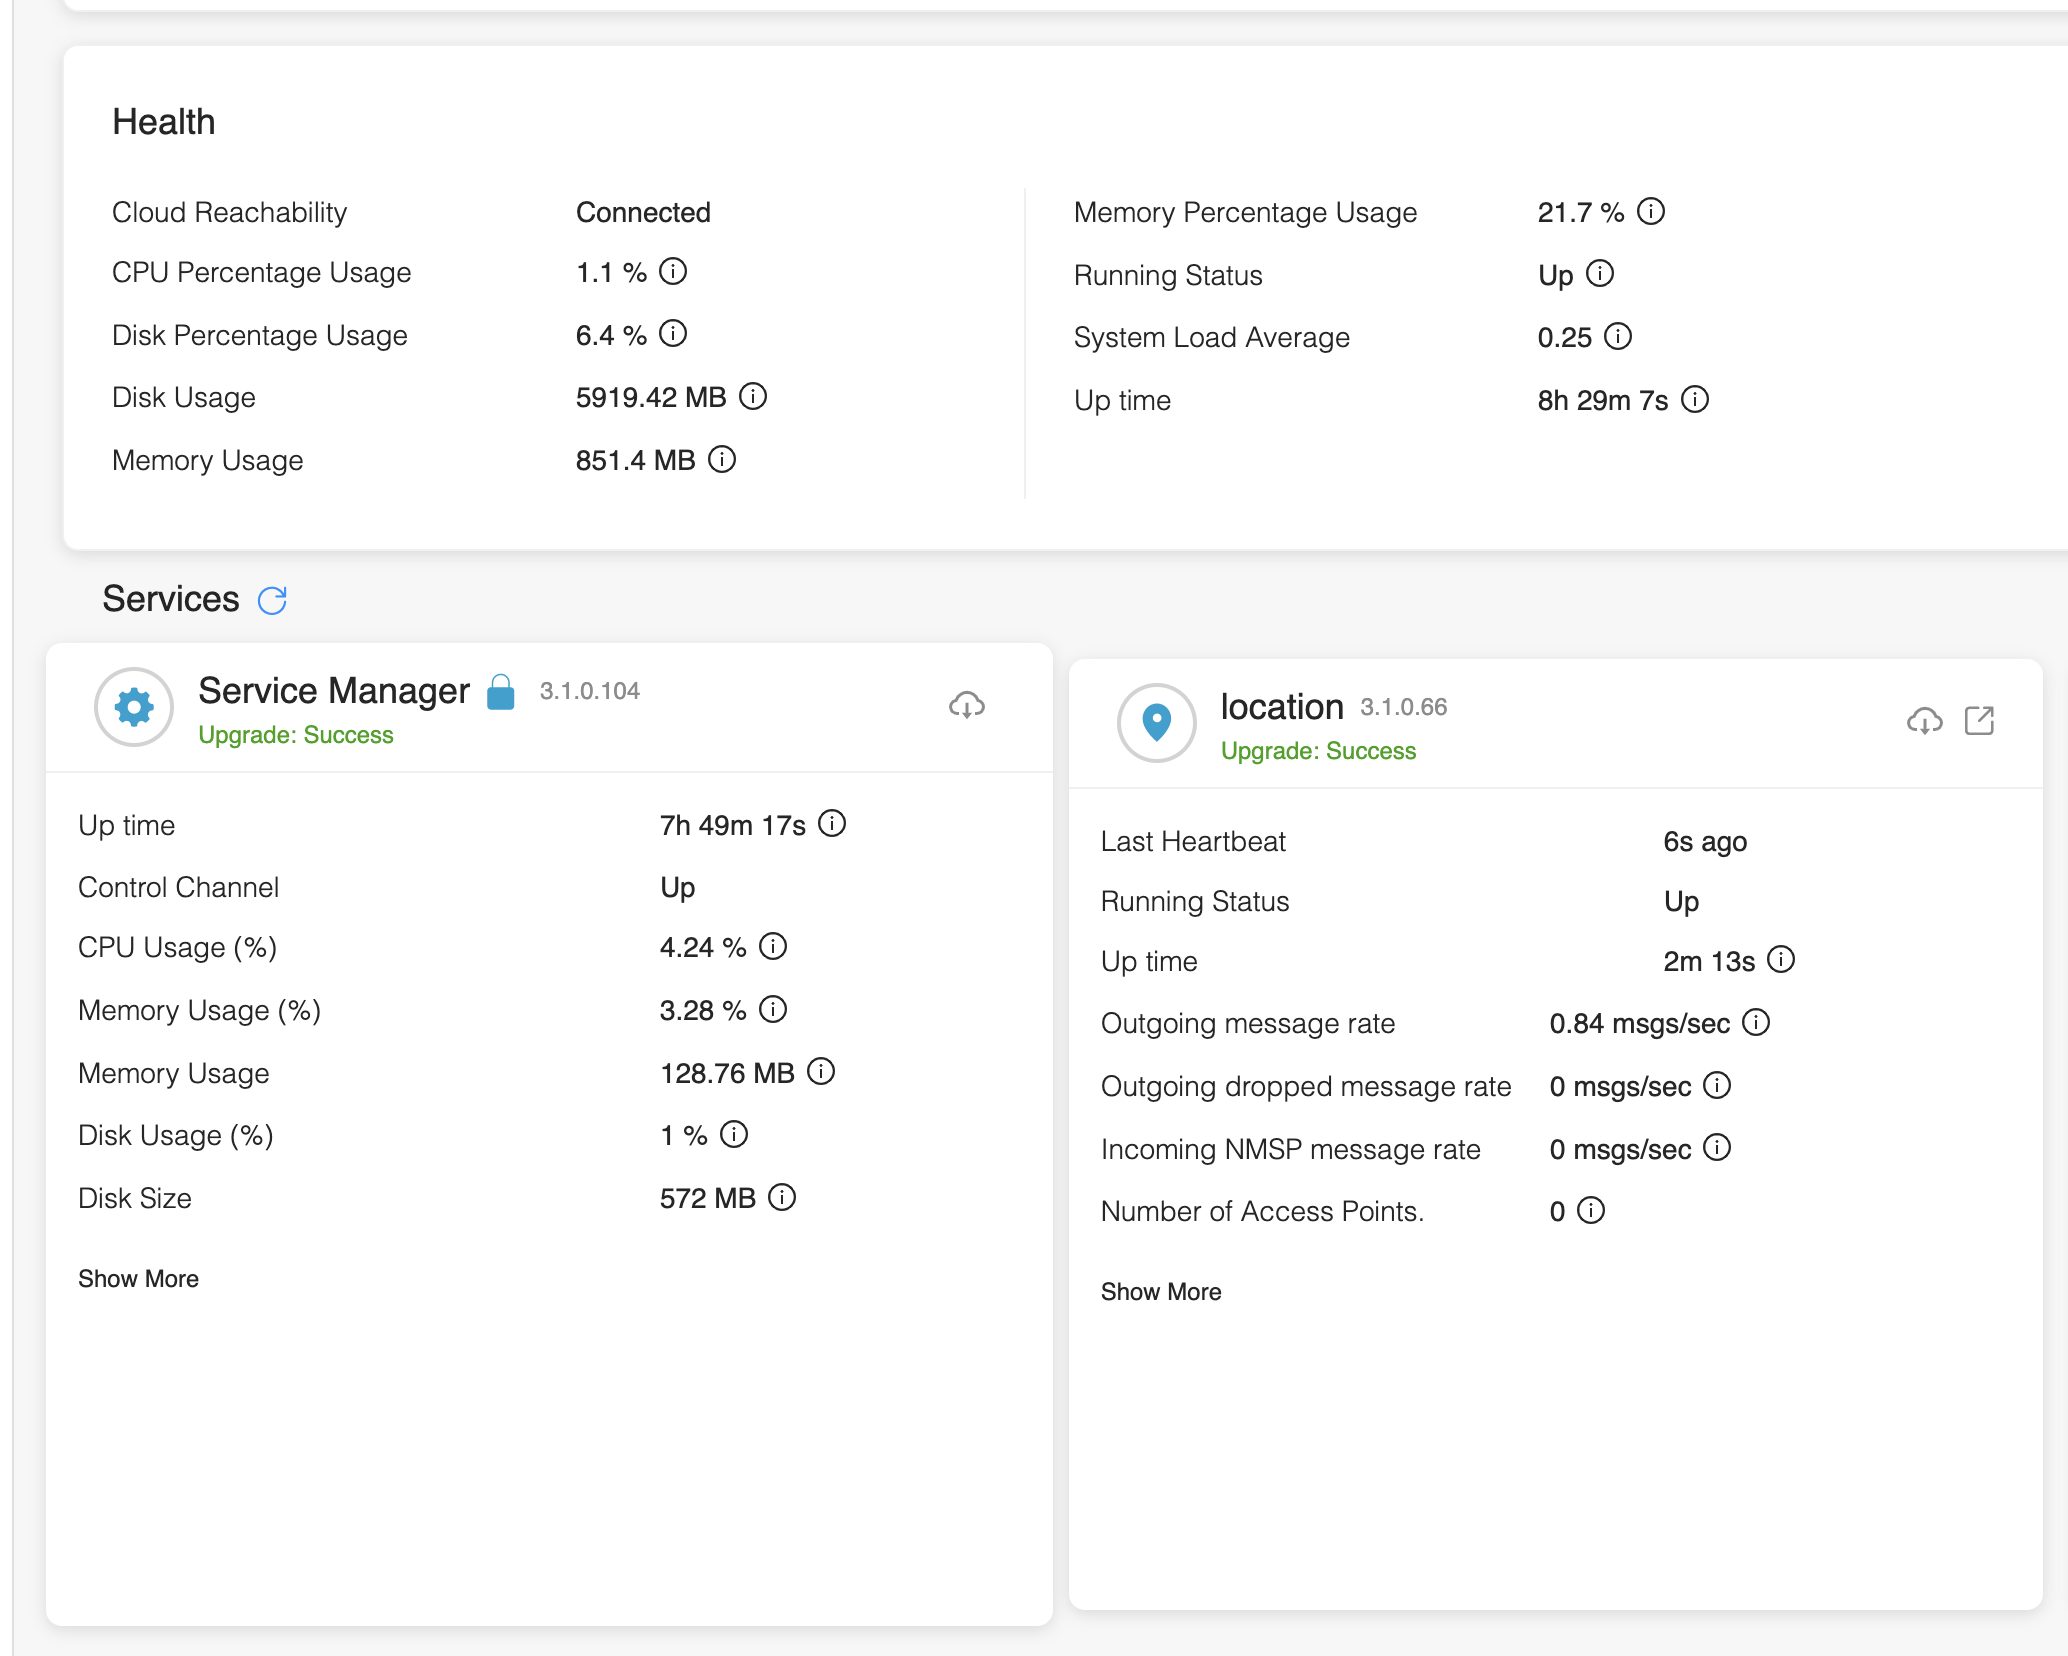
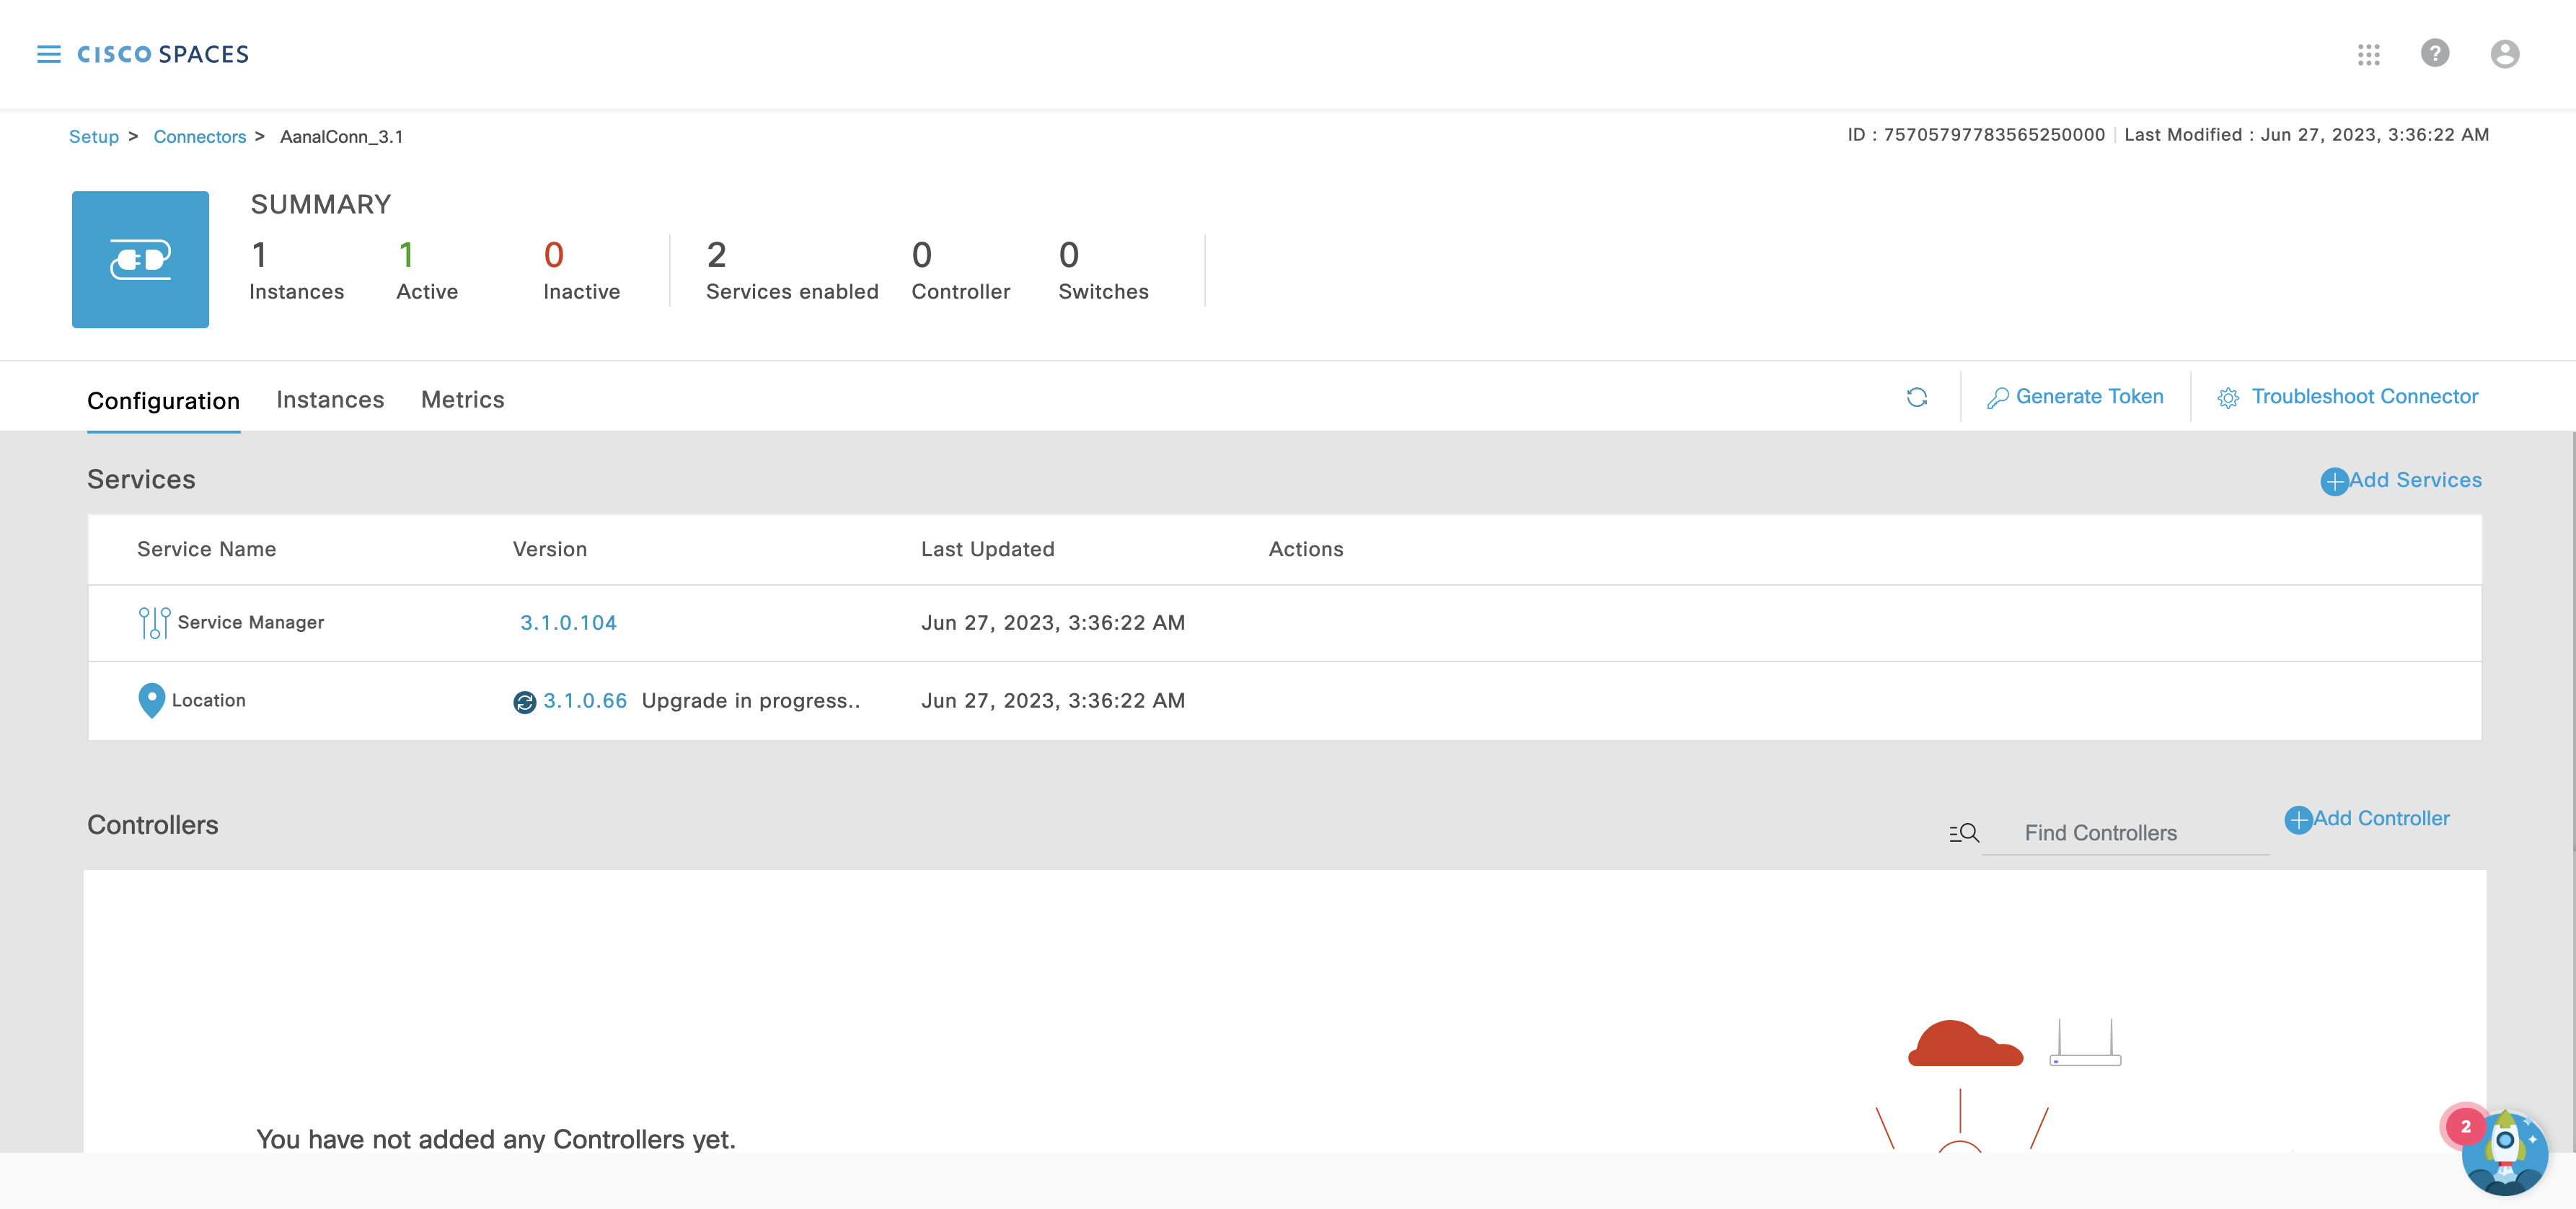
This is how the Connector Dashboard and Cisco Spaces Dashboard will look like once the connector is active
CONNECTOR DASHBOARD
CISCO SPACES DASHBOARD
In the Cisco Spaces Connector window, you can also configure the HTTP Proxy and other Privacy settings.
Setup Proxy to connect the Cisco Spaces Connector to the Cisco Spaces Cloud.
Add proxy server by clicking “Configure Proxy” under settings
add proxy IP with port – http or https
ex: https://< proxy server IP>:< port >
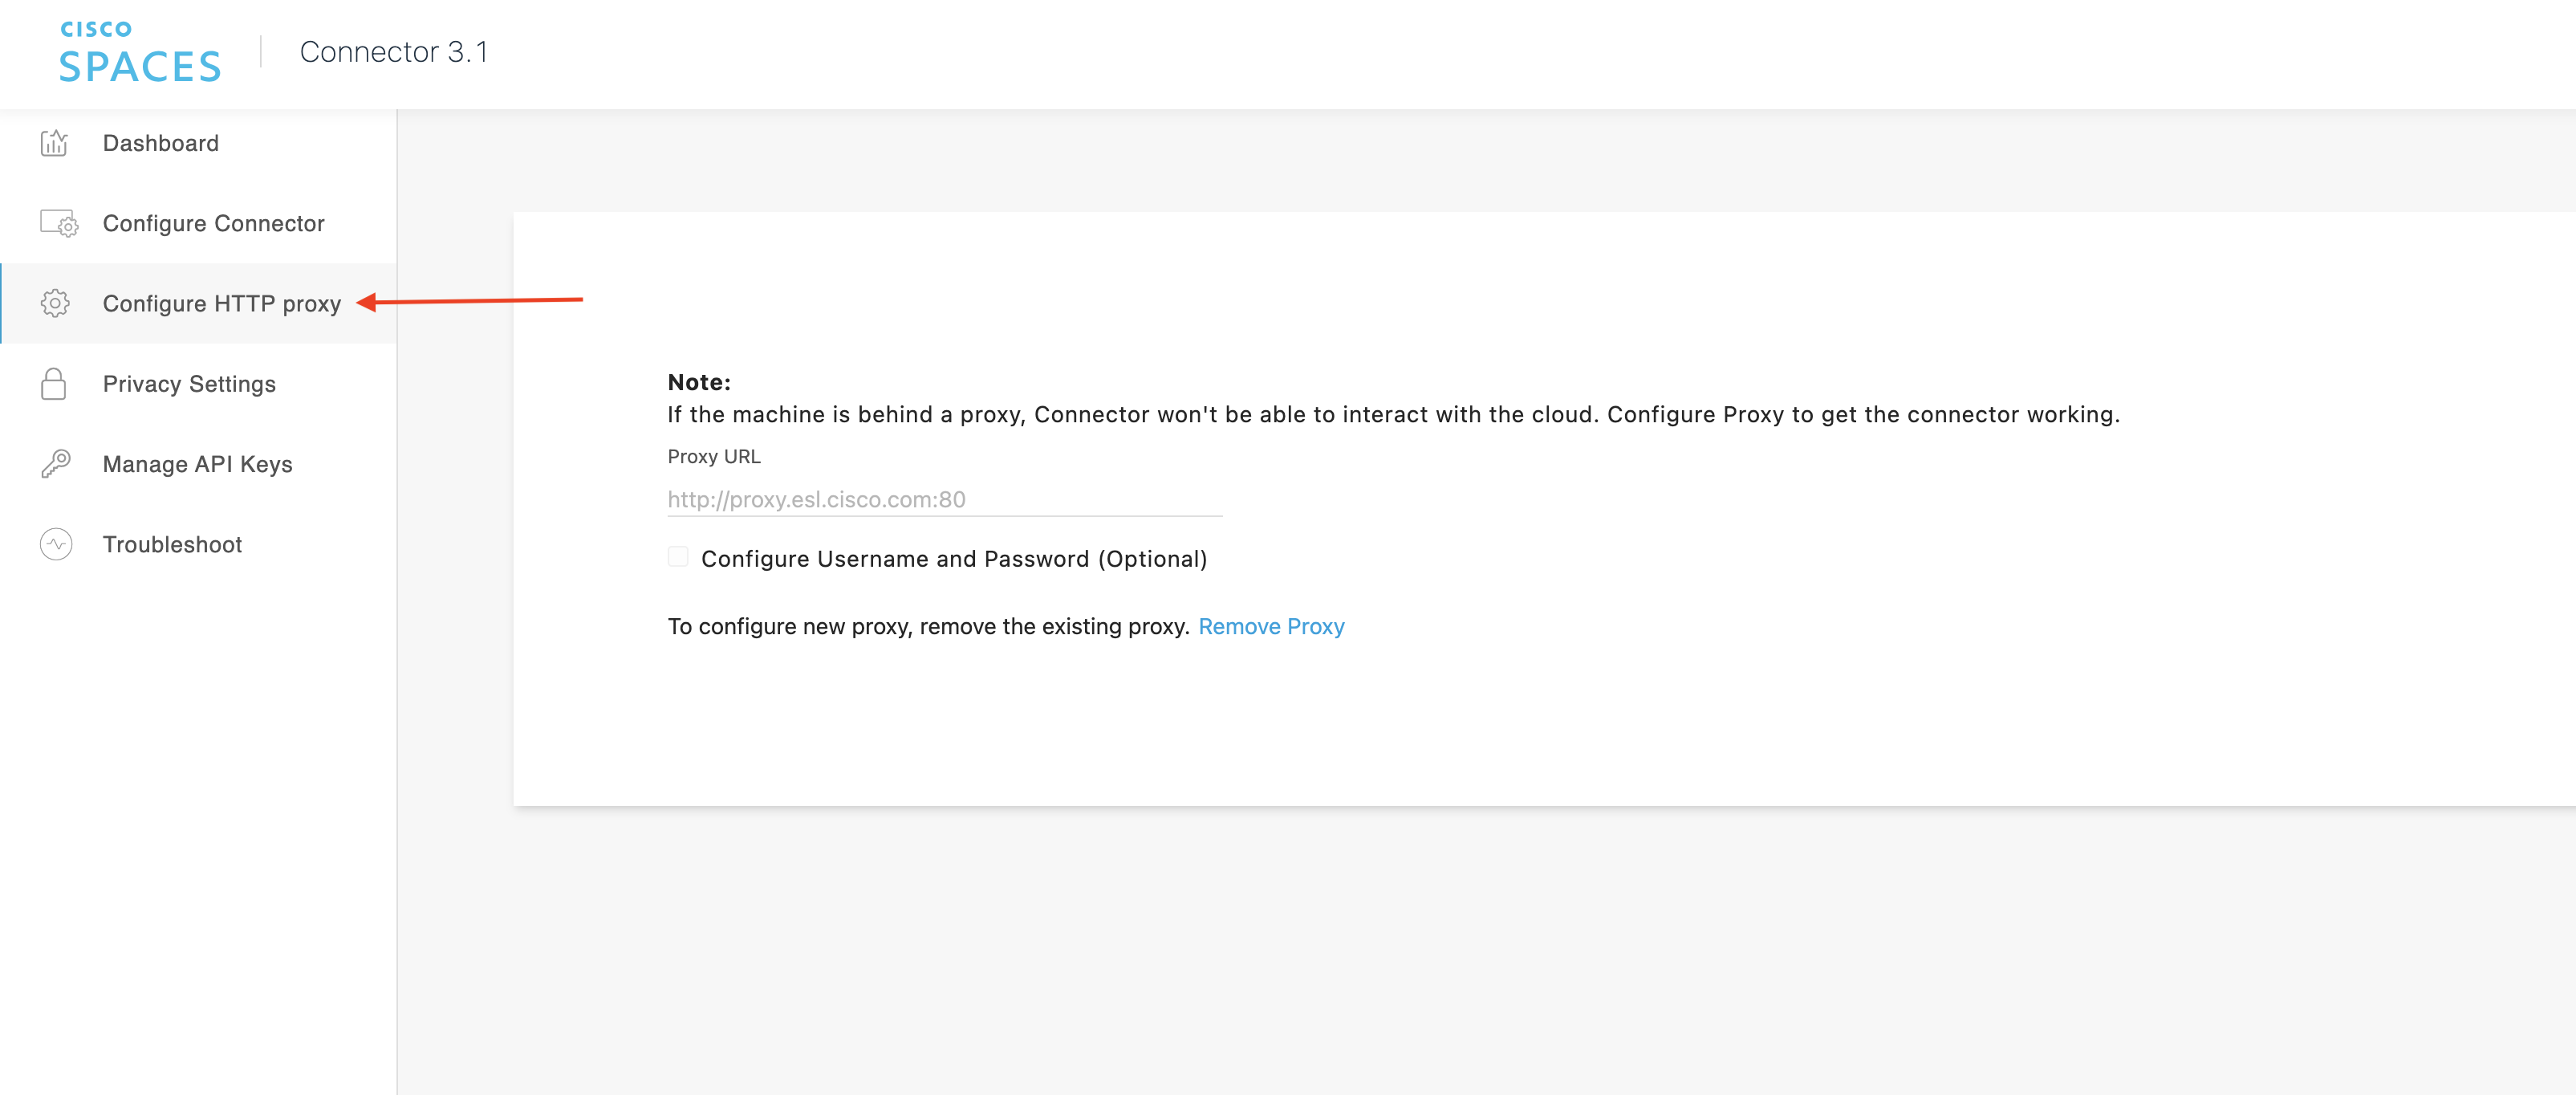
Verify the proxy by seeing proxy status on the dashboard.

NOTE: Proxy Setup is required only if your virtual machine hosting the Cisco Spaces Connector is behind a proxy. Without this proxy configuration, the Cisco Spaces Connector is unable to communicate with the Cisco Spaces Cloud.
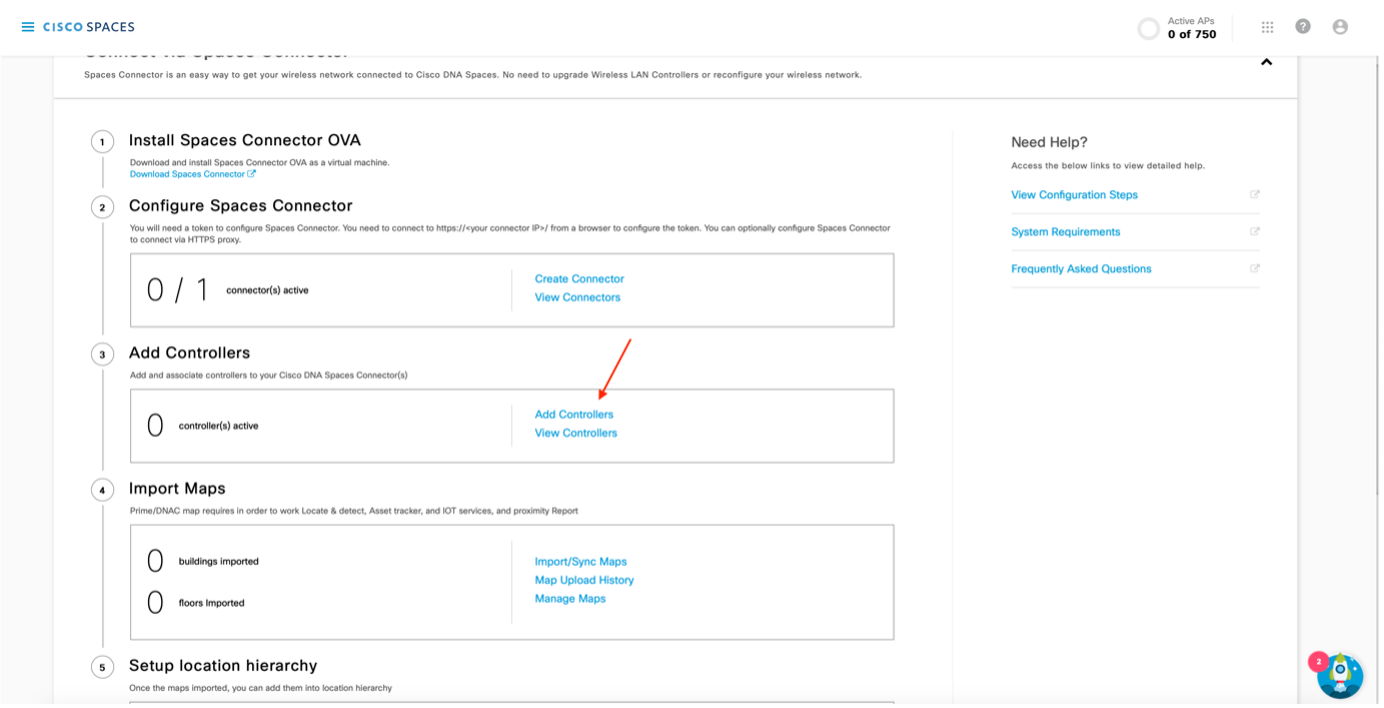
On the Customized Setup page step 3, click on “Add Controllers”
Select the Connector you’ve just created from the drop-down
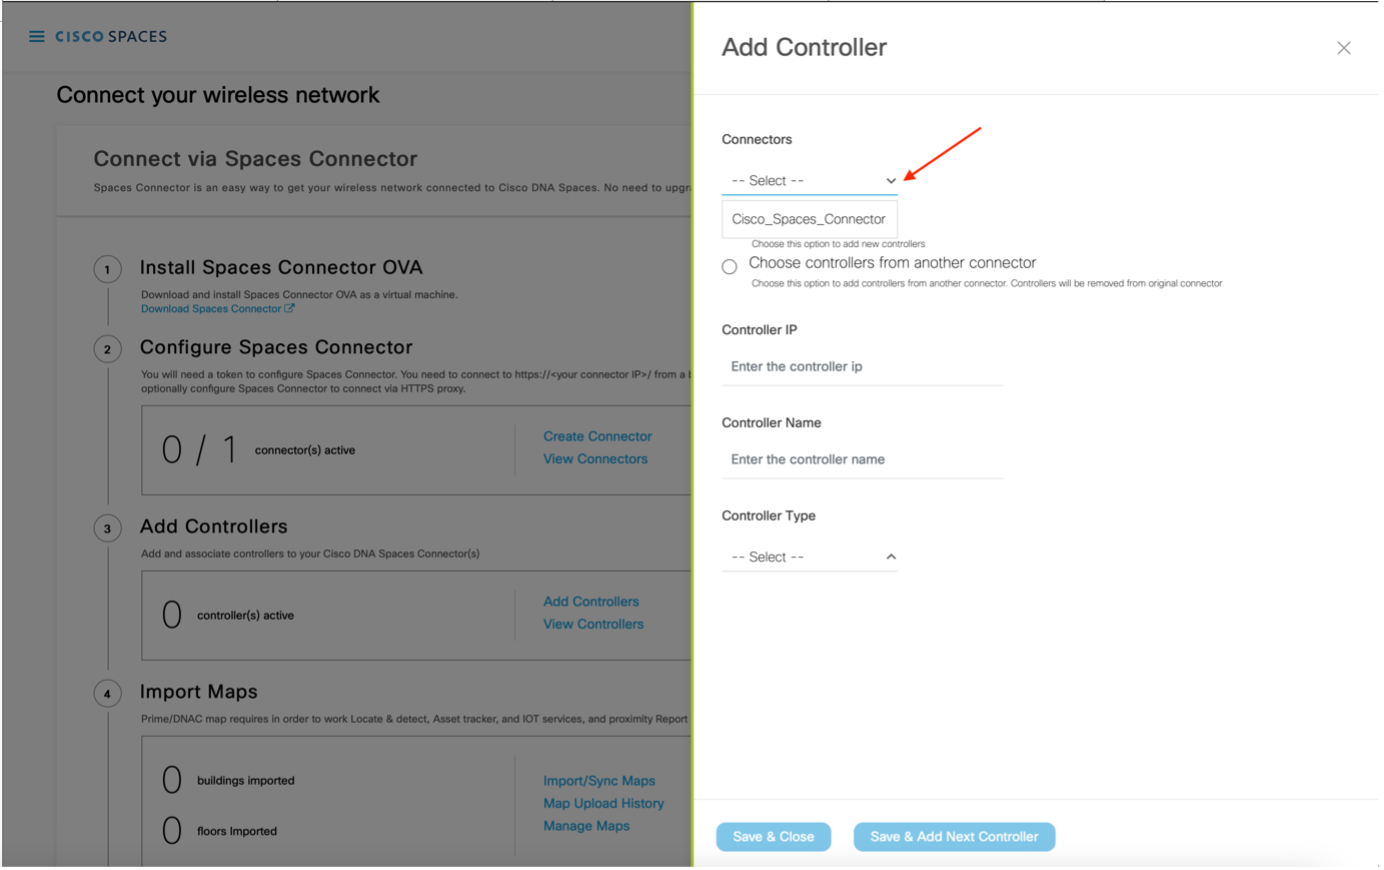
Add the IP address of the Controller
Add the name of the Controller
Select Controller Type
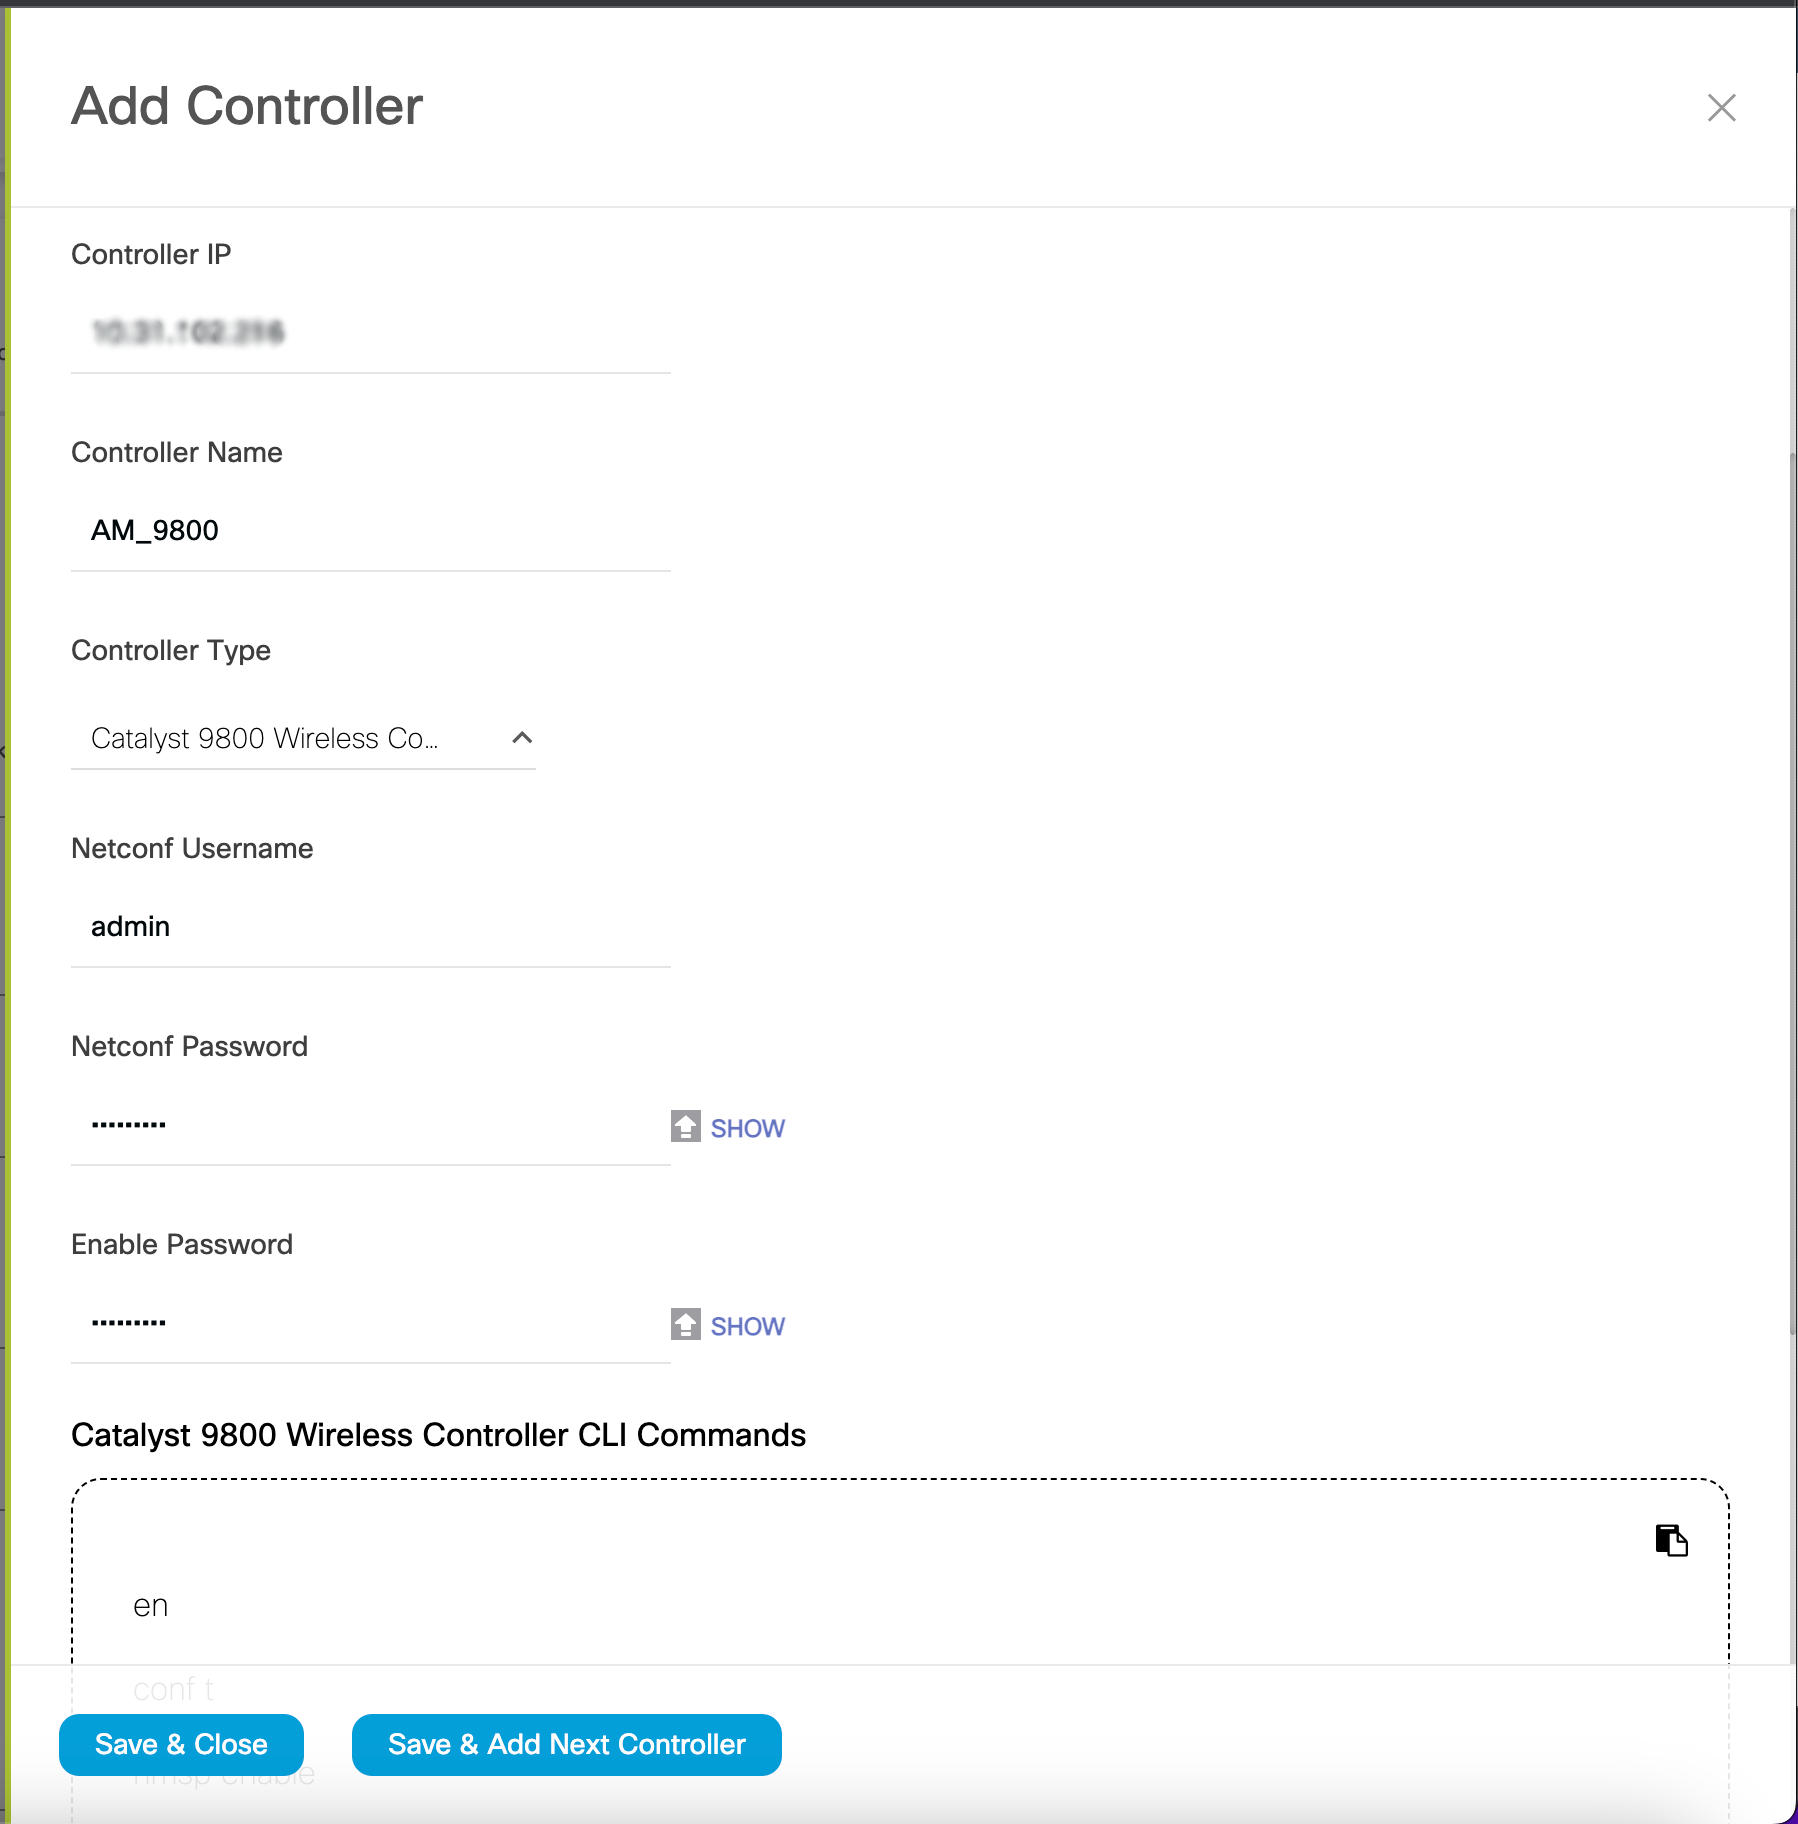
Add details based on your controller type.
For WLC (AireOS) – Select Controller SNMP version depending on your controller’s SNMP version. Read/Write permissions are needed for V2C and V3
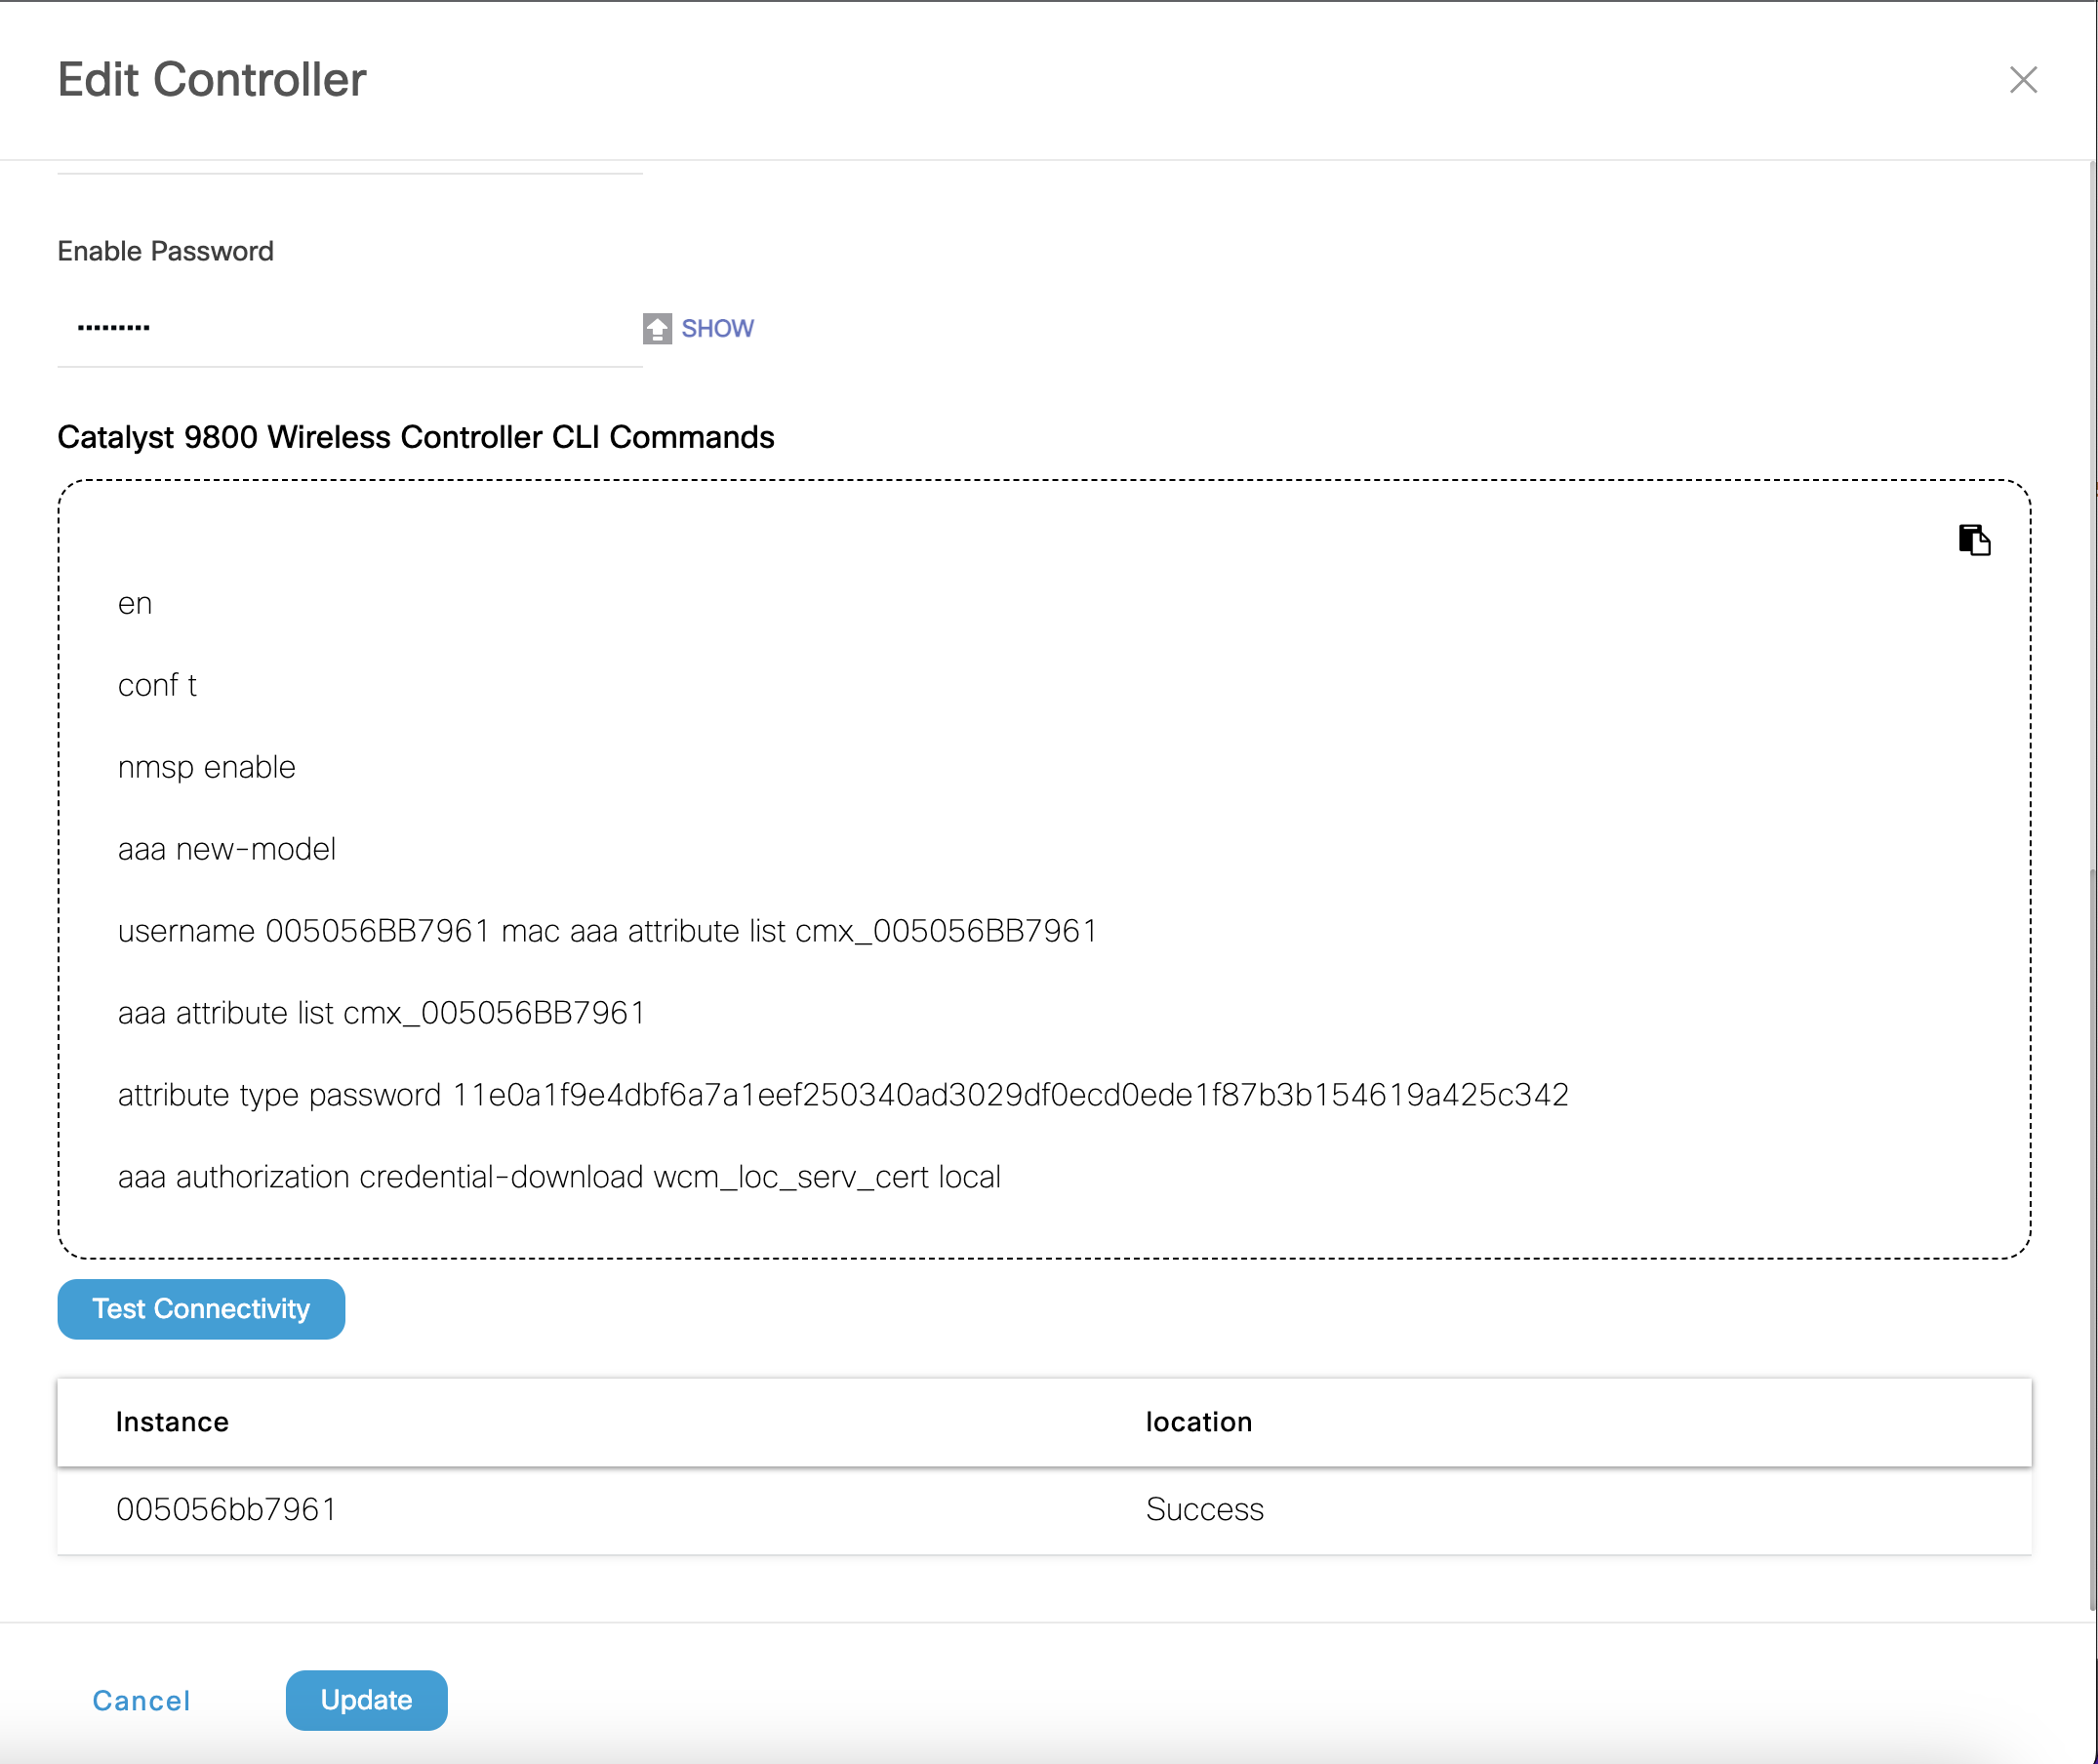
For Catalyst WLC / Catalyst 9800 – Add the following credentials
Click on the test connectivity button.
Click “Save & Add Next Controller” if you want to add another controller. If not, Click “Save & Close”.
THIS IS HOW THE DASHBOARD WILL LOOK LIKE ONCE THE CONNECTOR AND THE CONTROLLER ARE ACTIVE ON CISCO SPACES